I picked this up today in the 2nd hand store ("Kringwinkel") for the modest price of 4.50 euro. It is the Dutch version of the game.
I always wanted to play this game as a kid, but it never happened. The recent rerelease by Osprey was a bit too expensive, in my opinion (also because the game itself is perhaps not that good), but I still wanted to have it. Perhaps we might even play it - if the game is complete, of course.
Friday, 26 January 2018
Tuesday, 23 January 2018
Switching back to Vallejo Model Colour
Over the years (and I dread to count their number), I've had three major brands of paints I used.
Way in the beginning, when animals still spoke and we were all much younger, hairier and still at university, I started out using Tamiya acrylics and a smattering of Games Workshop paints (the round pots with flip on lids). This was mostly for practical reasons, as those were the paints that were easily available in Leuven at that time (mostly at the Lonely Mountain game shop, our home away from home at that time, and the Christiaensen toy store).
Some years later, when the internet started breaking through, I switched to Vallejo Model Colours, both mail order and from a model train store in Leuven which then carried this range. The period I used Vallejo Model Colours also coincided with the period I painted every single figure, whether it was a leader or a rank and file soldier, in full-on 3+ layer mode. This meant that, while I was very happy with the quality of the paints themselves, I did spend a lot of time mixing colours.
When Foundry then came out with their triad system and this happened to coincide with my tendency to ease off on the complexity of the painting, I made the switch to Foundry paints exclusively. Not having to mix colours any more but being able to use them straight from the pot was the main reason I switched to them, even though purely quality-wise, the Vallejo paints are the better ones IMO.
Which brings us to today. After somewhere between 5 and 10 years of using Foundry paints, I'm switching back to Vallejo Model Colours. I have two main reasons for this.
The first reason is my drift towards army level painting and away from display level painting which is now at the point where I only use two layers of colour on the vast majority of my paint jobs. This means that on the one hand one pot of paint in each Foundry triad remains unused while on the other hand it will also mean that, given the vast range of Vallejo paints, I am much more confident of finding matching colour pairs in their range without having to resort to mixing again.
The second reason is a more negative one and has to do with the Foundry paint pots themselves. More and more, I find that my pots end up like this long before the paint in them is used up:
On virtually each and every pot of paint that I have that is older than a year and is regularly used, the lids are broken. It starts off with the little tab you push to open the lid breaking off, usually within the first few months of using the pot. It then gets progressively worse, with the lid (which now has to be wedged open with a screwdriver or a set of pliers or some such device) breaking up more and more until all that is left is the bare minimum to seal the pot, as can be seen on the pot of Teal Blue on the right. The Vallejo paint, with its screw-top eyedropper bottles, does not have this problem.
Having taken to decision to switch back to Vallejo, I splashed out and bought a 72-bottle set from Scenery Workshop in the Netherlands. This, and the handful of bottles I still had stashed away somewhere will become my main set of paints.
What's everyone else's favourite brand of paint and why?
Saturday, 20 January 2018
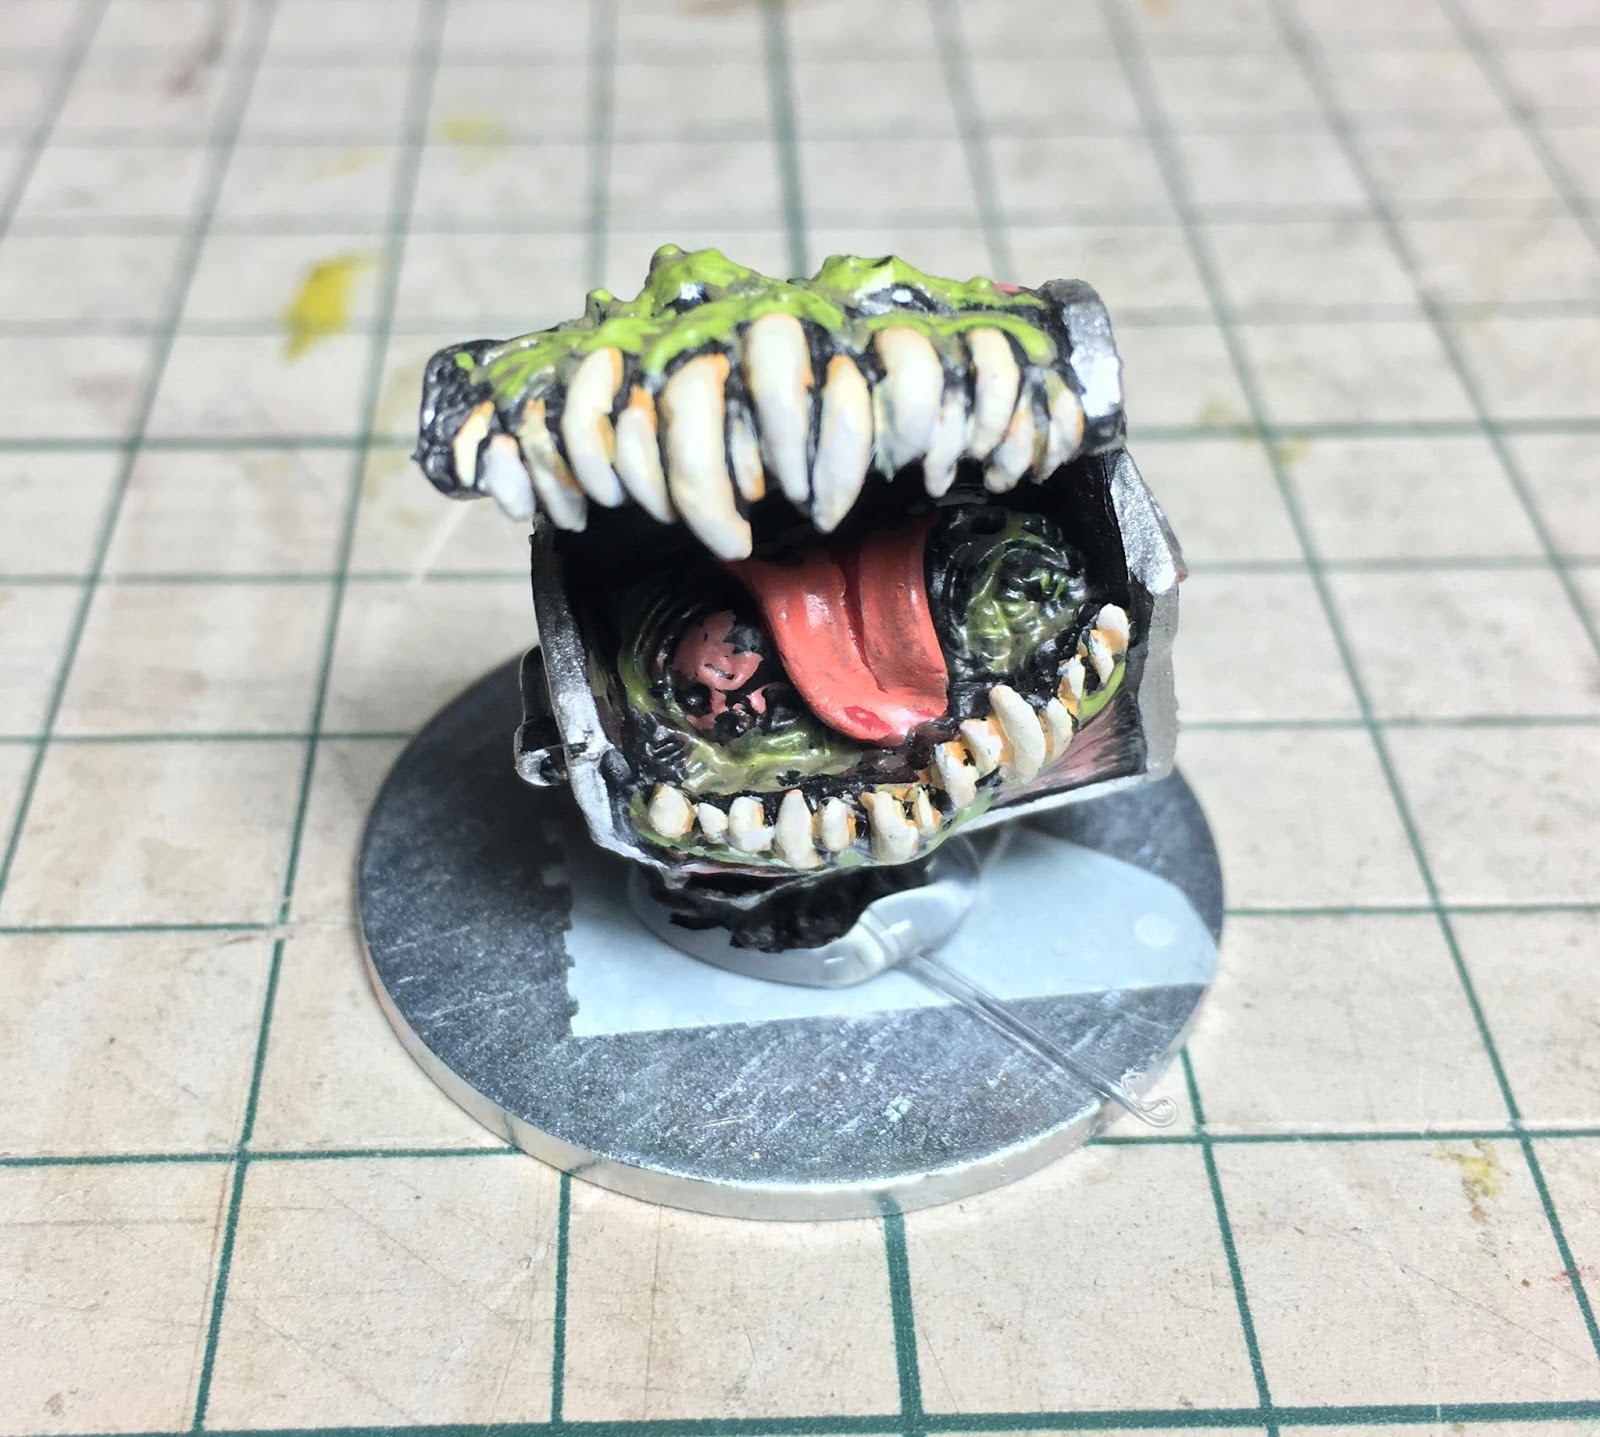
Wet Paint: mimic
Here's a few shots of a little mimic that has been hiding three-quarters finished in my painting box for a while before I finally finished it tonight:
The miniature is another Reaper Bones one. Even though the mimic has long been on of my favourite 'classic' D&D monsters, I think I've never used it in one of my adventures so far. Time to correct that oversight, I would say :)
Thursday, 11 January 2018
Wet Paint: mushroom men
These guys are Reaper Bones miniatures which I got as part of either the first or second Bones Kickstarter (I forget which). In the deep background you can see the first of the three mushroom men, whom I painted quite a while ago -- he made it back on my painting desk as a painting reference for his two friends :).
All three mushroom men will form a part of my growing 'it came from the forest' fantasy force.
My wargaming plans for 2018
Many fellow wargaming bloggers are writing about their wargaming plans for 2018. Mine are very simple: play more games! That's it.
Ok, now that's covered, something else. I was interviewed just before the Xmas break by the alumni magazine of my university for a regular feature "Crazy professors and their weird hobbies". Well, ok, that's not exactly the title, but you get the idea.
They needed some pictures as well, and I send them a few links from this blog. But that was not good enough. The pictures needed people, not just toy soldiers. So I staged a few photographs in my wargaming room (these are the low quality versions), with me "in action" playing an ACW battle.
Thursday, 4 January 2018
Oldhammer: Treeman (3)
In a previous blogpost, I told the story of how a scratch-built treeman became part of my wargaming collection (see here and here).
Through some good fortune, my long-time gaming pal David recovered one of his original scratch-built treeman in his pile of old wargaming stuff. This particular one was still unpainted. David was so generous to trade the model for some old Magic cards I had lying around.
The unpainted model:
Of course, I wanted to paint him. My first thought was to paint him in a brownish colour, to match the treeman already in my collection. But then I had the idea to give him a somewhat special appearance, and I decided on trying to paint him like a birch tree.
I spraypainted him black, then drybrushed him with various shades of grey, ending with white. Then I added fine black horizontal stripes to provide the birch tree texture. The result you see below.
And here are my two very special and unique treeman, engaged in conversation:
And no, there are not for sale!
Gerardus Mercator and 3 Cultists
I finished a couple of figures today.
First, a figure representing Gerardus Mercator. This was a limited edition figure for one of the CRISIS conventions. Since he was a professor at the university of Leuven (1530-1532) where I am currently a professor, I painted his robe as a university gown, with a proper light-blue lining for my faculty ;-)
Below are 3 cultists. I have no idea who the original manufacturer is, so any help is appreciated.
Wednesday, 3 January 2018
Imaginations in 42mm (11)
My generals are finished. I gave them a coat of matt varnish and gloss varnish yesterday, and this morning I mounted the figures on the horses. I remounted the figure on the right slightly after taking the photograph, such that he has a more upright pose.
I am pretty happy with the colour schemes and the paintjob. Painting figures has never been one of my fortes, but this style (blockpainting and gloss varnish) seems to suit me well.
Now I need to come up with some proper names for these gentlemen, and then perhaps, a first game.
(Pictures taken with my iPad, quality could have been better ;-))
Sunday, 31 December 2017
Imaginations in 42mm (10)
I started painting the generals for my armies (see also this blogpost). As you can see, there are not finished yet (they still need some touching up, and most importantly, a thick layer of gloss varnish), but let's say 90% of the work is done.
When painting figures in the "toy soldier style", I go for simple block colours. There's always the temptation to add some short of shading or highlights, or to add too many details, but I try to resist that. The painting should be in bright colours and in large blocks (but not sloppy or imprecise). Moreover, I try to keep the original painting scheme of the toy soldier as closely as possible. Thus, if he had a blue uniform, he gets a new blue uniform. If he had a white frock, he gets a new white frock, etc. I sometimes add a few colours on small details that were not painted in the original paint job, but that's about ir.
I also never touch the face, unless for small repairs where the bare metal is showing. I feel that you can give a toy soldier a new uniform if he needs one, but repainting the face is like altering his identity. I feel that if you repaint his eyes, or give him a new moustache, he becomes a new person. Some might think this is somewhat ridiculous, and sometimes I think this myself, but it's one of these little pet peeves I have when repainting an old figure. You have to show him some respect, and let him keep his dignity. Not repainting his face is part of that.
The two figures on the left will become the generals of the blue army, the one on the right the generals of the green army. Since they didn't have any green in them originally, I decided to add a few green details such as their sashes and waistbands.
Oh, and I repaired the brown horse that got broken near its ankles, and added a transparant flight stand to keep it stable.
And a happy 2018 to you all!
Tuesday, 26 December 2017
Imaginations in 42mm (9)
For my Imaginations 42 mm project - for which we still have to play our first game - I was still short of the generals for both sides. So far, both forces had a single general on foot, but I felt I should have a proper mounted general, along with a mounted ADC, such that both figures together could also occupy a hex in the game.
Instead of ordering some additional 42mm figures, I decided to take a look in one of my boxes full of old toy soldiers, and draft some of them into service (I regularly buy cheap random heaps of classic old toy soldiers on 2nd hand websites, but quality and size is variable). The drawer that contained 42mm (more or less) mounted figures, gave me 4 suitable models I could use. I have no clue about their age or manufacturer, so if someone can point me in the right direction, feel free to do so (no markings on the base ...).
They are still in good shape, although they do need a good (re)paint job, Also, there is some minor damage, but nothing that can't be repaired or hidden. As for repainting them, I will try to keep the colour scheme as close as possible to the originals.
After I convinced myself these were the proper figures to use, I wanted to clean them up. The brown horse (top right in the image above) was bent at the ankles, and I wanted to straight it out a little. And then both rear legs of the horse snapped ...
Luckily, I am not too fuzzy about that sort of thing. Yes, I wished I had been more careful, but hey, such things happen, and I have become too old to get all upset about a broken toy soldier. I will try to repair the horse, probably by mounting its forelegs on a scenic element such as a small rock, such that the whole figure has some stability. I don't expect superglue will be able to hold the weight of the entire body when I simply glue the parts back together ...
Instead of ordering some additional 42mm figures, I decided to take a look in one of my boxes full of old toy soldiers, and draft some of them into service (I regularly buy cheap random heaps of classic old toy soldiers on 2nd hand websites, but quality and size is variable). The drawer that contained 42mm (more or less) mounted figures, gave me 4 suitable models I could use. I have no clue about their age or manufacturer, so if someone can point me in the right direction, feel free to do so (no markings on the base ...).
| My drawer with mounted toy soldiers ... |
| These 4 figures will become 2 generals and 2 ADCs. |
After I convinced myself these were the proper figures to use, I wanted to clean them up. The brown horse (top right in the image above) was bent at the ankles, and I wanted to straight it out a little. And then both rear legs of the horse snapped ...
Luckily, I am not too fuzzy about that sort of thing. Yes, I wished I had been more careful, but hey, such things happen, and I have become too old to get all upset about a broken toy soldier. I will try to repair the horse, probably by mounting its forelegs on a scenic element such as a small rock, such that the whole figure has some stability. I don't expect superglue will be able to hold the weight of the entire body when I simply glue the parts back together ...
Subscribe to:
Posts (Atom)