Showing posts with label Naval. Show all posts

Thursday, 2 November 2023

ACW Naval game

A late gaming report, written up by Eddy ....

Yesterday (October 21), Jean-Pierre hosted a game of Sail and Steam Navies: Naval Battle System 1840 to 1880 for us. As this was our first play of those rules JP had decided on a nice introductory scenario : 4 USS ships versus 4 CSS ships on the mighty Mississippi river with some sandbanks thrown in for good measure.

David, the great-grandson of a CSA soldier, preferred playing the USS and it only made sense that JP joined him so both the experienced naval wargamers were on one side.

From looking at the ship cards it becomes immediately clear that in that day and age, no 2 ships are the same and in fact are radically different. So while the experienced USS commanders opted to steam up the Mississippi in a tight squadron I decided on a novel approach that always worked well historically : splitting my force. The CSS Gov Moore was little more than a fast platform for executing a ramming attack and I fully intended to exploit that by trying to outflank the USS squadron.

Sail and Steam - ship cards

The mighty CSS fleet executing my plan:

Sail and Steam - the plan

Of course it was all too obvious and the USS squadron changed course to overwhelm my lonely rammer, but made the tactical mistake of leading that effort with their only decent gunnery platform, leaving my other 3 ships free to blast the lesser USS ships.

One thing about the period which got very well reflected in the rules : it's hard to do enough damage to actually sink a ship - so the encounter pretty much ended in a draw. But we managed to get a good number of turns in as the rules are simple once you play a turn or two. We got a ramming action in, had a critical hit, a crucial initiative die roll that could have changed the story and all the stuff you need to have a nice wargaming afternoon.

What I really liked about the rules is that they're both fast-playing and are exactly at the detail level I want them to be. Also, the research gone into this game is staggering - the heart and soul of which are the ship cards. Hundreds of them, often more than 1 for a ship that got upgraded during the war.

A final note on the models used : there's just one word for them : staggeringly detailed and accurate. As this was the first outing of the models as well I fully expected them to either sink or blow up immediately, but that was not the case. Looking forward to JP introducing a raid, fortresses, boarding actions and all the other good naval stuff.

Sail and Steam - CSS Gov Moore

Saturday, 22 December 2018

An old boardgame ... Armada.

The local 2nd hand shop is right across the local bakery, so every time I stop to buy fresh bread or pastries, I always pop in to check if there's anything useful for my wargaming habits.

So this is the latest acquisition (price: 2.5 Euro). A naval boardgame published in the late sixties called Armada. This is the Dutch version, hence the reference to the Zilvervloot (aka the Spanish Treasure Fleet).


The game itself is rather simple: each player has a number of ships, and you have to move them along the grid (the grid looks triangular, but since you move on vertices, it really is a hexagonal grid) to reach a destination port as soon as possible. Since players move ships in opposing directions across the board, you can also shoot at each other, taking out the enemy ships. As can be expected, the game has nothing to do with the actual history of the Spanish treasure fleet ... the theme is simply pasted on. Nothing new there, as we see this in many modern boardgames as well :-)

I doubt that I will ever the play game (the plastic model ships are nice though ... I can repaint them and use them in a proper naval game), but I was surprised to see a very nice mechanic for determining speeds of the ships relative to the wind direction.

In the middle of the game board there is a large plastic island containing a "compass" marker. There are 6 wind directions (determined by a die roll each turn). The nice bit is that the movement distances are indicated on the rotating compass marker, such that you can immediately read off the movement distances relative to the wind direction. When the wind direction changes and the compass is rotated, these indicated movement distance rotate along as well, and so you never have to "compute" your relative bearing to the wind direction.

The picture below illustrates the idea. The wind direction is direction 3, and you can immediately see that when your ship moves on the grid in direction 5, you get to move a distance of 3 or 1 (2 distances, since merchants and warships move at different rates). Direction 6 does not allow movement at all (0 and 0).


There is a blue and a yellow compass as well, for different wind strengths. The numbers are slightly different, but I didn't check them out whether they all make "sense".


The entire mechanic looks very nice. You can of course do all this using tables and modifiers as well (as you would expect in a proper naval wargame), but having 3 different dials for wind strength, and having movement speeds on the dials such that they are always relative to the wind, struck me as a very clever idea.

Friday, 5 August 2016

Naval wargaming for kids

Some simple rules to quickly set up a game for kids - made up on the spot when they asked for a game at "Uncle Phil's Toy Room":
  • 3 types of ships: large, middle, small.
  • Choose 3 ships to move when it's your turn.
  • A ship must move forward 1 hex, then may make a 60 degree turn. Small ships may make a 2nd movement.
  • After movement, you can fire in any of the 4 side hexes (not the front or back hex).
    • Large ships roll 4 dice, middle ships 3 dice, small ships 2 dice
    • Target may shoot back (if it can do so) with 1 dice only (so it is important to manoeuvre such that you can attack instead of receiving the hits) 
    • Hits on 5,6
    • Large ships have 4 hits, middle ships have 3, small ships have 2.
  • If you must move into the hex where another ship is present, both roll a dice, sunk on a 6.
  • Anything else is made up by the umpire on the spot.


Saturday, 4 July 2015

Flagstone Fleets revisited

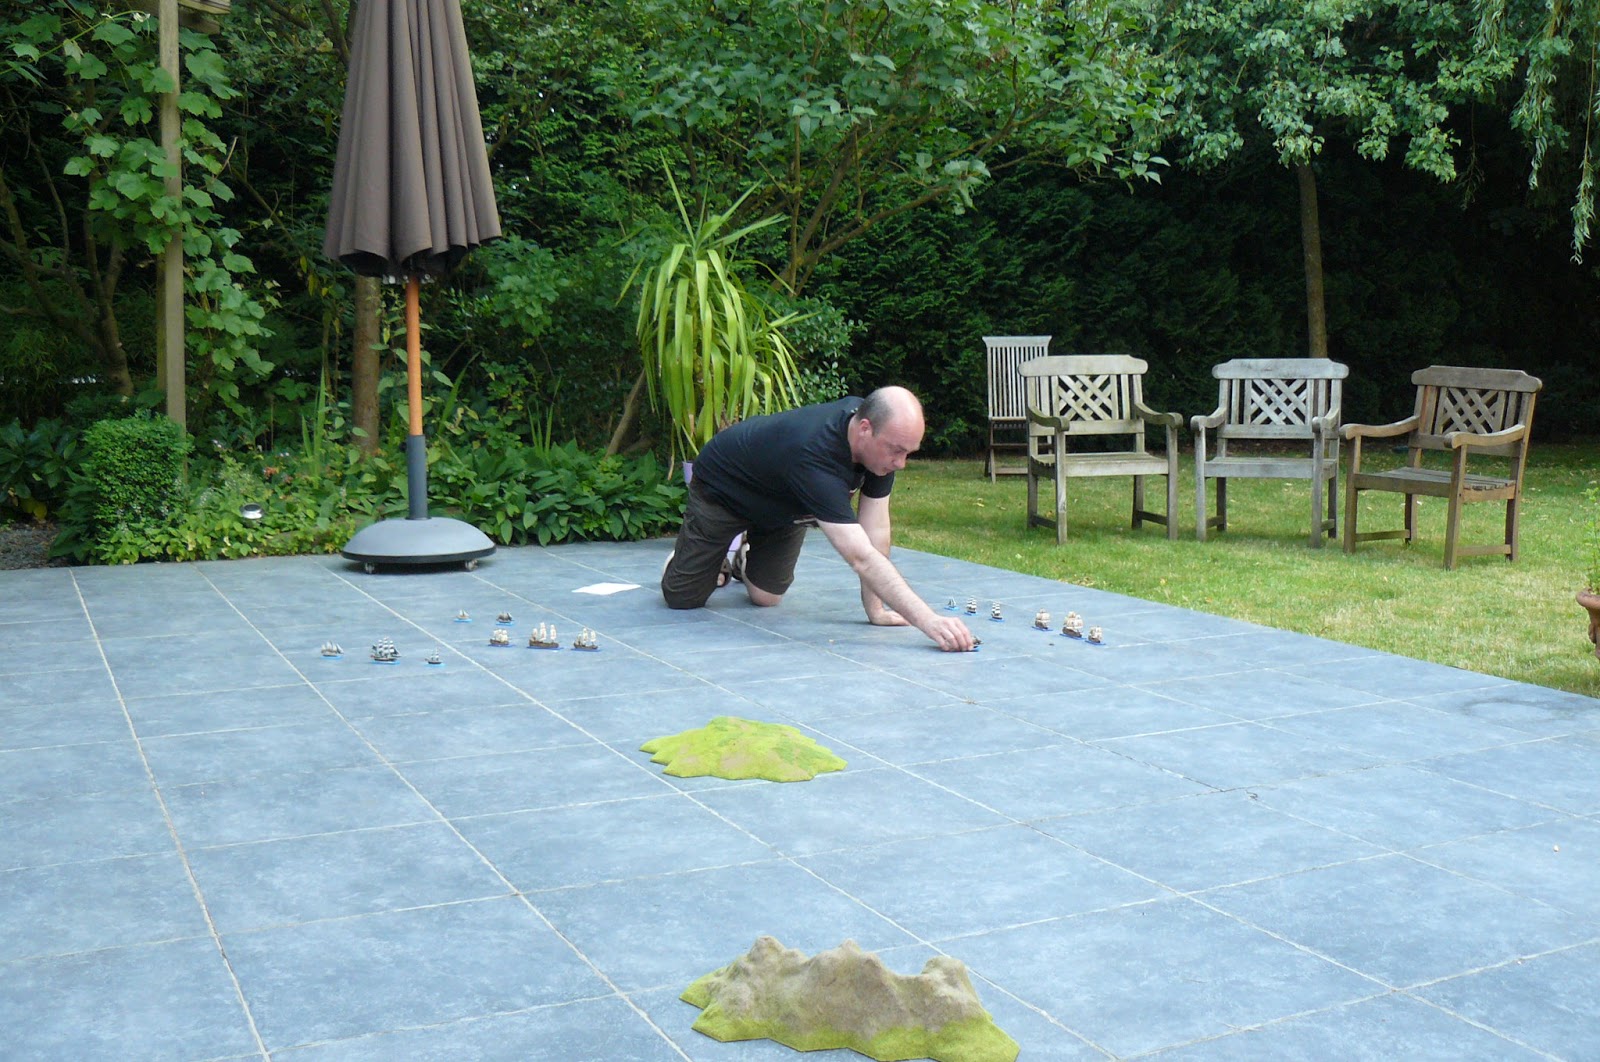
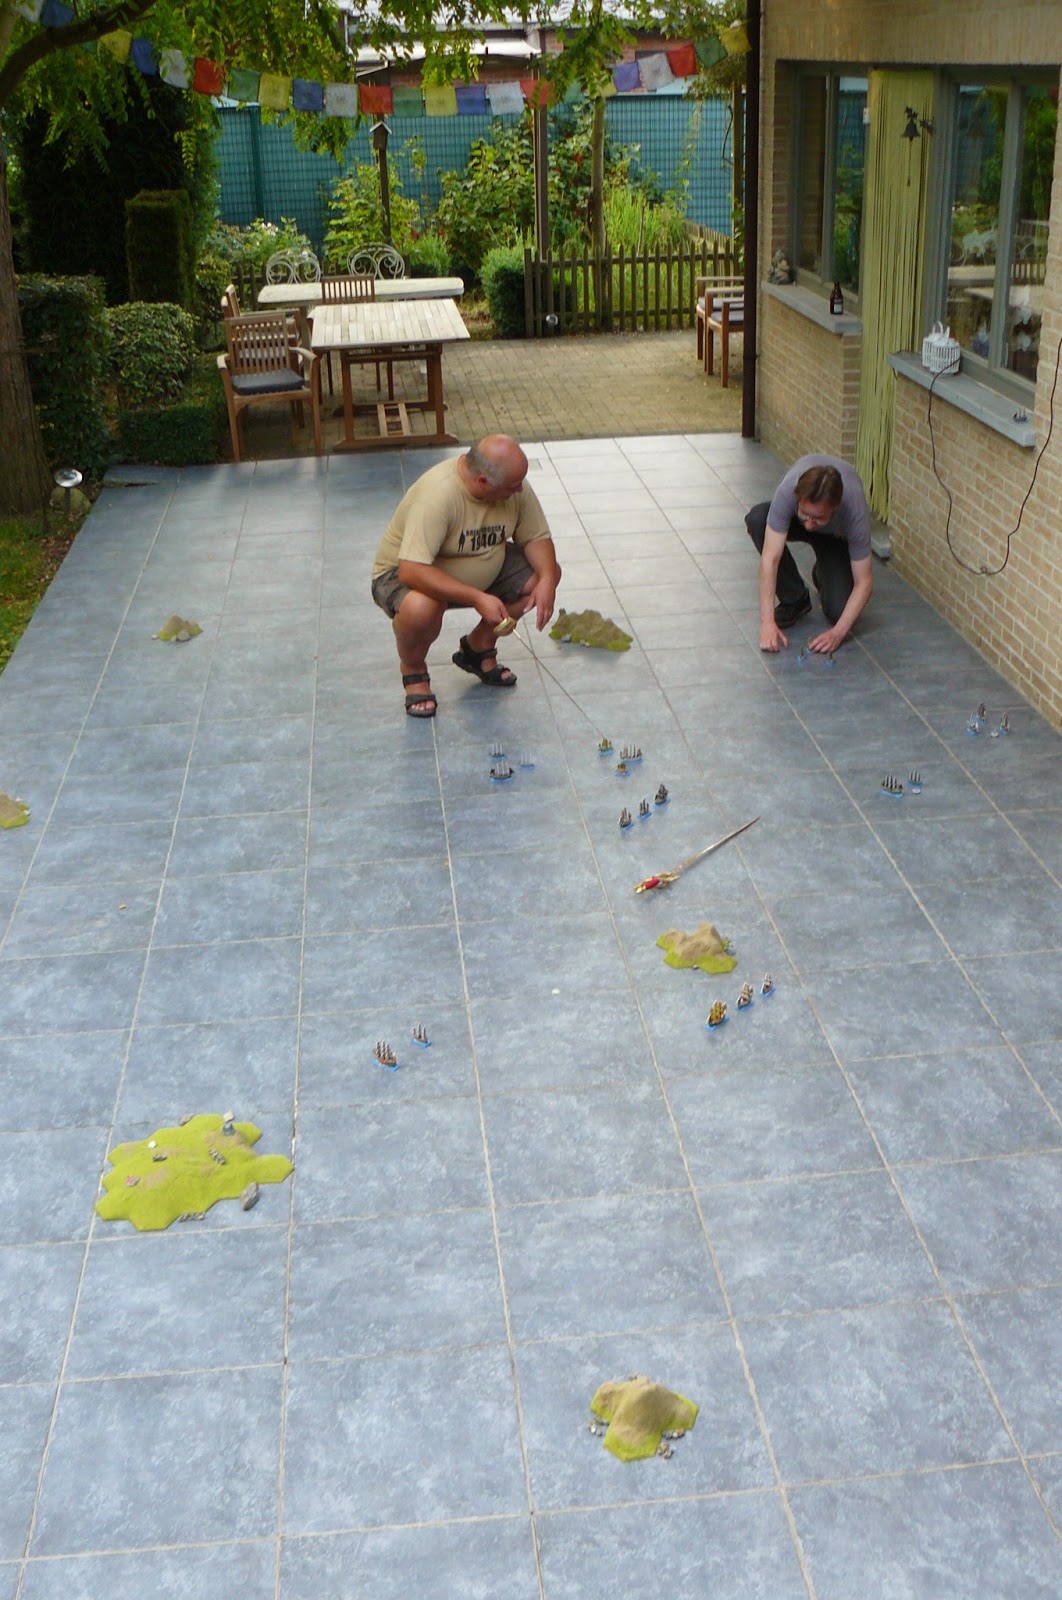
After we had an experiment 2 years ago with fighting naval battles on my blye/grey patio (blogpost, rules), this weekend seemed like the perfect opportunity to try it again. Hot temperatures, no rain in sight, and a lazy friday evening was the ideal setting for another Flagstone Fleets encounter. For those interested in the full story of how this game came about, I gladly refer to Miniature Wargames w Battlegames #372.

The cast was limited, only 2 players (Bart and Harry), with me umpiring. I also took all the photographs, so you only see both protagonists tinkering about their moves, along with the ships and the islands.

Ships are mostly cardboard ships from the Pirates game by Wizkids some years ago, along with some metal models from Peter Pig. Islands are Kallistra Hexon terrain pieces.


Tuesday, 18 November 2014

How fast can you paint 6 ships?

How fast can you paint 6 ships? Really fast, or so it seems. A quick and dirty paint job, finished in one setting, with some decals added that I had lying around. Not the greatest paint job, I admit, but it will do for perhaps a game or two.

Ships from Peter Pig: http://www.peterpig.co.uk/range18.htm


Friday, 21 March 2014

Flagstone fleets

In this month's Miniature Wargames (issue 372), there is again an article from our renowned little wargaming group.

From the blurb on the editor's page:
Phil Dutré likes nothing better than to get together with his chums in Belgium and lie around on the patio. At the same time, expect to see him equipped with a telescope and charts as he commands squadrons of men’o’war as they do battle outside his back door. Yes, not content with simply sitting around with their Trappist beer, the Schild & Vriend Gentlemen’s Wargaming Society like nothing better than to scuff their knees and toes over a watery tussle in the garden. Hard a’starboard and watch for sails on that concrete horizon!
As a teaser, here are some quick pictures:


Addendum December 2014: A short version of the rules, without any designer nots or gaming philosophy, can be found here.

Wednesday, 9 March 2011

Uncharted seas game 08/03/2011

Yesterday Alan, Eddy and myself played a game of Uncharted Seas. We didn't have a scenario but just lined up three fleets and had at it. The three fleets were more or less evenly matched (I used the models I had available and did not bother to work out the point values). Each fleet consisted of a basic starter fleet with some additions (cruisers or flagship):

* Dwarves (Eddy): 1 battleship, 2 assault cruisers, 3 cruisers and 6 frigates
* Orcs (Alan): 1 battleship, 1 battlecruiser, 1 assault cruiser, 3 cruisers, 6 frigates
* Humans (me): 1 battleship, 1 flagship, 3 cruisers, 6 frigates

The game for the Dwarves can be mentioned quite succinctly: they spent most of the game catching up to the action and in the end contended themselves with tangling with the Orcish battlecruiser that had split off the main Orc fleet. The Dwarves managed to sink the battlecruiser by the end of the game.

For my part, I started on the opposite side of the table as the Dwarves so I did not have any interaction with them during the game (we played on an 8x6 foot table). Most of the reason for this was a decision I made after turn one to change the axis of advance of my fleet by 90 degrees to concentrate on the Orcs. The reason for this was that I saw myself ending up between the Orc and Dwarf fleets being shot at by both had I continued on my initial course, and I did not quite fancy such a fate.

So, the main battle for me would be against the Orcs. After we closed up a bit, the frigates got into play when Alan launched his three brace of frigates in an aggressive move towards my cruisers which were leading the fleet. While my frigates had been lurking behind my battle line ready to counterattack such a move -- and did -- by the end of the frigate action, I was down one cruiser which had been decrewed by an assaulting frigate (with some help of long range fire of the Orc battleship). The end of this phase saw all frigates of both sides wiped out (the intrepid frigate that had boarded and decrewed my cruiser was summarily overrun and sank by the Tears of the Empress' Favorite Concubine, my battleship), two of the Orc cruisers suffering medium damage and one of my cruisers out of action.

Then it was time for the big boys to come out and play. Alan was moving his fleet on a more or less regular (these were Orcs, after all) formation, with his battleship closest to my fleet and the cruisers and assault cruiser in line abreast next to it. He initially did have the wind against him (one factor in my decision to go for the Orcs. I also would like to publicly deny any involvement of my clerics in the change of wind direction -- the mere thought is preposterous :) ) but it turned favourably a bit later only to turn straight into the Orcs' faces in the final turn of the game. My own fleet was in its classic battle line astern: the (now) two cruisers leading, with the Tears and lastly the Empress' Cynical Smile (the flagship) following.

While the main fleets were approaching, during and after the frigate action, I was somewhat apprehensive of the Orcish guns and the fact that they are forward firing: this means that for an Orc ship, moving closer to the enemy and presenting your optimum firing stance are the same thing, as opposed to my ships, whose strength is their broadsides. I shouldn't have worried though, as the reason why my battle line is the classic deployment for the humans is that the cruisers, leading the line, take the long range fire on the approach while the big bruisers (the 15 and 14 dice broadsides of the Empress and Tears) close up relatively unscathedly to deliver their fire. And that is exactly what happened: my cruisers took some damage closing in (less than expected because of the intervening frigates and small fore arcs of the Orc ships) while Alan's battleship got slightly dinged by (long range) fire from my cruisers and battleship. Then my two big ships came into close range of Alan's battleship (blithely ignoring the Orc cruisers as they would be easy prey once the battleship was gone) and blew it out of the water with their massive broadsides. The aforementioned turning of the wind in the last turn helped as it meant the cruisers suddenly did not have the move to ram my battleships, which might have become nasty. Scratch one Orc fleet.

Some pictures of the game:

The Orc fleet sails onto the table:

Uncharted Seas 08032011  Photo 1

Part of the Dwarven fleet:

Uncharted Seas 08032011  Photo 2

The Human fleet after making its 90 degree turn, with the cruisers racing to overtake the battleship and take their place in the van:

Uncharted Seas 08032011  Photo 3

The Empress' Cynical Smile serenely sails to its place in the line, sheltering a frigate squadron:

Uncharted Seas 08032011  Photo 4

The high point of the frigate action - Orc frigates in an all-out ramming attack. The center one would decrew the Human cruiser:

Uncharted Seas 08032011  Photo 5

The main battle fleets in close contact. Human cruisers have turned in behind the Orc battleship which is about to be subjected to the broadsides of the Human big ships:

Uncharted Seas 08032011  Photo 6

Action on the other side of the table: the Orc battlecruiser in its final moments, besieged by Dwarven firepower:

Uncharted Seas 08032011  Photo 7


Sunday, 21 February 2010

Uncharted Seas ships

And here are the pictures of my latest paint jobs.

_The Empress' Cynical Smile_, the human flagship joining her [friends](http://www.nirya.be/snv/ttm/archives/000306.html):

Human flagship

And their slightly more scruffy adversaries:

Orc fleet

More pics of the orc ships in their own [set on Flickr](http://www.flickr.com/photos/robartes/sets/72157623355135073/). As you can see, these were again painted with speed in mind rather than beauty. Oddly fitting, for orcs :).

Sunday, 13 September 2009

Nelson's column at Trafalgar (and some extras)

As promised, here are the photos (notice that I was too lazy to remove my kitchen table from the photo :) ):

Nelson's column - 1

Nelson's column - 2

Additionally, here's todays workbench pic:

Bavarian infantry

For some reason, these already look the part, even though there's only two colours of paint on them. I'm doing these a full regiment of 24 figures at a time - I'm curious to know where my upper 'army painting' limit lies.

Tuesday, 25 August 2009

French take revenge on Spanish fleet

Exactly one week ago, Koen came over to my place for a game of Trafalgar. This time, we played the 'Harbour Raid' scenario, a followup to the [last game](http://www.nirya.be/snv/ttm/archives/000314.html) that saw the Spanish treasure fleet escaping a French ambush to safety. Or so they thought.

As it turns out, superior intelligence work by the French enabled them to find the location of the treasure fleet while still at anchor in its port of call. They quickly despatched a squadron with the mission of raiding the Spanish fleet in port.

In this game, I played the French with 9 3rd rate ships, while Koen took the Spanish with the _Santissima Trinidad_, the _Santa Ana_ (both 1st rate ships) and 4 3rd raters. As last time, the rest of this report is my view of the battle.

Start of the game

My victory condition was to get half of my ships (5 of them, rounded up as half a ship does not float :) ) between the two islands at the other end of the table. The wind blew from the south (right in this and following images). My plan was fairly simple - I wanted to sail SE, close to the wind, in line abreast with the intent of forming line towards the NE once past the central island and sailing in between the two Spanish squadrons (one of 2 third raters on the left, the two 1st and another 2 third raters on the right).

However, no plan survives contact with the enemy, or in this case even just the first turn, as I immediately changed the plan at the start of the game. For some reason, once movement was underway, I did not like my chances going in between the two Spanish squadrons and decided to make a dash for it and try and contest the wind gage (i.e. race to the south to make the southernmost ship a French one, giving me some advantages). This would enable me to concentrate all of my ships (in two lines, one to windward and one to leeward of the Spanish) on the big Spanish squadron, hoping to finish it off before the other two Spanis ships arrived. Of course, that would also mean my deployment was wrong, as that was meant to swing into line off of the leftmost ship, while now that would be the last of the line...

French modify their plan

The red lines are what I thought Koen would do, but he quickly got wind of my plan and raced his ships towards the south as well, so the first part of the game was a race to the edge of the world by our respective windward squadrons:

Race for the wind gage

Meanwhile, I decided to see if I could cause the other two Spanish ships to stay away from the main fight by sending my second column through the island chain in the middle of the table (still intending to swing that column south towards the main fight). It took me a while to maneuver the ships into something resembling a battle line (finely maneuvring these things is harder than it looks in this game), but I got there after a turn or two:

The French leeward column

However, all this work quickly turned to nought when the wind turned to the NE at exactly that point (when the two pictures above were taken). This meant that the leeward column now could no longer get through the islands (the wind being now ahead of them for such a maneuver) and that my windward line was suddenly sailing into the wind and was thus taken aback. Some fancy maneuvring (read: good dice) was called for...

And then the _instant de gloire_ came for the French fleet. What initially looked like a disaster quickly turned into a game winner. The wind turning made my decision for me on where to deploy the windward column (left or right of the Spanish). Right was no longer an option as I would then tack right of the table, so left it was. This meant that five of my ships (not to mention the leeward column having a bit of a scrape with the islands) would need to tack in succession to the left, or five command rolls would need to succeed. The result:

The French windward column tacks perfectly

Perfect maneuver! Suddenly, I had five ships crossing the T of the Spanish fleet, or 5 close to medium range broadsides bow raking the Spanish fleet. Vive la France (et les dés)! This pretty much decided the game:

The end of the game

My concentrated broadsides decrewed the Santissima Trinidad (not that there was very much left to crew after two raging fires) and knocked out the rudder of another ship (the one sailing blithely on on the right). The remaining two Spanish ships did manage to set fire to one of my ships on their turn to cross our T (with even more devastating stern rakes) however.

After this turn, we declared the game for the French, as my windward column was now past the Spanish main line and would, with the help of the leeward column that was now past the islands (though on the other side as intended - damn wind :) ), easily be able to deal with the two remaining Spanish ships between us and the port. Revenge!

Good game again -- I really like these rules.

Tuesday, 11 August 2009

Spanish treasure ship escapes French ambush!

Last Sunday, Alan and I played a game of Trafalgar using my [freshly painted](http://www.nirya.be/snv/ttm/archives/000301.html) [French and Spanish](http://www.nirya.be/snv/ttm/archives/000312.html) sailing ships. The scenario we played was one from the book, called 'Pursuit', which is a variation on the 'important ship needs to get off table' theme.

I played the Spanish, with 4 3rd rate ships of the line and one 1st rate, the _Principe d'Asturias_. I nominated one of the third raters, the _Bahama_, as the Spanish Treasure ship that needed to get off table (we quickly decided this was the [Spanish Treasure Fleet](http://en.wikipedia.org/wiki/Spanish_treasure_fleet), even if that had last sailed over a decade earlier). Alan played the French with six third raters (so he had the edge in number of cannon) but had to deploy in two seperate groups, as per scenario rules.

What follows is my view of how the battle developed.

As I had the wind advantage (the wind was blowing in the direction I needed to escape -- east, or towards the bottom in the overview photos of the table) and Alan thus had to tack upwind to get to me, I was in a very comfortable position. My first few turns were thus spent sailing towards the spot indicated on the photo below, not needing to decide anything yet. The French sailors, in the mean time, did not same to be able to remember quite what to do when needing to tack, and a full five out of six ships ended up in irons with some mast damage to a few. Good start!

The blue arrows in the photo below represent what I thought Alan would do, if his ships ever got underway.

Start of the game

Having, after a few turns, arrived at the decision point, I had three options:

Decision time for the Spanish

Option A seemed the safest, with my five ships concentrated against just a few French. However, as the wind had now turned a point towards the south -- advantageous to the French -- and his farthest ships had set full sail and were thus chugging along at a fair clip, I thought that perhaps the French might yet catch me.

Option B, going down the middle, seemed to be the most risky as that would definitely land me in the middle of the French fleet.

Option C beckoned as a surprise alternative. Using it, I would have to hope that I could dash behind the northernmost (rightmost in the pictures) French squadron and sail off to safety.

In the end, this is what I did:

The Spanish make their decision

I decided to mix options A and B. The Spanish ships in the above picture are the ones with the blue markers (for full sail setting), so you can see that I sent three ships, including the _Bahama_, down path A, while two ships, including the _Principe d'Asturias_ went down path B in the hopes of interfering with the French ships that were closing the range fast. _Bahama_ would obviously have to remain at full sail and dash of at the utmost speed down the path indicated.

And with that, hostilities were opened and many a broadside was loosed. I suffered many hits on my ships, including many fires that luckily were fairly easy to put out on account of the rain that had started to fall. In response, the Spanish gunners turned out to be a panicky bunch that half of the time did not seem to be able to remember how to fire their cannon in the heat of battle, and that, when they did remember, were quite unable to do any real damage -- perhaps forgetting to actually load ball into their cannon, being satisfied with just the nice big bang (read: bad dice rolling on my part). Frustrating, especially when that meant that two unscathed (as opposed to at least somewhat damaged by the preceeding Spanish broadsides that would have been fired at them) French ships were able to cross the T of my northern 'screening' group (good maneuvring by Alan there):

French ships cross the T of two Spanish ships

Grumble. Luckily, however, what little damage and delay my ships could do to the French ships was enough to enable the Bahama to escape in the nick of time. Victory to the Spanish! Truth be told, it's probably the turn or so the French spent getting underway again after they failed to tack in the beginning of the game that saved me :).

Anyway, Alan and myself were pleased with the way the game played and with the result. We handled five or ships each and the game was played to conclusion in just 2,5 hours. Good ruleset!

More pictures of the game can be found [here on Flickr](http://www.flickr.com/photos/robartes/sets/72157621989562162/).

On to the next encounter!