Sunday, 19 February 2012

Engineers / pontooneers / bargemen

Here are some more figures I painted quite a while ago (they have featured in more than one game since) but only got round to photographing now: a number of pontooneers / bargemen / pioneers for a vagueish horse'n'musket era:

IMG 2730

They are all Redoubt ACW engineers, but with a number of the heads replaced by Victrix French Napoleonic heads. They were painted up as 9 generic pontooneers or engineers and three barge- / boatmen. Useful figures!

Wednesday, 11 January 2012

Some more Swedish Great Northern War fellows

We played a game with my Great Northern War collection yesterday and I've gotten into the habit of painting up something new for each game. In this case, it was a squadron of Swedish cavalry and a 6Pdr gun, also Swedish.

Nyland Horse:

IMG 2690

IMG 2691

Figures are from Reiver, with the squadron leader's horse (the falling one) from Front Rank.

And the 6 pounder battery:

IMG 2692

The gun and bucket man figures are from Foundry, the other two figures are Reiver.

Sunday, 8 January 2012

Bavarian 1st Chevaulegers, 2 more squadrons

These have been painted a while ago, but I only got round to basing and photographing them just now. Here are the final two squadrons (the first two are here):

IMG 2676

The flag is of course totally ahistorical (I don't think the cavalry units tended to take their standards along on campaign and this flag is obviously seriously over dimensioned), but that's a bit of wargamer's license I'm totally comfortable with :).

Figures are Wargames Foundry, painted in two layers.

Sunday, 18 December 2011

Horses, carts etc: update

The great equipment drive is continuing apace -- here's the current status:

IMG 0872

Since last post, I've constructed two extra powder carts and an extra one horse cart. Some have been primed (I'm using black gesso these days -- I've given up on finding a good matt black spray paint at the local DIY shop), and painting is underway on two of them. I've decided to use a full two-layer paint job on them (which is as high as I go these days, painting quality wise) instead of a quick dry brush job which I usually do for equipment and scenery. So all this will take me a bit longer to paint up :)

Monday, 5 December 2011

Horses, carts and wheels

So I've been steadily working on some horse and musket armies, notably Great Northern War Swedes and Russians and Napoleonic Bavarians. The past few days, I've turned my attention to what might be termed their _support infrastructure_:

IMG 0825

That's only just the start. So far, there's a Hovels Dutch wagon with two possible loads (I'll make a third out of coffee stirrers), a Foundry cart and powder cart and two Old Glory _wurstwagen_. The latter have either Foundry crew (for the one without horses) or Old Glory crew with Foundry Bavarian heads transplanted (ouch). Still to come are another cart and powder cart, some caissons (they'll be French crewed) and limbers and horse teams. Obviously, some of these will be more suitable for the Napoleonic than the GNW collection, but there will be a fair bit of overlap.

These bases can be used as baggage train, to generally doll up the battlefield or to provide some 'meat' behind a deployed artillery battery.

Monday, 14 November 2011

Engagement at Arnhofen: scenario

You've seen the models, you've read the battle report, now you can read and play the game. Here's the scenario for the Engagement at Arnhofen game:


PDF file - Engagement at Arnhofen
Engagement at Arnhofen (1Mb)


Enjoy responsibly!

_Update 20/11/2011_: changed wording of Bavarian orders (thanks Phil) and increased picture resolution.


Saturday, 12 November 2011

The defense of Bricqueville: a photo report

Last Tuesday, we had a full house to play another WWII battle using my 20mm collection (recently augmented by Crisis purchases). The scenario involved a follow up to the fictional battle of Saint Clair radar station: the British paratroopers, having destroyed the radar station and retreated across the Dives now have to defend against the inevitable counterattack:

IMG 2597
IMG 2598

Any hopes of the British that their blowing up of the bridges would slow the Germans down were quickly dashed when the first thing to crest the bridge ramp was this bridging unit:

IMG 2601

British artillery strikes notwithstanding, the bridge was quickly repaired and the German players busied themselves pushing their armor across:

IMG 2603

This seemed to cause some disquiet among the British players:

IMG 2604

The following three pictures show the German advance, as yet strangely unopposed by British troops:

IMG 2605
IMG 2606
IMG 2607

Until finally the first British paratroopers are spotted defending a detached villa:

IMG 2609

Much to the delight of the British players, it seems:

IMG 2610

While a certain _gravitas_ seemed to descend upon the German players:

IMG 2612

Especially when a British 6Pdr AT gun revealed itself behind a hedge:

IMG 2614

However, the AT gun only managed to lightly damage a Wirbelwind which promptly retaliated and wiped out the gun crew. The way was now open for the Germans to steamroller on into Bricqueville:

IMG 2617

However, as seen on this picture, nighttime was quickly approaching, and as the Germans were still fighting for Bricqueville, a hard fought draw was declared:

IMG 2618

It was judged that the British paras would extricate themselves and evacuate during the night, moving further west towards the British beachheads. Will be continued!


Friday, 11 November 2011

Some more 20mm WWII things

Some time ago, I painted some British paratroopers for a game following shortly thereafter. This Tuesday, we played another game with my WWII figures (the Defense of Bricqueville) and, true to form, I painted up some stuff for that as well.

First up, two Airborne jeeps and crew, from Brittania miniatures:

British airborne jeeps

And, to drive their opposition around in, a Steyr personnel car from the RTR (Raventhorpe Ready to Roll) range:

IMG 2631

That last model was bought at this year's Crisis and featured in the game three days later, painted and all :)

Wednesday, 7 September 2011

Engagement at Arnhofen

Yesterday evening saw the second play of the latest Command Post game, Engagement at Arnhofen. It is the first game for my 'new' Napoleonic project and features my Bavarians and Austrians.

The game is based on the action around Arnhofen, Abensberg and the Seeholz (trust the Bavarians to name a wood after a lake) on April 19th of 1809. This was, after the Austrians crossed the Isar at Landshut against moderate opposition from Deroy's III Division (Bavarian), the first action in the 1809 campaign featuring Bavarians engaging the Austrian invader. While the action on the day was more of an encounter battle, with reinforcements arriving during the day for both sides, the wargame was a more classic set up, with part of the forces deployed on table and the rest moving onto the table at the start of the game.

Yesterdays game was played with a full house of players: Eddy and Phil took the Austrians while Alan and myself played the Bavarians (helped for one turn by my daughter :) ).

The Austrian players decided to deploy their on table command on the far side of the Seeholz woods, aiming to move to a defensible position at the edge of the fields below them and waiting for the arrival of their second brigade moving up the table. The Bavarian cavalry deployed behind the hills, with the Chevaulegers in skirmish formation and the Dragoons in column along the road, ready to dash forward should the need arise.

And so, as distant gunfire rolled across the hills (the battle of Teugn-Hausen was fought at the same time historically), the armies set out to engage each other.

The contribution of the Bavarian cavalry brigade to the following battle is easiest dealt with. Due to a remarkable lack of initiative from the brigade commander (read: bad command rolls throughout the evening) the cream of the Bavarian horse did not participate in the action, apart from some ineffectual shuffling about. While their mere presence did keep the Austrian Dragoons stationary for most of the game, one imagines that the brigade commander would have been spoken to in quite stern tones by his division commander later in the evening.

The rest of the battle developed as two separate fights. On the Bavarian left, the Austrian battalions of the Kaiser regiment (1IR) were attacked by half of the Bavarian infantry brigade, while on the right, the Lindenau regiment (29IR) tussled with the other half of the Bavarian infantry. The Bavarians, having the advantage of interior lines, were able to move units between both assaults while the Austrians, being separated from each other by the Seeholz forest, had to fight their individual battles by themselves. This is a picture of the initial stages of the battle, where the left flank fight was already underway while the right was still maneuvering:
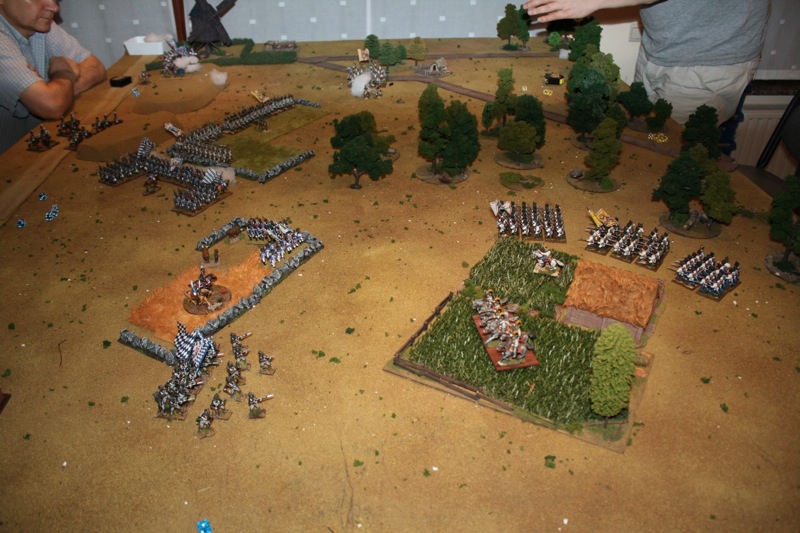
IMG 2554

When the smoke and dust settled and stock was taken of the situation by the end of the wargame evening, the Austrian brigade under Thierry was found to be broken. The brigade under Richter was still engaged but had one unit broken, one lost in the woods and had just had the brigade commander killed (we forgot that yesterday :) ). The Bavarian cavalry, on account of not doing much at all, was in still in perfect condition. The Bavarian infantry brigade, having bore the brunt of the fighting (well, all of it, really) was also broken (every single unit in it was shaken at the end of the last turn). So, in the spirit of the historical battle, the wargame was declared a hard fought draw, with maybe a slight advantage to the Bavarians. But then again, I played with the Bavarians so I would say that wouldn't I?

I'll leave you with some pics from the game. First up is the textbook attack of three Bavarian battalions on the left flank. The rightmost battalion would not participate in the final melee but move to the right flank to support the fight there.
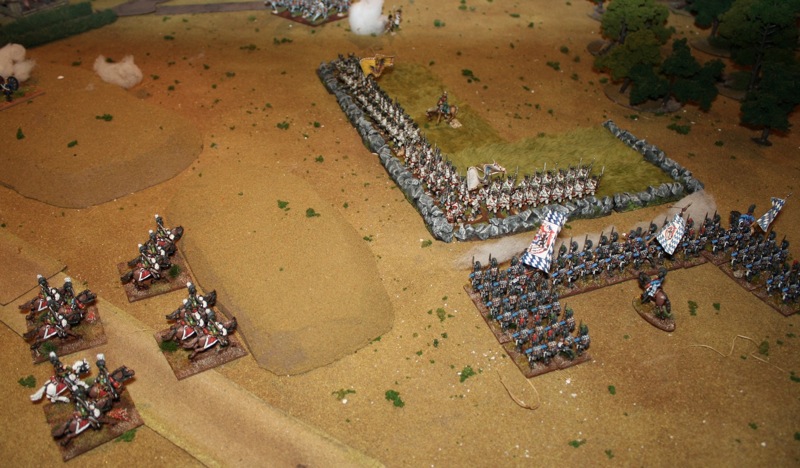
IMG 2555

Next is the situation on the right flank at the end of the game. The Austrian battalion engaged at the top of this photo and accompanied by the brigade commander was broken in that melee.
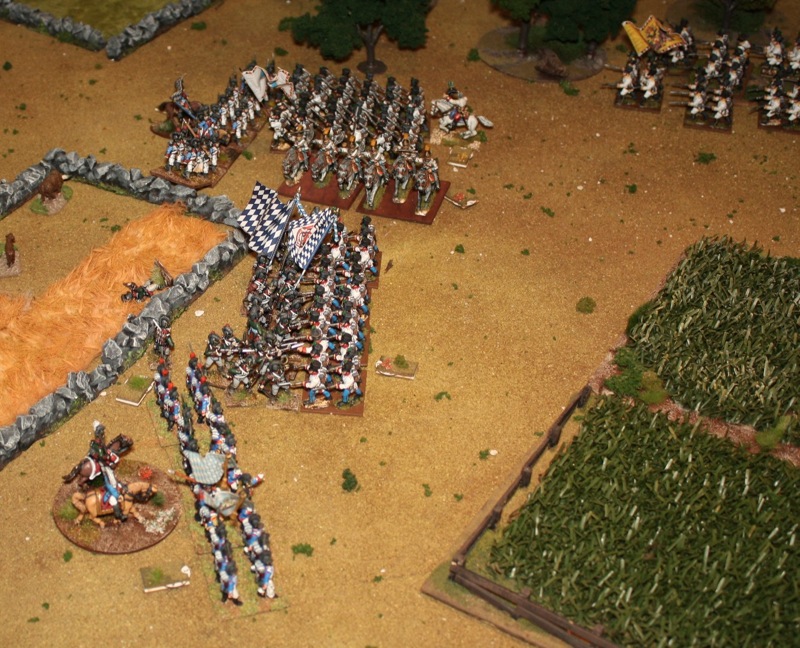
IMG 2557

And finally the end at the left flank:
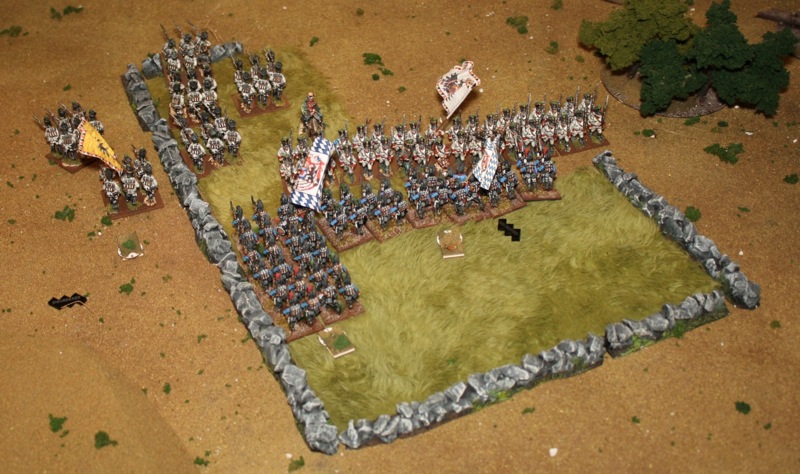
IMG 2558

The scenario for this game will be posted once I've drawn some maps for it :).

Monday, 22 August 2011

And another convert

Some time ago, one could admire some teddy bears painted by my daughter. It seems I have a new convert:

IMG 2547

That's a spare Victrix French Grenadier who is in the process of becoming 'the orange hunter'. Blue, white, brown and pink ones were to follow.