Monday 20 May 2013

Hortistari

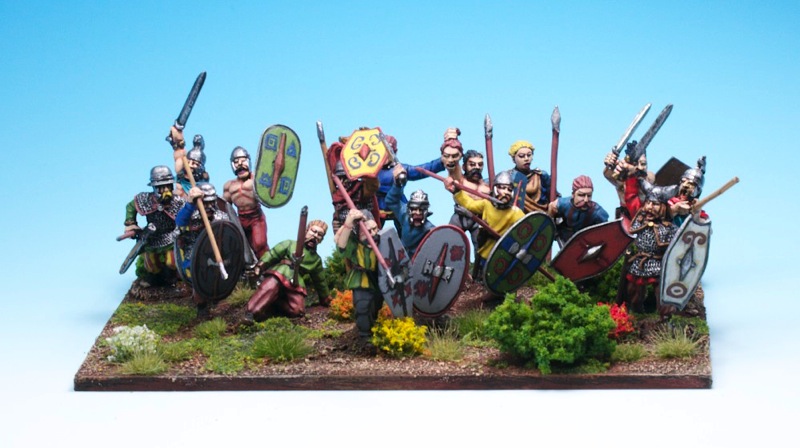
And here are the finished Hortistari, viewed from the business end:

IMG 3366

As said, this is a 'counts as' 24 figures war band based on a single big base, so I can get away with only 16 figures on the base. I think I'll be doing more of my ancients units on these big bases. I used to base them individually, harking back to their WAB days, but I might change that now. I like rulesets without figure removal to indicate casualties, and these big blocks make physically moving the figures on table a lot easier.

Sunday 12 May 2013

Wet Paint: Hortistari (Celts) and some civilians

It's been a while since I've done one of these posts, mainly because it's been a while since I painted anything that was not a 1:300 tank of scenery item, but here's the latest on my painting desk:

IMG 1354

The unit of Celts are the Hortistari. I'm trying something different with them. Instead of basing them individually and then putting them on a movement tray, as my other units of Celts are, I just plunked these guys down on one big base. It's a bit difficult to see in this photo, but the figures are glued on in a sort of wedge, to suggest a charge into battle. The big advantage of this is that you can get away with a unit that has a normal footprint of 6x4 miniatures only having 16 miniatures (in this case). Also, four of the miniatures on the base were painted some time ago but had not been incorporated in a unit yet, so painting only 12 figures got me my sixth war band of the army. For those keeping score, the others are the Malini, Zemstiani, Larii, Arboretes and Avertendi. Most of the figures are Wargames Foundry, with a few Old Glory sneaking in.

The two figures in front are civilians for my horse & musket collection. The guy carrying the flaming torch is an old Ral Partha Ravenloft 'angry mob' figure (donated by Phil). I have no idea any more what make the woman carrying the bucket is - possibly Eureka?

Saturday 11 May 2013

Russian breakthrough at the Semmel Valley

Over the last two gaming evenings at the Command Post, Eddy, Koen and myself played the big Cold War Commander game mentioned before - the Battle of Semmel Valley. This is a fictional scenario in an equally fictional Cold War gone hot setting, where a reinforced Russian Motor Rifle Regiment has to break through the defences of a British battle group, somewhere in Germany east of the Rhine.

The battlefield was, as the name already hints at, the valley of the River Semmel, which splits into the Kleine and Grosse Semmel in the middle of the battlefield. This is an overview shot of the table, with the BUA's named for reference. The British can deploy hidden anywhere on the table, the Russians enter from the left of the picture:

IMG 3331

The Russian mission was to control the exits of the valley - the two road exits between the river forks on the right of the table. As the Semmel itself was unfordable (and we conveniently ignored the fact that all of the AFV's in the game were actually amphibious), that meant that the Russians would have to take the bridge in the centre of the table, or build a bridge somewhere else using their bridging column (the presence of which was unknown to the British players).

The Russian plan recognised that a straight attack through the valley would not be a good idea. Instead, the northern flank of the battlefield, with the village of Hochdorf, would see the major outflanking attack, with only a screening or pinning attack envisioned in the valley itself. One rifle battalion would attach Hochdorf itself while the two tank battalions would follow this attack but swerve left to take any British forces in the valley itself under fire from the high ground. When British resistance was neutralised, the bridging column would drive up and bridge the Semmel river to allow the tanks to cross.
In the valley itself, a rifle battalion would advance and take Klein Semmelhausen and stop there, with the intent of pinning any enemy forces in Gross Semmelhausen to support the main attack. The third rifle battalion was held in reserve to drive up the main road to the bridge once it was clear.

As opposed to the well established maxim, the battle went pretty much according to plan for the Russians. The rifle battalion attacking Hochdorf was almost completely wiped out and never got into the village itself (it was defended by two British infantry companies) but did pin the British in Hochdorf enabling the T72 and T80 battalions to take up positions behind them and engage the British in the valley. The attack on Klein Semmelhausen established that there were no British troops in either Klein or Gross Semmelhausen, but did draw an attack of Chieftain tanks on them, part of which were subsequently engaged and destroyed by the Russian tanks.

Some pictures of the battle in progress:

IMG 3338
Russian rifle battalion driving on Hochdorf. By the end of the game, only a reinforced company would be left of them, not much further up the road from where they were in this photo.

IMG 3341
Russian advance triggers a British ambush along the right hand road. This and a second ambush along the left hand road accounted for some delays in the Russian advance and some wrecked BMP vehicles.
IMG 3354
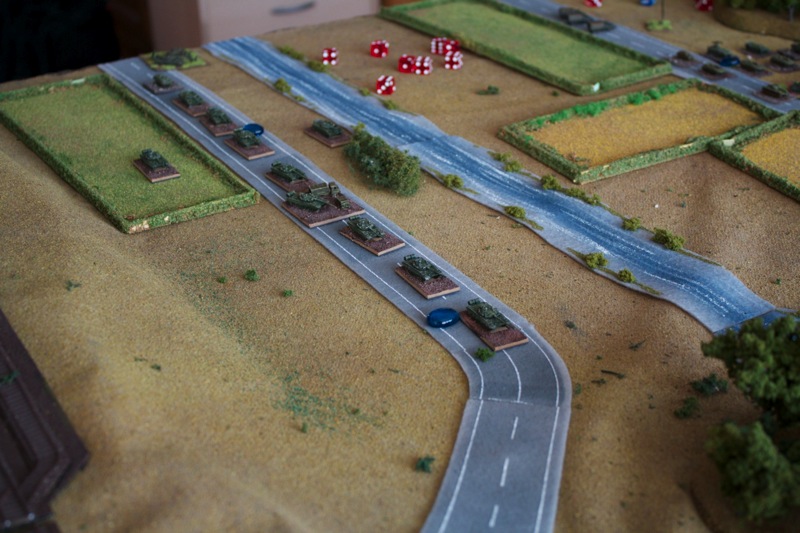
A long column of T72 tanks advances up the right flank.
IMG 3358
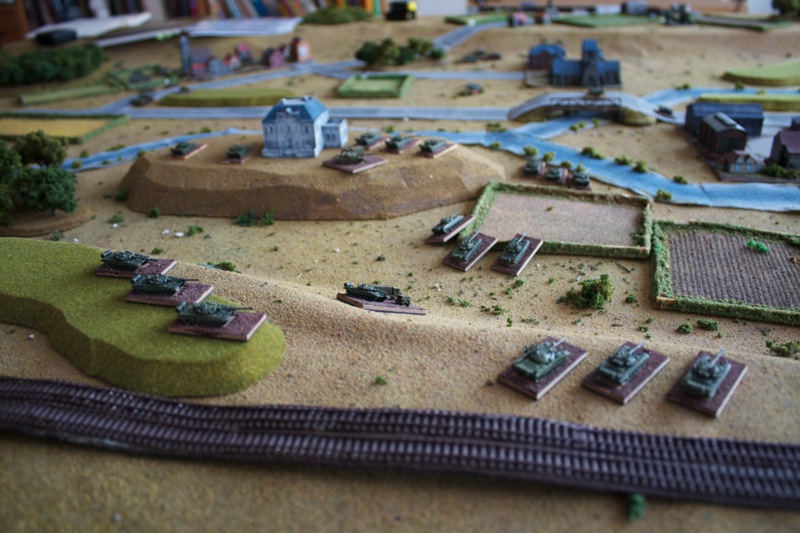
The Russian tank positions overlooking the valley. T80s in background on the hill, T72 in foreground.

IMG 3360

The aftermath of the battle of Hochdorf. A severely depleted Russian Rifle battalion not getting any closer to the village itself.

IMG 3363

The positions at the end of the game.

Based on the positions as shown in that last picture, we more or less decided that the battle was going to be a Russian victory. The tank battalions had established fire superiority over the central bridge area, the bridging column was moving up to enable the Russian tanks to cross the river, and the final Russian rifle battalion was ready for its dash up the central road and on across the bridge.

Despite some good experiences with the Xkrieg Commander series of rules in the past, we felt that for this particular game it did not work. Getting to the limited result mentioned above took us two gaming evenings, which is a bit too slow for our liking. Phil's post has more details on this.
Wednesday 8 May 2013

"Fast play" rules are very relative ...

Last night we had another game of Cold War Commander (CWC), played on the table shown in this blogpost. It had been a while since we played moderns in 6mm, but our experience with the ruleset Blitzkrieg Commander, and the promise of "Fast Play Rules" on the cover of the CWC rulebook, stirred up our hopes of producing an excellent game.

I have to admit the game was a bit of a dud. Not due to the excellent terrain and figures set up by comrade-in-arms Bart - the motto of our small gaming group still is Visual Appeal is Everything - but rather due to the slowness and unattractiveness of the rules themselves.

What exactly was the problem in my view?

The command & control system is fine. Roll 2D6 vs. command rating of an HQ to activate a bunch of units, and off you go. This is very similar to some other games we play regularly (Black Powder), and since a few years, an accepted mechanism in the stable of wargaming rule mechanisms (see also Warmaster, Blitzkrieg Commander etc.). Although one can think off many small variations and modifiers to fiddle with this basic idea, the core rule itself is very sound. It forces you, as a player, to think about what the most important actions on the table are, try to resolve these first, and then switch to the less critical areas. Nothing wrong with this aspect of the rules.

The major thing that bugged me, however, was combat resolution. Over the years, I've come to see combat resolution as a stochastic process, that yields some outcome of having inflicted a certain amount of hits. This process should obey a few principles:
  1. The stochastic outcomes should be plausible and linked to the historical context of the game. So, after throwing dice, drawing cards, looking at tea-leaves etc., the odds should be such that when a toy tank shoots another toy tank, there is at least some connection to the event of a real tank or platoon shooting at another real tank or platoon in terms of range of probable outcomes.
  2. The procedure itself should be fun. It is indeed possible to design a myriad of different procedures to reach the wanted outcomes. Look-up tables; buckets-of-dice; single die with modifiers; opposed die rolling; card drawing; spinners; throwing darts etc. etc.
    But, whatever procedure you choose, it should be fun to execute, and fast. It is here, as a game designer, that you have the liberty to design a game that is fun to play.
CWC falls short in this 2nd aspect. Combat resolution is NOT fun, and it is SLOW. A single stand rolls upto 6 D6 - which all have to be saved. Then more dice are needed to decide on suppresion. All this for causing perhaps a single or 2 hits on a stand that can take 6 hits. This is a frustratingly slow process, and hence, not much of a fun process either.

The end result? We will design our own rules for 6mm Modern Wargaming. Now, that is FUN to do!

But, as I said in the title, everything is relative. Your fun might not be my fun, and your notion of fast play might be different of mine. Fair enough, and nothing wrong with that. Wargaming is a broad church, and that makes it an interesting hobby.