Movement trays are very handy in a lot of games. But care has to be taken that the visual look of the game does not suffer. I hate it when half-empty or dirty or ugly movement trays are being used.
For our last game, I quickly made some standard bases with small scenic features which can be used to "fill up the holes". As you can see below, I used some rocks, a small tree, some skulls, a rat, etc.
Place them between your figures in a movement tray, and the visual appeal suddenly goes up by a factor of 10!
As an added bonus, you can give your army some additional flavour: use skulls and graves for an undead army, rats for a skaven army, or general scenery items or wounded figures for any historical army.
Showing posts with label Basing. Show all posts
Thursday, 11 February 2016
Wednesday, 21 January 2015
It's the figures, not the rules!
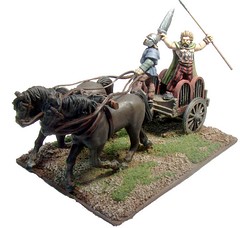
This past weekend I spent some time cleaning up and repairing an old army of mine. The army in question are Oldhammer Orcs & Goblins (I will post some pictures later), but this particular detail is irrelevant for this post.
I almost never repaint miniatures - except visible damage - but I do rework the bases. More than the paint-job of the figure itself, it is often the base that provides a common look-and-feel of all the figures in an army. If all the bases are visually similar, it provides a much larger visual cohesion on the battlefield.
The bases for the models in this particular army were in a dire state. Initially, figures were based individually (most are Citadel slottabase figures, but not all), and the bases were painted black. Then, grey flock was added. Later on, figures were based in groups of 4 on 6cm by 6cm bases to adjust to a particular ruleset that we were using at the time. Since I thought this was the best ruleset ever, the bases were superglued to cardboard and given another layer of paint. When that ruleset fell out of favour (duh!), I removed the figures again, but now leaving glue marks on the slottabases, and some of the flock came loose in the process.
So, I redid the bases this weekend, all figures were left individually based. The bases were again covered in grey flock (not what I would today, but no choice given the history of these figures), and adorned by rocks, tufts of grass, etc. At last these figures are "showable" again on the tabletop.
What I realized (once again) is that if you are a long-time wargamer, rules do not really matter, but figures do.
As a starting wargamer, it is quite natural that you acquire figure that go with your ruleset of choice. Your budget might be limited, and you don't always know where to start. Hence, following the recommendations made by the ruleset, or buying the figures that are sold specifically for the ruleset, is the best course of action.
But of course, rulesets lose their popularity due to a myriad of reasons. Some of these are external: the ruleset is no longer "supported". As a wargamer, one develops different preferences over the years. Rules that seemed so clever and fun, might feel like a pure random engine several years later. Social reasons might also play a part. There's no use in clinging to a ruleset if all your friends hate it. And lastly, there is also innovation in the design of wargames themselves. Rulesets do become better over the years (but not always! :).
The turnover frequency of rulesets is often not matched by the turnover frequency of figures. It is quite easy to change rulesets; it is much harder to buy and paint a completely new set of figures. Hence, the figures in a collection often outlive the use of any particular ruleset, and it makes no sense to adapt the basing of figures to a particular ruleset.
I have been wargaming for over 30 years, and I have come to realize that the constant factor during all these gaming years is a good and solid collection of figures, not any particular ruleset. 10 years from now, I might use rules that don't even exist yet. But very likely, I will use figures of which a large fraction are already in my collection today.
Tuesday, 5 November 2013
Flexible artillery (re)basing
I ran into a problem when setting up my wargame table for a new game the other day:

The scenario I'm setting up (one from CS Grant's excellent Scenarios for Wargamers) calls for a number of redoubts and I wanted to provide for the option of deploying a cannon in one of said redoubts. As the discerning reader can no doubt infer from the picture above, the artillery base in question is too big for the redoubt (and yes, the gun is not put on the base correctly - that is not the point of this post :) ).
So I came up with this idea:

This is of course nothing revolutionary, and in all probability I am not the first wargamer to do this, but it is pretty neat nonetheless. On top of the an MDF base, I glue a layer of thin 'paper steel' (I get mine from the tastefully named Tiny Tin Troops). This is then terrained with my basing gunk (Pumice Gel with brown dye added) but some space is left ungunked to accommodate the bases of the crew members (which are now also individually based on magnetic bases) and a smaller area to accommodate my standard Nd magnet on the bottom of the gun carriage. I am then free to put all figures on the base for normal deployment, take the gun off to limber it, or take everything off for those special cases, such as deployment in BUA's or redoubts.
All together, this is the result in based version for normal deployment (basing of course to be finished):
In redoubt mode:
And the base itself without occupants:
The scenario I'm setting up (one from CS Grant's excellent Scenarios for Wargamers) calls for a number of redoubts and I wanted to provide for the option of deploying a cannon in one of said redoubts. As the discerning reader can no doubt infer from the picture above, the artillery base in question is too big for the redoubt (and yes, the gun is not put on the base correctly - that is not the point of this post :) ).
So I came up with this idea:
This is of course nothing revolutionary, and in all probability I am not the first wargamer to do this, but it is pretty neat nonetheless. On top of the an MDF base, I glue a layer of thin 'paper steel' (I get mine from the tastefully named Tiny Tin Troops). This is then terrained with my basing gunk (Pumice Gel with brown dye added) but some space is left ungunked to accommodate the bases of the crew members (which are now also individually based on magnetic bases) and a smaller area to accommodate my standard Nd magnet on the bottom of the gun carriage. I am then free to put all figures on the base for normal deployment, take the gun off to limber it, or take everything off for those special cases, such as deployment in BUA's or redoubts.
All together, this is the result in based version for normal deployment (basing of course to be finished):
In redoubt mode:
And the base itself without occupants:
Wednesday, 23 December 2009
How I do bases these days
It's been a while since I've done a how to article, and even longer since I've done one on basing. Allow me to rectify this with an article on how I base figures nowadays.
As opposed to a full blown how to (which essentially is simply put stuff on base, paint, flock - no mystery there) I'm simply going to list the various materials I use in basing my miniatures.
- The bases themselves
- For the bases themselves I either use slottabases (both the 20mm, 25mm and 25x50mm cavalry versions) or variously sized bases from Litko in the US. The bases I order from them are the 1.5mm plywood ones, with the heavy duty magnetic bottoms.
- Nd magnets
- I glue these underneath the slottabases. I get these from Supermagnete.be
- Golden acrylic pumice gel
- These is my current version of the magic basing compound from Pebeo I wrote about earlier. Since then I have however been unable to track this down in my local Brico (it apparently was a one off and not part of the regular catalog), so I've switched to one I can get in a local arts'n'crafts shop (De Banier).
- Ground cover
- For ground cover I use various combinations of:
- Woodlands Scenics blended turf
- Static grass (no idea as to make)
- Woodlands Scenics field grass
- Noch grass tufts
- The occasional stone, twig or acorn supplied in unlimited quantities by my children, who seem to have half a forest available to them at their school, and have no qualms whatsoever transporting most of it back home in their pockets.
Friday, 27 January 2006
How I currently base my figures
Fellow Schild & Vriend member and TTM author BD once mentioned to me that it would be a good idea to do a basing tutorial on this here blog. There are a lot of painting tutorials out there (including some of our own), but tips on basing your well painted figures are apparently somewhat underrepresented. Hence this entry. BD, see - I do listen to you :)
Over the years, I've used several different ways of basing my miniatures, but lately I've been settling on a way I'm quite happy with. For as long as that will last, at least :).
For the bases themselves, [I use standard slottabases](http://www.nirya.be/snv/ttm/archives/000001.html) (hey, that was the _very first entry_ on TTM. Ah, nostalgia :) ), augmented by [some rare earth magnets](http://www.nirya.be/snv/ttm/archives/000137.html), though I am now eyeing [Galeforce Nine](http://www.gf9.com) bases, because they come with 'rubber steel' inserts to put in your movement trays or transport boxes, saving you an extra order elsewhere. I also like the GF9 bases because they are not slotted.
The disadvantage of slotted bases is of course that when you put a flat based figure (i.e. without the tab to fit in the base's slot) on the base, you will need a way to cover up the slot in the base. The classic recipe of white glue and sand does not work here, ending up with at best a local depression in the base, and at worst a clear hole. You need something that covers the slot well - some kind of wall filler like Polyfilla is the usual solution. I used that for some time, but have now found something which I think is ideal: P�o sand mortar from [Brico](http://www.brico.be):

The Pebeo range of mortars and textured gels is meant to create interesting textures for painters and interior decorators. As miniature wargamers are the world's foremost scroungers, we can of course use these things as well. In the case of the sand mortar, it makes an ideal basing material. It scoops easily, not being runny; it is fairly sticky so it sticks to the bases easily but not sticky enough so that you cannot easily wipe off any overspill on the figure itself; and its texture is just right to recreate a kind of rough terrain for the figure to stand on. The result when the stuff has been applied looks like this:

The mortar is dry after around 24 hours (though you can cut this short in a pinch if you don't mind risking your brush when you paint the not completely dried mortar) after which it can be painted and drybrushed just like normal:

The base above was finished with a few patches of [Woodlands Scenics](http://www.woodlandscenics.com] Blended Turf flock (I get mine from [EC Scenics](http://www.ecsenics.co.uk), glued on with gel form super glue.
All of my recently finished figures have been based in this way, and you can see the results on [my Flickr account](http://www.flickr.com/photos/robartes).
It's a fast and simple way of producing good looking bases. A future 'improvement' is that I will use lighter colors, more tans than browns, to paint the bases, as these look a bit dark when viewed en masse. But as most of my armies have had their bases painted with my current colors, I'll use the new colors for new armies (Carolingians to start with).
TT tags: miniatures wargames basing
Sunday, 14 August 2005
Amazing Magnets indeed
It's been a bit quiet around here because I've been occupied laying floorboards in the new house (in the parts that did not have floor tiles). That's all done now and I haven't chopped of any fingers or other appendices, so I'm back in business miniatures wise.
During this episode, I received a package from [Amazing Magnets](http://www.amazingmagnets.com), which I ordered some time before. Amazing Magnets sells magnets, amazingly, but not just any old magnet. They sell [neodymium magnets](http://en.wikipedia.org/wiki/Neodymium_magnet) targeted at the craft market. Neodymium magnets can hold a very strong magnetic field in relation to their mass, so a small magnet can hold a strong magnetic field.
I ordered their [smallest size square](http://amazingmagnets.com/products.asp?ID=01401) magnets, with the idea of using them on the bottom of slottabases instead of glueing magnetic tape to the bottom, which has its problems. The order arrived impeccably packed and included a little bag of samples in different sizes -- great service.


As seen from the pictures above, I glued two of the little magnets to the bottom of a slottabase. This gives me a magnetic field that is strong enough to suspend the figure upside down from a metal box without any problems, yet still easy enough to break the magnetic force to move the figure when necessary. One magnet did not result in a strong enough magnetic field.
This is a great product -- instead of spending a considerable amount of time glueing magnetic tape to the bottom of the bases, there is now just the one step: glue two tiny magnets to base (I use ordinary superglue) and you're done!
I shall certainly be ordering more of these magnets (possibly in a larger size to just have to glue one magnet to the base), as they are quite affordable (100 of these tiny magnets set me back $9.00, while postage and packing from the States to Belgium was less than that) and work beautifully.
Highly recommended.
Thursday, 6 January 2005
Rebasing: Just Like Divorce and Re-Marriage
Ok, so why the weird title? Well, I just sat down this week and completely rebased an entire army from its old WRG DBx style basing over to Warhammer Ancients Battles (WAB). As I sat there prying little 25mm figures off of perfectly good bases my mind began to wander, until the X-acto knife promptly brought me back to reality! However, in those few seconds of free association the kernel of an idea began to flow (before the blood did as well) and take shape about rebasing, and how it is really a metaphor for wargaming divorce and re-marriage from one set of rules to another.
Now, what I mean is that how we base our figures often makes a statement of our committment to one particular rules set or basing standard. For example, I would say that since WRG 6th/7th edition ancients, that style of a basing had become a standard. Very few new sets of ancients rules in the past 15 years or so took the bold step to propose an alternate basing system. Well, that changed in the late 90's with WAB. Now, WAB very explicitly states you can use any basing method to play, but definitely advocates their own basing (and this is evident from following the Yahoo groups forum).
Well, after playing the rules a few times I came to the conclusion that I liked them. In fact, I liked them a lot more than DBM. Now this is not a bash at DBM, I played WRG ancients from around 1985 and helped playtest the original versions of DBA and DBM. I just came to the conclusion that DBM no longer looked or felt like the descriptions of ancient battles I read in primary or secondary sources. So, this brings us to the divorce part.
By taking the dramatic step of rebasing my army to WAB, it is no longer useable for DBx. I've basically divorced myself from that set of rules permanently (in regards to my own armies, I'd still happily play it if someone else wanted to) and I find that a pretty radical step in a wargamer's life. Also, by adopting the WAB basing convention, I've essentially wedded myself to that set of rules (at least temporarily and until the next rebasing).
So, my relationship with one set of rules that lasted almost two decades is over. A new one is beginning and I wonder if WAB will last as long as WRG did.
Thursday, 21 October 2004
Terraining figure bases
Over the years, I've used a number of different ways of finishing figures bases, ranging from the very involved and time consuming to the one step and finished variety. Lately, I seem to have converged on two ways, one slightly faster than the other, so time constraints are the major determining factor in choosing which of the two.
* The involved way: plastered bases
For this, I mix up a basing 'goop' -- for lack of a better word. It consists of about equal amounts of dry plaster (dry, unmixed [Polyfilla](http://www.brico.be/catalogue/pages/nl/popup.asp?ref=1787522) ), shell sand (normally to put in bird cages -- those of you with Norwegian Blue parrots know what I'm talking about), white glue, water and brown paint. This is applied to the base, taking care to avoid the figure's feet, hooves or other downward pointing appendages, and left to dry. The base is then finished as detailed below.
The disadvantage of this method is that it's slow (working the plaster around a figure's feet is slow going) and that the goop, containing plaster, does not keep, but dries out after a day or so. For this reason, I usually wait until I have a whole batch of figures to base.
* The quick way: shell sand
The other method is just using shell sand. Slightly watered down white glue is painted on the base, which is then dunked in a container of shell sand. When dry, this is painted brown and finished as below.
The advantage of this method is that it's faster, as you're painting on the glue, which makes it easier to avoid the figure's feet. There is one step extra, as the shell sand needs to be painted brown, but that does not take that much time.
The bases are finished by [drybrushing](/snv/paint1.html#drybrush) with two successively lighter shades of brown, and finally irregular patches of static grass are applied.
Both methods result in bases that look good _en masse_, and as long as you don't mix the two methods within the same unit, they can be used in the same army without trouble. And in case you're wondering, this is what it looks like:

Saturday, 28 February 2004
Single basing vs multiple basing of figures
One of the things that pops up regularly on various wargame related mailing lists is the issue of basing. More specifically, in this case, the basing of 25mm Ancients for Warhammer Ancient Battles. There are two basic camps: base everything singly (i.e., one soldier to one base) versus base troops on multiple bases. In the multiple base camp, the most popular sizes for the bases are those that stick to the DBx standard, basing figures on single DBx bases or on bases whose sizes are multiples of a DBx base.
Both ways of basing have their advantages and disadvantages. Some of these are mutually exclusive, some are present in both basings.
Let's start with the advantages of single bases:
As to disadvantages of single bases, there's just one, but it's a biggy:
On to multiple bases. Advantages:
The disadvantages:
On the face of it, multiple basing seems to come up on top when looking at these advantages and disadvantages. Nevertheless, I am currently rebasing most of my 25mm Ancients to single figure bases, and more specifically slotted bases from Hetzerdog. Why? Because I found that the look of ranks upon ranks of single based figures does appeal to me, and that using single bases makes it easier to stay consistent in basing, as opposed to the multiple bases where one set were finished with static grass and painted Polyfilla, the other with two colors of flocking, and yet a third with painted parrot cage sand. With the single slotted bases, the only viable way of covering the slot is by using Polyfila, so every base will be Pollyfilla and static grass (with the odd bit of extra embellishment).
Special figures will still get their own base (e.g. Bartholomeus Sinister Grassus is based on a custom size base with a duck, his mascot), but the majority of my rank and file are being rebased to single bases.
Currently, a unit of Sub Roman Briton veterans (Late Roman Auxilia), a Sub Roman comitatus (BSG's comitatus) and a unit of pedes are on my modelling desk, on single bases awaiting the Polyfilla treatment. At the least, it keeps me busy :)
Both ways of basing have their advantages and disadvantages. Some of these are mutually exclusive, some are present in both basings.
Let's start with the advantages of single bases:
- Figures are based singly. Well, obviously. This is an advantage because this means that the figures can be used for any ruleset with any basing system, using simple sabot bases. It also means that the figures can be used individually for skirmish games. As my main interest in this period and scale is Sub Roman Britain (or Early Medieval Britain), a period characterised by low inensity skirmish type fighting, this is a definite advantage.
- Looks. This might be a bit of a surprise - it certainly was for me - but singly based figures actually look good. You don't have the diorama effect you can create with multiple bases, but the single bases have their own esthetics, especially if you remain consistent in how you finish the bases.
As to disadvantages of single bases, there's just one, but it's a biggy:
- Transportation, both in game and outside of the game. In a game, it's obvious that moving 36 figures that are based individually is more work than moving 36 that are based six to a base. You can work around this to a certain degree with movement bases, but you have to be careful with how you finish your movement bases to avoid killing the visual appeal of the bases. Transporting figures safely to games is also more difficult for single based figures, as the tradition way of using magnetic sheeting under the bases is less effective with the smaller surface area of the magnets, and if you use slottabases, it's a devil to get the sheets to stick. However, for those with lots of money, rare earth magnets can help in that regard.
On to multiple bases. Advantages:
- Ease of movement and transportation. This is the big one. Whichever way you look at it, it is easier to move 6 figures glued on a stand than to move the same 6 figures based individually. The same goes for transportation - bigger bases means bigger footprint, which means greater stability or greater adhesion when using magnets.
- Looks. Using bigger bases, you can stuff more scenery on the base, effectively making the stand a mini diorama. It is easy to overdo this, however - if every stand in your army has a pool of stagnant water, two ducks and three tree stumps on it, along with enough greenery to hide an army of frogs, you are probably taking this a bit too far.
- Fixed position of figures. This is actually two advantages in one: on a multiple figure base, you can to a certain degree 'protect' certain fragile figures by putting them towards the middle of the base, thus preventing handling damage, and you can position figures in such a way that they fit nicely together &emdash try lining up a pike phalanx in single figures to see what I mean.
The disadvantages:
- Lack of flexibility. The bigger you make your bases and the more figures you put on them, the less the number of different rules systems you can use them for. If your are the kind of gamer who plays one ruleset and one ruleset only, this is actually an advantage, of course, but if you are like me, you want to use your figures for as many different rulesets as you can get your hands on (all in search of the Perfect Ruleset, of course). There is no beating the flexibility of singly based figures.
On the face of it, multiple basing seems to come up on top when looking at these advantages and disadvantages. Nevertheless, I am currently rebasing most of my 25mm Ancients to single figure bases, and more specifically slotted bases from Hetzerdog. Why? Because I found that the look of ranks upon ranks of single based figures does appeal to me, and that using single bases makes it easier to stay consistent in basing, as opposed to the multiple bases where one set were finished with static grass and painted Polyfilla, the other with two colors of flocking, and yet a third with painted parrot cage sand. With the single slotted bases, the only viable way of covering the slot is by using Polyfila, so every base will be Pollyfilla and static grass (with the odd bit of extra embellishment).
Special figures will still get their own base (e.g. Bartholomeus Sinister Grassus is based on a custom size base with a duck, his mascot), but the majority of my rank and file are being rebased to single bases.
Currently, a unit of Sub Roman Briton veterans (Late Roman Auxilia), a Sub Roman comitatus (BSG's comitatus) and a unit of pedes are on my modelling desk, on single bases awaiting the Polyfilla treatment. At the least, it keeps me busy :)
Subscribe to:
Posts (Atom)