The december game played in Phil's Attic in the series Schild en Vriend Revival Games was set up in back-to-basics philosophy, and this because of 2 reasons:
1. We used unpainted, plastic 20mm ACW figures. This is a throwback to our old days when we just started with miniature wargaming. But in some way, I do feel there is something very attractive playing with these figures -- as long as there is a nice terrain setup.
2. The scenario came out of BattleGames issue #2, a magazine that regularly prides itself on its 'Old School Wargaming Spirit'.
For the ruleset, Brother Against Brother was used, but hexified of course, since we use the Kallistra terrain as our terrain of choice. The rules can be used as-is, dividing all ranges given in inches by 4 to get a range in hexes.
The scenario saw a force of Confederate rebels against an army of Union soldiers. The Union's mission was to capture a bridge, whilst the Confederacy had to defend it. Eddy and Frank played the Union, while Phil and Bart took the roles of the Confederate commanders.
After the initial deployment of the defenders, the Union had to divide their force in three attack columns. Each force has an officer, able to give orders to squads belonging to that company.
The game started pretty smoothly. The first Union troops where shot at by a Southern artillery battery placed on the centre hill near Devil's Rock. On the Union left flank, progress was smooth, with a Confederate cavalry squad wiped out after a gallant charge by the latter. The central artillery battery near Devil's Rock was routed by return fire, and the Union right flank exchanged shots with Southern troops cleverly hidden in woods on the Southern left flank.
This was all without the involvement of the defense line of Confederate infantry near the Springfield Bridge, which Engineers were busy preparing for demolition.
Alas, near turn 10 a morale card had to be drawn by a squad on the Union left flank, indicating their Officer was shot by a sniper. THWACK. This meant all squads could only load and fire, as long as no replacement officer was found (30% each turn). Unfortunately, all the Union squads were in cover and unable to exchange shots with the Confederate troops, which led to much frustration on and near the battlefield. In the mean time, the central Cavalry of the Southern Rebels, led by Jubal Early, wanted to charge over the central hill. After some initial hesitation, they were unable to reach their intended target, an out-of-command Union Cavalry squad, so they took out their carabines, effectively causing their opponents to skeedaddle.
This was the final straw, and the Union conceded -- sort of -- since it was late already in real time.
Everyone agreed it was a fun game, and the BaB rules are really working well, but in hindsight, the Officer Thwack morale card was the wrong card at the wrong time, and probably too devastating as a random effect.

Wednesday, 13 December 2006
Sunday, 10 December 2006
You can't start young enough...
... as this here picture proves:
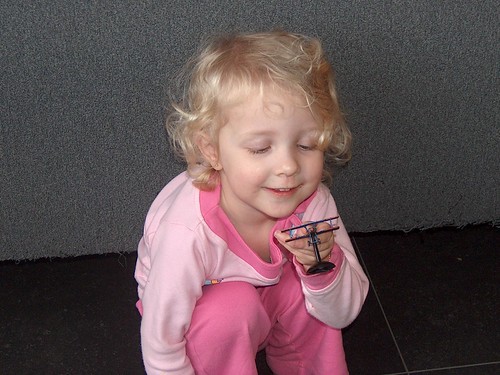
Of course, she destroyed the plane five seconds later, so perhaps I'll keep her away from toy soldiers for a little while longer :)
Of course, she destroyed the plane five seconds later, so perhaps I'll keep her away from toy soldiers for a little while longer :)
Thursday, 7 December 2006
Celtic figures
The other day, a gaming friend interested in getting some Celtic figures asked me about what manufacturer my Celts are from. Here's my answer:
As a bit of gratuitous self promotion (hey, it's my blog after all), you can ogle my Celts [here](http://www.flickr.com/photos/robartes/sets/72057594075245680/).
TT tags: miniatures wargaming
Well, for Celtic figures, you're spoilt for choice if nothing else.
Because Celts are the figures featured in the WAB book, just about
everyone and his dog do a Celtic range.As to my Celts - they're mostly Foundry, with a few Renegade and Old
Glory chariots and Old Glory infantry. The vast majority is Foundry
however, bought way back when they were just putting their stock into
packs and selling off the non-pack-packaged stock at ridicilously low
prices. They're good figures, and I would recommend them, except for the
price of course. However, it is rare you can not get any sort of
discount on Foundry stuff, and I believe they're doing their usual horde
deals for Christmas again, although that would mean buying *a lot* of
figures to get a good price per figure.The Old Glory figures I have for infantry are the older Caesar's War in
Gaul (CGW or CWG) range, not the newer Celtic range (Update: it turns out these figures are now the PPC range). The figures are on
the good side of the Old Glory spectrum, but still suffer from the
typical Old Glory 'awkwardness'.The Renegade stuff is truly chunky: they outmass just about any other
figure on the table, and the swords are indeed as massive as they look
on the website. I've only got a few of their chariots, so that doesn't
matter that much, but I would not combine Renegade infantry in a unit
with another manufacturer's figures. They're good figures though, on a
par or even better as Foundry's, except for the chunkiness.All that aside, would I want to start over, I'd have a good look at
Gripping Beast. They suffer from a few flaws (typical poses, impossible
poses to stick spears on with a few of the spearmen), but they look
gorgeous on the website.
As a bit of gratuitous self promotion (hey, it's my blog after all), you can ogle my Celts [here](http://www.flickr.com/photos/robartes/sets/72057594075245680/).
TT tags: miniatures wargaming
Thursday, 23 November 2006
Another Colonial Game
After the exploits of the FFL in the Desert (see post below), we had another Colonial game this week, this time in the Congo. Report by Eddy, pictures here.
The setup : King Leopold II is on a personal inspection tour of his little piece of personal property in Africa, visiting a diamond mine. Taking a coffee break at the local fort a scout comes running in with news : Zanzibarians see his presence as an opportunity to enlarge their trading empire and have instigated a revolt amongst the natives who need not much motivation to kick some white butt anyway. A messenger is immediatly send to the main encampment demanding quick rescue but for the moment King Leo, his retinue, a company of Belgian troops and 2 companies of Askari will need to hold the fort until the rescue party arrives. The size of the native force is considerable - at least 12 companies worth of warriors. Can the fort hold ? Will the rescue party arrive in time ?
Bart & Eddy playing the brave natives. Phil, Koen (later replaced by Frank) playing the "Force Publique"
Pre-game native tactical talks decided that taking the fort should have precedence over trying to slow down the reinforcements so only a minimum of 3 companies are going to be used to try to buy time for the others to take the fortress. Such a suicide mission is tailor made for Eddy while Bart would use his tactical finesse (read : mini-maxing) to take the fort. The ambush was set. Let them come and don't throw those spears until you can see the white of their eyes.
Koen/Frank played the fort CO while Phil would lead the rescue party. Well, it's always said you need 3 things to win a card-driven game : a good plan, good cards and good dice. The plan was good : those 3 delaying action companies did their duty, holding until the last man, even managing to wipe-out one of the rescue companies so that in the end only 2 companies got through to the fort. Too little and too late because the combination of attacking the fort only from one side, hereby halving the return fire, good cards and good dice had steadily eroded the fortress defenders. One company of the valiant relief party was still able to make it onto the walls, but sheer numbers prevailed, resulting in a vacancy add in Vacature : Job : King, degrees : none required, previous experience : women preferably.
Le Roi est mort - Vive le Roi.
Wednesday, 8 November 2006
The Legion in the Desert
This month, our SnV revival game was set in the North-African desert. Using the newly acquired Desert terrain from Kallistra, along with the Wooden figures from Windcatcher Graphics, and the Afriboria rules, we had an excellent game.
Full reports will no doubt follow ...
Full reports will no doubt follow ...
Crisis 2006
Last weekend we attended with the 'Schild and Vriend Demo Team' they annual Crisis convention in Antwerp, hosted by Tin Soldiers of Antwerp.
As usual, this convention is the highlight of the year for wargamers in the Low Countries and surroundings. The large hall was filled with traders and clubs. The SnV participation game was using a hexified version of the Wings of War boardgame. Dogfights in WW1 have a certain romantic feel, and we had quite some succes attracting players for short 10-15 minutes duels in the air.
Anyway, just go and see the pictures at http://www.tsoa.be/ .
Tuesday, 24 October 2006
Timers and Hourglasses ...
I recently acquired the boardgame Space Dealer at Essen Spiel. One of the reasons I was attracted to buying it, is because they use hourglasses (timers) as playing pieces. The game lets you build a space station with various functions, and in order to use a function (e.g. produce a certain good, or develop a technology card), you put a timer on it. Once the timer has run completely, the action associated with that card is carried out. Because players have only 2 timers, they need to think about what resources to activate. Also, the game is played in real time; there are no real turns. The timers drive the progress of the game. Once 30 minutes in real time have elapsed, the game ends.
A few years ago, I was also very interested in game called TAMSK, a game in the GIPF series. In this game, timers are also used. They determine when a certain piece needs to be moved. If the time runs out, there are penalties involved.
Another turn-less game is Icehouse. In Icehouse, a number of pyramidal playing piece are put on the table. Players can take pyramids, put them on top of others etc., all without turns. This seems as if it can be chaotic, but in practice, it works really well.
Especially Space Dealer got me thinking about ising something similar in miniature wargames. Most wargames we play are centered around turns, in which a number of units can do something. Possibly card-driven sequences or command-and-control rules can limit the number of troops one can move and or the type of actions one can do, but basically, the game is still turn-based.
But it doesn’t have to be. Inspired by Space Dealer, I started thinking about using a turn-less structure. Suppose you have a number of units on the table, and both players have 2 or 3 timers at their disposal. A player who wants to move or fire with a unit, puts an order chit next to the unit, along with a fresh timer. The timer starts to run, simulating the time for the unit ‘to get ready’ to act on the order. Once the timer has run out, the unit can be moved/attack/fire, and the timer is available to put an order next to another unit. In the mean time, other timers might have run out, and acted upon, and the opposing player does the same. Thus, the game becomes a flow of a sequence of actions by units, the exact order of which is determined by the timers.
Of course, it would take some time to tune this. If the timers take too long (10 mintes ...), players will do a lot of thinking, and watching impatiently untill one timer runs out. On the other hand, if the timers are too fast (5 seconds ...), the game becomes a chaotic scramble. The optimal duration of a timer should allow for a decent, steady pace of play, with time in between to allow for some proper tactical thinking. Also, it would require reasonably fast resolution rules. Resolving an action that takes longer than the time needed for a timer to run out is impractical.
I plan to use this mechanic in one of my future games -- maybe a fantasy battle using my hex-based Te Wapen rules. In the mean time, any comments are welcome.
Wednesday, 11 October 2006
Straight from the hip
The following shootists had answered the call for a final showdown :
Phil “Doc Savage“ Dutré
Koen “Brawl Bait” Devroey
Frank “Eagle Wings” Vleugels
Eddy “Crap Shooter” Sterckx
First scenario : Last Gringo Standing – a straight shoot-out, everyone starting in a corner
Koen and Frank immediately started shooting at each other while Phil used his usual subtle tactic of charging straight ahead at full speed to join the fight while Eddy was using the cover provided by the town houses for a sideways approach.
As soon as Phil was in range, Frank suddenly noticed he left his spare pants or bullets or whatever behind a tree somewhere and “advanced to the rear”, while Koen circled the stable, not trusting the moves Eddy was making. But the one who should have been more careful was Phil : while making sure he remained in cover for both Frank and Koen he didn’t watch his back too carefully and Eddy got the first kill of the night : a headshot. It wasn’t going to be the last : of the 7 player killed in the course of the evening, 5 were headshots. Our tactics may be lousy, but our aim is straight.
Of course this move to kill Phil had left Eddy totally exposed so Koen who had circled the stable managed to first immobilize him by putting bullets in both his legs and then finish him of with a headshot. Meanwhile Frank had found his courage and some spare bullets and the final showdown between Koen and Frank was decided in the latter’s advantage.
Second scenario : 2 versus 2 - Eddy and Koen defending the town, Frank and Phil trying to take it over
As Koen was starting at the other end of town, Frank and Phil’s tactic was to both concentrate their movement & fire on Eddy. Frank got in range first, but Eddy kept dodging every incoming bullet and in return kept hitting Frank in non-vital parts. What exactly constitutes non-vital parts with Frank is still open for debate. When Phil got into range their firepower was even doubled, but still no hits on Eddy. Finally the cavalry arrived in the form of Koen who got into Phil’s rear. Suddenly things happened very quickly : Phil shot at Koen : straight headshot, Phil shot at Eddy : straight headshot – game over in the blink of an eye. Against the odds and all that – “it’s a dice game”
Third scenario – Sheriff versus 3 lousy bandidos trying to blow-up the prison – aka : Let’s kill Koen
Eddy’s legendary lousy playing style dictated the tactics of the 3 bandidos : he would go straight through the middle attracting Koen’s fire while Frank would move to the right and Phil to the left. Sure enough the plan worked : Koen got pretty preoccupied with shooting long range at Eddy, scoring a leg hit, but nothing more. Meanwhile Frank and Phil had closed in fast and trapped the hapless Sheriff in the alley behind the prison. With no way out the Sheriff took 3 bullets in the chest before finally succumbing to the endless barrage of brawls and shots.
Fourth scenario – Stagecoach – Frank commanding 3 bands of outlaws versus 2 wagons full of gold that had to move across the table and exit at the other end.
As one band of outlaws started in the town on our right and another across the river on our left, the only viable tactic was : get out from between them as fast as possible, keep hugging the river so the town gang may not get there in time to stop us. Eddy with the Winchester and Phil with the shotgun on the first wagon, Koen with his Colt on the second. Firepower up front to confront the bands – it looked good in theory.
The tactic brought the wagons close to the band across the river but there was nothing we could do about that. Sure enough it worked : the town band got in a couple of long range shots but proved ineffectual at stopping the wagon train but the outlaws across the river were another thing as they refused to stay on their side of the river. Phil and Eddy both took out a couple of bandidos but by sheer numerical superiority (and keen positioning) they managed to drag Koen from the second wagon and into a brawl. It looked bad for a while but good dice allowed Koen to get back on the wagon and continue the epic journey. But the river outlaws weren’t about to give up as they knew our wagons would slow down while crossing the river and sure enough they managed to drag Koen a second time from his wagon, this time fatally wounding him with Phil helpless because he needed to reload and Eddy’s Winchester not effective at such a close range.
With Koen dead and the second wagon needing a driver there was just one available option for us : Eddy would have to kill the remaining outlaw while Phil would jump from the first to the second wagon. Amazingly the plan worked and we got across the river into safety. Well, relative safety because a third band confronted us : Indians who had all won the Lottery and bought themselves Winchester rifles. Our plan remained : full speed ahead and get through them as fast as possible. Not knowing where we would hit their line the Indians had spread-out a little so we didn’t have to confront all 5 of them at close range and in hand-to-hand combat which together with the protection of the wagons (read : good dice rolling) proved enough to get us through. We had tragically lost Koen on the way, but the gold got through and we would receive a nice bonus.
Four games in under 3 hours – a fast and fun evening
Monday, 25 September 2006
Now that's a wargame terrain!
This Sunday, we took the kids to the Efteling. The visit itself was very nice but off topic for this blog, except that in one building we only ended up in because we were looking for a toilet, they had a giant diorama of a big mountain valley with trains, cars, boats, and what not - the ultimate wargames terrain:
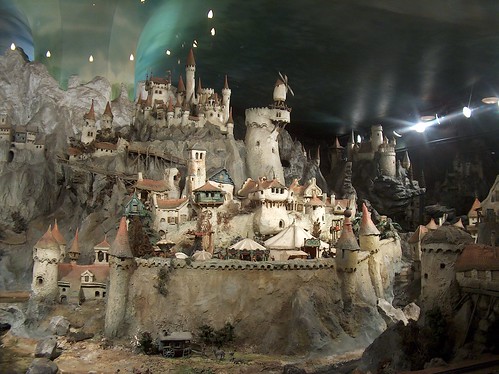
The picture shows only a small part of the entire setup - it wraps around in the distance on both sides. My wargamer's brain went in over drive with the possibilities of gaming on it :)
The picture shows only a small part of the entire setup - it wraps around in the distance on both sides. My wargamer's brain went in over drive with the possibilities of gaming on it :)
Thursday, 14 September 2006
Full Thrust
For our monthly "Schild & Vriend Revival Game Series", we had a very nice Full Thrust game this week, at Frank's completely new wargaming facilities. We used to play FT quite a lot over the years, and it was nice to play a system again after so many years. It still felt very familiar.
Now, some people say FT does not have a lot of tactical depth. I do agree in some sense, since once you have mastered the movement rules, it all comes down to selecting what weapon type to fire first. However, when space is littered with planets and asteroids, things become interesting.
The first scenario we tried was a classic Space Academy asteroid belt run: steer your ship as fast as possible around the table without crashing into any big space object. Phil won this Space Race without too much trouble and was promoted to Space Cadet of the Year.
Now that everyone had the movement rules mastered, it was time for a more interesting scenario. Frank, Koen and Phil had a cruiser each, and their mission was to intercept an enemy fleet of 4 ships (Bart and Eddy), before these were able to check a suspicious radar blip on their screens. The tactical plan of Frank, Koen and phil worked brilliantly: send a cruiser on each flank, turn around the asteroid belt, and end up smack in the aft-arc of the main ship of the enemy. This all worked very well, so well even that Eddy's two ships were just obliterated in the process. Not to worry, Bart gave one of his commands to Eddy, so the game could continue.
With all ships converging on the same location, and the big one effectively standing still, the game to a small shootout. Eddy lost another ship, and after some shooting, the last big ship of the BartEddy alliance exploded in space.
So, the overall effect was that Frank, Koen and Phil had won the game (although we admit we had some lucky dice rolls on crucial shots), and that the intruders lost 4 ships, 3 of which that were under Eddy's control. After the court-martial it was decided he had to spend at least 5 years frozen in the Jive Cubes on Sigma Alpha X . Bart was sentenced to one week of forced labour in the Cobalt Mines on Pegasus III. Frank, Koen and Phil all won a free cruise to the Pleasure Palace of the Batuvian Demon Whores on Andromeda IV.
So far the Full Thrust game! On to the next dice-rolling fest!
_Update_: (robartes) [Some pictures](http://www.flickr.com/photos/robartes/sets/72157594284291860/) of this game are now up on Flickr.
BattleLore
I've been a big fan of the Battlecry gaming engine ever since it was published. Likewise, I also like Memoir44 and C&C Ancients, exactly because they use the same engine. This gaming systems were developed by Richard Borg, and they have drawn quite some attention over the years.
Even my own Te Wapen fantasy rules are based on the ideas found in these games.
I was therefore pleasantly surprised that Days of Wonder will publish a fantasy version, called Battlelore. More info on:
http://blog.battlelore.com/en/
http://www.battleloremaster.com/
Even my own Te Wapen fantasy rules are based on the ideas found in these games.
I was therefore pleasantly surprised that Days of Wonder will publish a fantasy version, called Battlelore. More info on:
http://blog.battlelore.com/en/
http://www.battleloremaster.com/
Sunday, 10 September 2006
We've moved
Right, nirya.be is now live (at least the HTTP part of it) at Dreamhost. It will take a while for DNS changes to propagate, so this post has been put up at both old and new versions. Comments have been disabled while DNS has not fully propagated, BTW.
This should take a few days maximum. You can check for yourself by doing a nslookup for www.nirya.be, which should return 208.97.191.54 (the shiny new host), not 193.109.185.2 (the old host).
This should take a few days maximum. You can check for yourself by doing a nslookup for www.nirya.be, which should return 208.97.191.54 (the shiny new host), not 193.109.185.2 (the old host).
Thursday, 7 September 2006
Right, this might hurt a bit
After many years of good service from [Dommel](http://www.dommel.be), I have decided to move nirya.be to a different hosting provider because Dommel no longer has, by any stretch of imagination, a good price/quality ratio (good quality, but too expensive for what you get).
As of now, nirya.be is in the process of moving to [Dreamhost](http://www.dreamhost.com), which might or might not result in lots of funny effects on this site, including but not limited to intermittent or continuous unavailability of the site, all of the posts and comments of this blog disappearing and other various funky shenanigans. You have been warned.
As of now, nirya.be is in the process of moving to [Dreamhost](http://www.dreamhost.com), which might or might not result in lots of funny effects on this site, including but not limited to intermittent or continuous unavailability of the site, all of the posts and comments of this blog disappearing and other various funky shenanigans. You have been warned.
Tuesday, 5 September 2006
Crusade 2006
Saturday, September 2, Bart, Alan and myself attended Crusade in Leopoldsburg. As the Schild en Vriend demo team, we ran a fairly simple game: WW1 dogfights, based on the Wings of War rules, and hexified (see also a previous game report on this blog on this topic).
The game proved to be succesful. We managed to run a few scenarios, and even had some bystanders join in. This game was supposed to be a dry-run for the Crisis game, and I think the test proved to be ok.
As for the convention itself, there were the usual suspects: all the various Belgian/Dutch gaming clubs, and some shops, selling a limited selection of their goods (at very high prices, sadly enough ...). Nevertheless, being the obsessive/compulsive buyer I am, I bought a few things: 2 boardgames, some Pirates boosters, and a figure in the B&B.
The demo games were of a good level. Best game was probably the 80 years war battle by De Alde Garde. There were the usual GW games, but also Flames of War by Murphy's Heroes, and some alternative fantasy game (Confrontation a.o.).
All in all, a nice and small convention, ideal to catch up with people, but not the major shopping fest that Crisis is.
Tuesday, 29 August 2006
Operation Market Garden game done the right way

Operation Market Garden has always captured the imagination of many wargamers and historians as a tragic 'could have been' battle. It only stands to reason that many wargamers, ourselves included, have replayed this battle in some form or other on our wargames tables.
The [Elhiem gang](http://www.elhiem.pwp.blueyonder.co.uk/), a bunch of dedicated 20mm gamers, have done it in style, however. They set up a 20mm megagame of the entire Operation Market Garden -- see the [game report here](http://www.elhiem.pwp.blueyonder.co.uk/game.html).
This is truly mouth watering stuff, the stuff wargamer's dreams are made of. Well done, guys!
Saturday, 26 August 2006
Wings of War hex modifications
These are the basic modifications we used for our hex based version of Wings of War. Obviously, they lack the principal item -- the hex based cards themselves. This is for two reasons:
Planes are always oriented towards hex sides, not vertices.
The firing arc for rear gunners is the same from the rear of the hex, but excluding the hexes directly behind the plane.
__Update__: the up to date version of these rules now live on the main site [here](http://www.nirya.be/snv/rules/wings_of_war_hexified_1.html)
- The cards for the small tables are not done yet
- I'm not sure whether I can publish these cards, copyright wise -- but I'll check.
Movement
Movement is done using the new hex based maneuver cards. There are two sets of cards:- A version for small tables (or tables with large hexes)
- A version for bigger tables
Planes are always oriented towards hex sides, not vertices.
Firing range
Short range is 3 hexes, long range is 6 hexes.Firing arc
The firing arc is found by drawing two lines from the center of the hex out through the vertices left and right of the hex side towards which the plane is facing. Hexes bisected by this line count as part of the firing arc.The firing arc for rear gunners is the same from the rear of the hex, but excluding the hexes directly behind the plane.
__Update__: the up to date version of these rules now live on the main site [here](http://www.nirya.be/snv/rules/wings_of_war_hexified_1.html)
Friday, 25 August 2006
Phil's History, Part 5
Part 5 of my personal quest for the ultimate gaming experience! (part 1, part 2, part 3, part 4).
After spending quite some years dealing with fantasay roleplaying, fantasy miniature wargaming and card games, I think it was in the fall of 1996 that I was looking for something new. I had finished my Ph.D. earlier that september, and so I had again a lot of time on my hands (writing a Ph.D. is hard work!).
I had always been fascinated by toy soldiers and historical miniature wargaming, but it was rather difficult to get good material for it. Most of the hobby shops sold lots of fantasy-related gaming materials, but historicals were much more difficult to find. The mid-nineties changed that, of course, due to the availablity of the internet for everyone. Although I had been on the net since 1988 or so, it was only around 1996 that people not connected to universities gained mass access. Hence, a lot of sites were created on which historical miniature wargaming was featured.
One of the rules I had bought at that time a very simple Napoleonic ruleset by Barry Edwards. It focused mainly on the Peninsular War, but everything was good at this point. Dusting off some old Airfix figures, I fielded my very first historical miniature game (all I had done before that was fantasy and SF) in the gaming room of the Lonely Mountain shop in Leuven. This proved to be a complete new experience. We were playing with rules in which you only had 3 types of troops, as opposed to the zillions of different types in fantasy games, combat resolution didn't involve buckets of dice, and we felt we actually were doing something historical ;-)
So, for the next 2 years we repeated the experience and experimented with many different rulesets: Shootist for Wild West skirmish games, Rapid Fire, Crossfire, Spearhead, Brother vs Brother, Paragon Aerial combats, Probsub (aka 'They shot the whale'), Fire and Steel, Tactica, DBA, Principles of War a.o. We also still played many F/SF games, but the GW days were gone for good: Fantasy Rules, Dirtside, Full Thrust, Star Wars, etc. We even managed to invent games ourselves. The now legendary Aquazone is still fondly remembered! Games were played almost every Tuesday in the Lonely Mountain in Leuven, and ended well past 1am, after which the hard-core gang often went to the kebab-place a few houses down the street to hold a serious debriefing. Rarely did I show up in the lab before noon the following day :-)
For me, this period ended in the summer of 98, when I moved to the USA. These days, we call those crazy 2 years 'The Golden age of Schild en Vriend', because many of us had plenty of time on our hands (pursuing a Ph.D. allows you a lot of free time of you don't have to write :-)), and most of us were still single. This ideal mix proved to be very fruitful, and many of our current game sessions and game ideas somehow can trace a lineage back to that period.
Thursday, 24 August 2006
Dogfight over Flanders
We had another "Schild & Vriend Revivial Game" this month, this time organized by Bart Vetters, and hosted as usual at Phil's Gaming Attic. Again, Eddy Sterckx was so kind to provide us with a gaming report:
Wings of War at Phil's place
Last night, at what is already becoming a fine tradition, we had another game in Phil's attic.
Bart had adapted the Wings of War (WWI dogfighting) system to work on hexes and we were ready to try it out in a series of dogfights : Tommies versus Jerries. As the dogfights throughout the night unfolded it would mostly come down to 1-1 fights between a slow moving, highly maneuverable versus a fast moving, slow turning plane.
The system basically is about guessing where your opponent will be next turn, picking the right three maneuver cards and hope you can get a shot in. Damage done can go all the way from a tiny hole in the wing canvas (0 points damage) to a bullet through the pilot's head (game over)
The first round immediately taught us the important lesson that given the size-constraints of the terrain you better plan ahead ... carefully ... very carefully. Over the evening more planes were lost due to flying “out of bounds” then to enemy fire. This especially proved to be a disadvantage for the faster planes who were often reduced to: fly straight ahead - Immelmann - fly straight ahead in the other direction kind of tactics. A brilliant suggestion to reduce the distance flown by one hex managed to remedy this in one stroke: the third round felt correct with real dogfights going on across the boards. I think that everyone agreed that this single correction made the system 99% playable as is, no further tinkering required, though a bigger board and missions (photographing / bombing / strafing) would add to the variety.
Now as to the question of which plane is better : the slow movers / hard turners or the fast movers / slow turners opinion is still divided, we'll probably need another game-night like this to really get to grips with the system. So as Frank would say : Ze Red Baron vill fly again !
Sunday, 30 July 2006
... and let it out again
We seem to have survived the upgrade. First change so far is that now all comments are moderated, meaning I have to approve them. I'll look into better spam filters later on.
Take a deep breath...
... because I'm about to upgrade to the new version of MT.
Hope to see you on the other side
Hope to see you on the other side
Wednesday, 26 July 2006
Please wear hard hat and ear protectors at all times
Over the next few days, I'll be upgrading TTM to a new version of the blog software (Movable Type). This might mean some inconveniences as well as periods of downtime in the near future.
The reasons for this are many:
* There is apparently a new generation of comment spam software out there, that scans the blog and looks for the comment URL, so my earlier ploy of changing the name of the comment script is no longer effective. MT3+ has a number of other spam prevention features.
* MT3+ is now free for personal use
* MT3+ has a number of Technorati Tags plugins that I intend to make use of
So, if something weird happens here in the near future (well, weirder than usual), you'll know what to blame.
Wednesday, 19 July 2006
Vietnam Game
I almost forgot to mention we had a quite enjoyable Vietnam game last week. Rules were hex-based, as is usual these days when I'm hosting games. Instead of writing a lengthy battlereport, here are the pictures, thanks to Bart and Eddy:
[http://albums.photo.epson.com/j/AlbumIndex?u=4124492&a=32239015&f=](http://albums.photo.epson.com/j/AlbumIndex?u=4124492&a=32239015&f=)
[http://www.flickr.com/photos/robartes/sets/72157594203571487/](http://www.flickr.com/photos/robartes/sets/72157594203571487/)
[http://albums.photo.epson.com/j/AlbumIndex?u=4124492&a=32239015&f=](http://albums.photo.epson.com/j/AlbumIndex?u=4124492&a=32239015&f=)
[http://www.flickr.com/photos/robartes/sets/72157594203571487/](http://www.flickr.com/photos/robartes/sets/72157594203571487/)
Tuesday, 18 July 2006
Wargaming video
For those who haven't seen it yet:
http://www.hmgs.org/wargamevideo.htm
A very well made video promoting the hobby of wargaming.
http://www.hmgs.org/wargamevideo.htm
A very well made video promoting the hobby of wargaming.
Sunday, 25 June 2006
Hyperborea turn 2
What? Another new post? Another miracle, I suppose ;)
Anyway, for those of you who are interested, we had a quiet turn in Hyperborea. Just assassination and barbarian raiding to report. Have a look at the latest edition of the Hyperborean Times for details.
Download file
Alan
Anyway, for those of you who are interested, we had a quiet turn in Hyperborea. Just assassination and barbarian raiding to report. Have a look at the latest edition of the Hyperborean Times for details.
Download file
Alan
Wednesday, 21 June 2006
Building a Carolingian army
What, a new post?
As I've stated before, posts around here would be thin on the ground for a while, as we dealt with the effects of having a colicky baby around. I wasn't kidding :).
The last couple of days, I've been getting back into things as Ruben seems to be getting a bit better (though that could change in a heartbeat), having had time to paint again in the evenings (working on Carolingians and Celts), and having some time to think over future plans.
On of those plans was to do a Viking vs Carolingian game at Crisis this
year - a (sort of) recreation of the Battle of Leuven in 891 where Arnulf of
Carinthia, King of East Francia and later Emperor, came over to our parts to
beat up on a part of the Viking host that had earlier besieged Paris and was
now wintering in Leuven. Events have transpired against this game being
finished before Crisis (backup plans are in motion), but I am continuing to
work on it. The first part is building a Carolingian army, and that is what
the rest of this post is about.
The idea for the Crisis game is to do a skirmish level game, but I am
building the Carolingian army as a 'normal' WAB army to use in WAB games.
As long as I base the Carolingians individually, that will not be too much
of a problem. So, what should the army look like? Let's say I'll aim for
around 1000 points initially, just to have a goal to paint to.
First off is army list. The most suitable list would be the 'Late
Carolingian or Capetian' list in the Shieldwall book, though you could
probably build something from the 'Germanic barbarian' list in the Beyond
the Golden Gate book, or just assemble your own from various other profiles.
For simplicity's sake, I'm going to use the Shieldwall list, but I'm not
really going to bother too much with the percentage limits, especially not
at 1000 points. For this, I'm following Phil's lead, who thinks of army
lists as an inspiration only, if even that :)
Anyway, on to the army. Arnulf of Carinthia was King of East Francia
(Germany) at the time of the battle, with his heartlands to the extreme
southeastern side of it, in current day Carinthia. I assume that he mustered
part of his army there, or at least in southern Germany, and moved with it
to Leuven from there. That would probably mean that most of that part of his
army would consist of _miles_, the 'professional' warriors of the age. A
more general levy would probably not have accompanied him on such a long
trip. So the core of the army should consist of a (relatively) small number
of professional warrior types. The _miles_ profile, mounted or dismounted,
from the list should match this perfectly. For the general list, I'll take
these as mounted (can't have a Carolingian army without cavalry :) ), but
for the actual Leuven battle, where the main push was through a swampy area,
they would probably have dismounted. So that's one part of the army: a
number of mounted milites. The figures for them will be from [Artizan Designs](http://www.artizandesigns.com)
[Carolingian range](http://www.artizandesigns.com/catalogue.asp?sub_range=19).
Next is Arnulf himself. He would obviously have to be the 'Rex' character,
but as this is only a 1000 points army, I'm taking him as Comes and assuming
that one is the Army General. He is of course mounted. As to figure to
represent him, I'll be waiting for Artizan to release their mounted
Charlemagne. No harm in going for royalty :) I'll also be including an army
standard, bearing a huge banner depicting some saint - Arnulf was at this
point aspiring to become Emperor, so anything that would have put him on the
Pope's good side would have helped. The banner will be of the 'impossibly
huge' variety that looks tremendous on the tabletop, but would be
exceedingly impractical in reality, bowling the standard bearer over at the
slightest gust of wind.
The second part of the army will be infantry, and would represent the troops
raised locally. Arnulf might have sent _missi_ (military messengers) over to
the noblemen of the Leuven / Flanders region telling them to raise an army.
These will form the infantry component of the army. They will consist of a
number of spearmen units and some archers. Although the army list does not allow _liberi_ (freemen) for the Late Carolingian army, I'm going to blithely go ahead and take them as such anyway - these would be the freemen of the Flanders region rallying to defend their country from the Vikings. The figures used will be a mix of
Artizan figures and [Chiltern Ancients](http://www.chilternminiatures.co.uk/).
As to painting them, I'm going to try an assembly line method again, even
though I've had bad experiences with them in the past. I'm going to follow
up on one of Phil's suggestions of doing 'matrix painting'. I've constructed
a little box holding figures on their paintin corks in a 4x4 pattern, and
will use that as a 'matrix' to distribute colors across. If, for example, I
am painting a green color, the green will go across the matrix, with one
figure having its cloak painted green, the next his trousers, and so on, and
that for every color. I'll see what happens.
Anyway, putting it all together, this is the army list I've come up with so
far:
1000.0 Pt - (SW) Western Franks - Carolingian French Army list - Arnulf's Carolingians

1 Comes @ 116.0 Pt
Hand Weapon; Light Armor; Shield; Throwing Spear; Warhorse
1 Warhorse @ [0.0] Pt

6 Mounted Milities @ 183.0 Pt
Hand Weapon; Leader; Light Armor; Musician; Shield; Standard; Throwing Spear; Warhorse
1 Warhorse @ [0.0] Pt

6 Mounted Milities @ 183.0 Pt
Hand Weapon; Leader; Light Armor; Musician; Shield; Standard; Throwing Spear; Warhorse
1 Warhorse @ [0.0] Pt

24 Liberi @ 159.0 Pt
Hand Weapon; Leader; Musician; Shield; Standard; Thrusting Spear

24 Liberi @ 159.0 Pt
Hand Weapon; Leader; Musician; Shield; Standard; Thrusting Spear

17 Liberi @ 117.0 Pt
Hand Weapon; Leader; Musician; Shield; Standard; Thrusting Spear

8 Coloni @ 40.0 Pt
Composite Bow; Hand Weapon

8 Coloni @ 40.0 Pt
Composite Bow; Hand Weapon
Wednesday, 17 May 2006
Battle for Rohtang Pass
In the sequence of 'Schild en Vriend' revival games, the May game (after WW1 in December, Lowenheim in January, WW1 in March, Memoir44 in April) was a 25mm fantasy battle using the Te Wapen rules (http://games.groups.yahoo.com/group/Te_Wapen/ ).
Four players were present: Maarten, Alan, Eddy and myself. Eddy was so kind to provide us with an after action report:
Just a small AAR on last night�s game The Punitive Expedition into the Orc
homelands after the successful raising of the siege of L�heim. As fate
would have it Alan and me would be playing the brave humans, Maarten and
Phil playing the ugly, cowardly bad guys so it seemed that the God of Dice
was for once going to play fair tonight.
It would be a classical medieval/fantasy battle and Phil re-assured us that
�There would be no suprises�. At that point in time we should have realized
anything Phil says has the believability of a press statement by Mohammed
�There are no Americans in Bagdad� Saeed al-Sahaf but that would become
painfully clear in the game ahead.
So we split-up our army into 3 sections to be able to navigate the 3
mountain passes leading up to the Orc plain � and presto, suddenly archers
appeared out of nowhere to pepper our trapped troops with deadly arrows from
the safety of the mountains. �Well, you can�t call that a surprise, can you
- you�re moving through mountain passes, what did you expect ?� was the
only comment from Phil so we knew that there would be other trouble ahead.
Those archers had cost us two units, both of them ranged units (blunderbuss
and archers) and managed to delay our approach considerably so while the Orc
army was happily setting up a battleline only our cavalry had managed to
extricate themselves from the mountain passes and form-up in a line. There
they would wait a couple of turns for the infantry to catch-up and cover
their flank.
As our cavalry was on the left, and the Orc cavalry / wargs was on the right
a gigantic cavalry clash was clearly going to happen so it would be
important to get the first charge in. Through some cunning play (read :
luck) it were the humans who got to launch their charge first. And what a
charge it was � virtually annihilating the Orc cavalry but then it dawned on
us that it had all been a gigantic trap as the deadly card of �Judgement
Day� was used on our troops � twice - This had the effect of removing just
as much figures from our units as we had killed in that charge. 2 heavy
cavalry units got wiped-out, with a third just hanging on and our most
powerfull unit � the Red Dragon � frozen in place. It was a disaster from
which the left flank would never recover. Gone was the tactical plan to
occupy the enemy burial mound.
So with our left flank gone, our right flank still hopelessly stuck in the
mountains and out of the game, our only hope lay in the centre where we had
a local superiority as the Orc army had concentrated too many of their units
on their right flank to counter our cavalry. But the God of Dice hadn�t
abandoned us : Maarten and Phil were getting low dice while even our
long-shot totally-against-the-odds attacks managed to kill some enemy units
so the unit kill tally was slowly turning into our favour. With one unit
killed equaling 1 VP we were even ahead by 1 point throughout the middle of
the game though we didn�t control any of the victory locations worth 2 VP�s.
It was getting late so at that point Phil declared that since neither army
was likely to fulfill their victory conditions a �moral victory� would be
given to the first army to reach 10 VP�s. It was 7-6 in our favour at that
moment so a desperate struggle in the center ensued with both sides going
for kills regardless of the consequences. The Orcs were up first killing 3
of our units so it was 7-9 and they were only 1 VP removed from victory, but
in our next turn the last cavalry unit coupled with a wizard�s fireball
attack and even a regular infantry attack (the only one in the game IIRC,
all the rest being ranged, cavalry or magical) managed to kill an orc unit
and in a stroke of genius Alan also managed to occupy the central victory
location stone which netted us an additional 2 VP�s : 10-9 � we had �won�,
but given the carnage all around us, we would have settled for a draw
anytime.
Aftermath :
As this was a card-driven game with activation, attack bonus and opponent
counter-cards we had to use-up all our cards to get out of those bloody (in
both senses of the word) mountains and out into the plain while the Orc army
had had a chance to accumulate some deadly counter-cards which they used to
good effect. I don�t think we ever used either a bonus card or a
counter-card throughout the game which is fine as it means the system is
flexible enough to cope with different situations and strategies.
I should have brought along my digital camera (and I will next time) as the
table looked spectacular. For those who were there here�s what I would have
taken pictures off : the Orc army lining up beautifully in the center of the
table, the total confusion in the mountain passes following the ambush, the
human heavy cavalry drawn up for battle on the hill and the charge downhill
and the scenes of Armageddon in the centre as both armies just battered each
other to pulp.
Sunday, 7 May 2006
Hyperborea - latest
We've just completed the first full turn of my new Ancients campaign. We had an interesting if cautious first round, with some players sending in five pages of orders and others being rather minimalist - neither is a criticism, but it was interesting to see the different approaches.
The latest events are summarised in the second edition of the game newspaper.
Processing the orders was fun, basically I look at the game situation, the explanation of the player, the likelihood that it will succeed anfd then I roll a % dice. The higher it is the better it will succeed. Suffice to say I had the usual range of massive successes and pathetic failures but the result is a story that develops.
For those who want the background, you can see this in previous posts on this blog.
For the next turn, we have a Peace Council, which is Phil's idea and something unusual (unique?) for a wargames campaign. It promises to be interesting, so watch out for a full report here.
In the meantime, here is an annotated map showing what is going on.
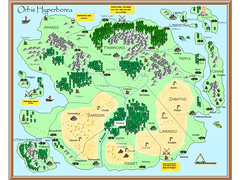
hyperborea - turn 1
Originally uploaded by ahuyton.
Alan
The latest events are summarised in the second edition of the game newspaper.
Processing the orders was fun, basically I look at the game situation, the explanation of the player, the likelihood that it will succeed anfd then I roll a % dice. The higher it is the better it will succeed. Suffice to say I had the usual range of massive successes and pathetic failures but the result is a story that develops.
For those who want the background, you can see this in previous posts on this blog.
For the next turn, we have a Peace Council, which is Phil's idea and something unusual (unique?) for a wargames campaign. It promises to be interesting, so watch out for a full report here.
In the meantime, here is an annotated map showing what is going on.
hyperborea - turn 1
Originally uploaded by ahuyton.
Alan
Saturday, 6 May 2006
Foundry Dallimore painting book
Having been painting for years in what is now generally accepted to be the _Foundry style_, as 'invented' and pioneered by the illustrious Kevin Dallimore, I was very interested to see that Foundry had a book planned written by Dallimore about his, or the Foundry's, painting style. Of course, there's a gap the size of a healthy [narwhal](http://en.wikipedia.org/wiki/Narwahl) between Foundry _planning_ to release a book, and actually releasing it (just look at what they did / are doing to the late Terry Gore _Ancient Warfare_ and _Medieval Warfare_ rules), so it took quite a while for the book to actually appear. However, I ordered a copy once it became available on the [Foundry site](http://www.wargamesfoundry.com).
I had high hopes for this book, but I came away with mixed feelings. On the one hand, it is of course the ultimate in what is often referred to as 'wargames porn', i.e. lots of pictures of truly amazingly painted figures, the likes of which are hardly ever seen in real life (another parallel there). If you want to ogle at hundreds of exquisitely painted figures and vehicles, this book is your ticket to nirvana.
On the other hand, I had hoped that Mr. Dallimore would have explained his technique a bit more. Now, there are of course lots of step by step photographs of miniatures being painted in his style, which illustrate the basic 'three layer' concept quite clearly, but face it - the basic three layer concept is exceedingly easy to grasp: you put three layers of paint on and you're done. You do not need seventeen step by step photo series to get that.
What I would have liked to see, and did not find in the book, is the two things that make or break a three layer paint job: colour choice and topography of the paint job. Or in plain English: what colours to use (in terms of value and chroma difference between the three colour layers) and where to put them. That is never explained, possibly because it is very difficult to explain.
The colour choice (not the colour balance of the entire figure, but the amount of difference between the three layers) is more or less implied by the book's use of the Foundry Paint System colours. The assumption is that as Dallimore has designed the colours himself, they represent the 'correct' colours to use. For example, as I have [remarked earlier](http://www.nirya.be/snv/ttm/archives/000044.html), the shade colour is already quite light, a fact that I had not appreciated before. In effect, my 'three' layer paint jobs are mostly two layer paint jobs, as my shade is usually so dark as to be indistinguishable from the black base coat once the highlights are applied. This is probably the reason why the shade colour in the Foundry Paint System is so light, and presumably why Mr. Dallimore formulated it that way. However, none of this is mentioned explicitely in the book, which is something I had expected.
The second point, where to put highlights and how much of the underlying layer to cover, is also not explicited anywhere. You can infer some of this from the step by step pictures, but again it is never stated (beyond the occasional tantalizingly short remark).
Now, perhaps I expected too much from this, and indeed the two areas that left me wanting are very difficult to explain, but I had expected a bit more. Too bad.
What I did pick up from the book is what colours to use in an intentional two layer paint job. I have been using two layer paint jobs increasingly on figures (see, for example the latest bunch of [Celts](http://www.flickr.com/photos/robartes/sets/22845/) whose skins are simple two layer jobs) but have been struggling with getting them to 'pop' as much as a three layer job, mostly by not knowing which colours to use as the two colours in question. The book's section on two layer paint jobs, in concord with some areas in the rest of the book have helped me in deciding this - skip the highlight colour and treat the shade as 'mid' colour, i.e. leave fairly noticeable areas of black.
That's it for me - mixed feelings for the book. I've lent the book to Alan, so I'm curious as to what he thinks of it (Alan, that's your cue :) )
Tuesday, 2 May 2006
Lighting redux
In my [first article](http://www.nirya.be/snv/ttm/archives/000035.html) in the miniature photography series, I talked about lighting. The gist of the article is that lighting is very important and that you cannot get enough of it.
I have been struggling to get enough light on my miniatures with the desk lamps I'm currently using to paint by, but never quite succeeded in doing so. The photographs turn out OK, but you can still see evidence of uneven lighting on most photos, as well as some blatantly underlit photographs, as in this Viking:
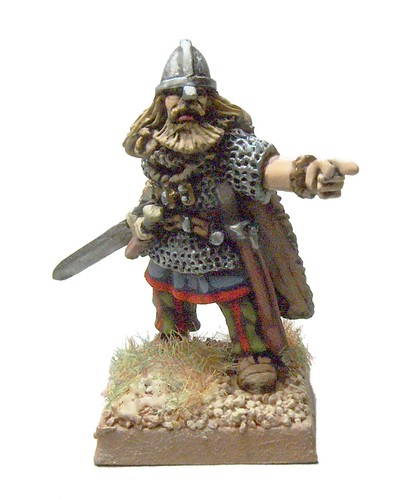
(if you don't see what I mean, click on the photo and select the largest picture on the 'All sizes' page).
This weekend, however, I found the perfect recipe - no more underlit or unevenly lit figures - just use sunlight! The last four pictures of miniatures I took are done in simple daylight, with no extra lighting added (though, admittedly, with long exposure times), and they are just perfect (lighting wise, that is). Check out this dwarf (who, incidentally, will go up on Ebay soon):
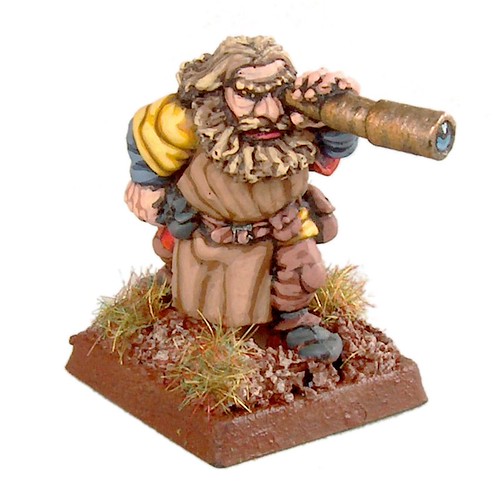
This pic was taken with the dwarf sitting on my living room table in normal, indirect, sunlight (not direct sunlight to avoid hard shadows). Nothing more was done with the picture except to snip away the background and replace it with a white page.
Of course, as I take most of my pictures at night after having just painted them, I might have to rethink my photo taking strategy :)
I have been struggling to get enough light on my miniatures with the desk lamps I'm currently using to paint by, but never quite succeeded in doing so. The photographs turn out OK, but you can still see evidence of uneven lighting on most photos, as well as some blatantly underlit photographs, as in this Viking:
(if you don't see what I mean, click on the photo and select the largest picture on the 'All sizes' page).
This weekend, however, I found the perfect recipe - no more underlit or unevenly lit figures - just use sunlight! The last four pictures of miniatures I took are done in simple daylight, with no extra lighting added (though, admittedly, with long exposure times), and they are just perfect (lighting wise, that is). Check out this dwarf (who, incidentally, will go up on Ebay soon):
This pic was taken with the dwarf sitting on my living room table in normal, indirect, sunlight (not direct sunlight to avoid hard shadows). Nothing more was done with the picture except to snip away the background and replace it with a white page.
Of course, as I take most of my pictures at night after having just painted them, I might have to rethink my photo taking strategy :)
Saturday, 29 April 2006
Rambling on
Hi everyone, it has pretty quiet around here since Bart decided to have a second little horror (actually number one is very sweet, and I have not yet met number two, though I can guess that he is small, incoherent and rather boring to all except immediate family - no offence, Bart, it's just one of those facts of life).
So why don't I bore everyone with a brief account of my recent gaming? Great idea, I think, so working backwards, here goes. Today, I visited our local games shop in Brussels L'Antre Jeux which has a pretty good selection of all types of games. I bought a Flames of War source book, planning to build a Soviet force, some quite nice trees for 14 euro, which I will have to base and flock but I think will be quite effective plus 'Commands and Colours Ancients' from GMT. A sort of thinking gamer's Memoir 44, for those who know the series. Quite a good series of games based on the Punic Wars.
In the week, I played DBM (this is a dangerous admission on this site and in my gaming group, who are largely anti-DBM, thinking rightly it is largely for rules lawyers and frustrated chess players). I played with my Normans against Jacques (a local Police Commissioner) who brought out his brand new Nikephorian Byzantines. Alas, I rudely and luckily dispatched them with the cream of Normandy's finest knights. we will try again next week.
I have done some painting as well. Over easter, I took advantage of the cold and grey hangover from winter to paint up some ACW troops and scenery. This was to add to the very nice painted armies that I bought recently from local NATO supremo, JP and Bart D. (the latter bought them from the former and then sold them on again). I now have enough to field two corps per side for Principles of War and have some nice woods and a homestead ready. I also painted up some 15mm Carthaginian types and some 28mm Saxons - both these armies are now very close to completion, at last.
There's not a great deal of action around here, or at least not that I'm aware of, so for the next few weeks it will be a bit more DBM (such a great game), painting and boardgames. 1st may I will try Paths of Glory again, the GMT world War One game. If I don't get too badly hammered, I may even tell you all about it!
Alan
Saturday, 15 April 2006
1:1 scale experiment n� 2

In case you will be wondering what the low post count now and in the near future is about ...
Child number two, our son Ruben, was born Wednesday 12/04/2006. Mother, son, sister Britt and father are all doing fine.
Thursday, 13 April 2006
Hyperborea - first game news
Well, we're away at last. Nearly all the players have submitted their contributions and already it's easy to see that mayhem is the only possible outcome. Statements of belligerence have been issued, battle-lines started to be drawn in the sand. But, it may not be quite so simple.
I have produced the first edition of the game newspaper: Download file. Have a read to see more.
In case you can't be bothered, basically, Pharoah Phil, faced with 7 hostile players, has called a Council for the Summer (turn two). The object? To talk about how to maintain the peace. This will be a fascinating gaming event, as we see up to eight players at a negotiating table talking about peace rather than war. I'm really interested to see if this can work.
Now the players have received the paper and have been invited to start talking to (abusing) each other. In the meantime, I am busy creating spreadsheets to work out opening positions, economies and army strengths. These will go out to the players shortly (I finally worked out a relatively simple formula to automate the army creation) and they will be invited to submit their first orders.
Reminder: see the rules and map at previous entry.
Tuesday, 11 April 2006
Applying Little Big Men transfers
One of the most innovative new wargames products of the last few years are the shield transfers and banners from [Little Big Men Studios](http://www.littlebigmenstudios.co.uk/Shield%20Transfers.htm). Judging by the amount of posts and queries on various miniatures related discussion boards and mailing lists, applying them is a bit counterintuitive at first. Having recently bought a number of transfers and banners for my Carolingian army (currently consisting of a total of one miniature, but growing :) ), I fiddled about with them a bit and came up with this photo guide of applying the little buggers. This example is of a banner, which is applied to white paper, but the same principles apply to shield transfers applied to a white painted shield. The banner in question is one from the Dark Age banners sheet, and will be applied to a Carolingian Frankish figure from [Artizan Designs](http://www.artizandesigns.com).
First off, the transfers are called 'rub off' transfers, whilst they are in fact anything but. When you say 'rub off transfer' to me, I think of the rub off drawings we all used as kids, where you just scribbled all over the reverse side of a piece of special paper to apply the design on the front side to whatever you were holding it against. These transfers are nothing like that. In fact, they are better called 'stick on' transfers, in that they essentially consist of a very thin transparent film with the design printed on one side, and glue on the other side. The idea is that you stick the sticky side down on your paper or shield, leaving the design facing outward.
Now that that has been cleared up, let's take a look at the banner we're trying to use.
On the actual transfer sheet, the design (the transparent film mentioned above) is sandwiched between two layers of plastic. One is a thick, clouded plastic that covers the design side of the banner and acts as a protective sheet. The other is a thin, transparent sheet that covers the glued side and is a bugger to remove. Unfortunately, the first step you need to do, and the one that is causing the most grief to first time LBM users, is to remove this sheet, whic is called the backing sheet in the instructions supplied with each banner or transfer sheet from LBM.
Perversely, though logically enough, the protective plastic layer comes off a lot easier than the backing sheet, but it is that one that does need to come off first. For a banner, it is usually possible, as evidenced on the photo above, to score the plastic outside of the banner itself with a hobby knife and get a grip on the plastic like that. For a shield transfer, which are cut to size before the plastic layer is removed, this is not possible without damaging the design. In that case, patience and a steady hand is called for. Steve from LBM gives the tip of sticking the clear plastic side down on a piece of sticky tape and removing it like that (assuming the bond between the backing sheet and the sticky tape is stronger than the one between the design and the backing sheet, of course). Once the backing sheet is removed, the sticky side of the design is exposed and it can be applied to the paper or shield.
After the banner has been stuck down on the paper (rubbing with the back of a pencil or pen helps here, hence the term 'rub off' transfers, presumably), the clouded plastic protective layer is removed, which is mercifully easy compared to removing the backing sheet. Once this is done, the design of the banner appears in full glory:
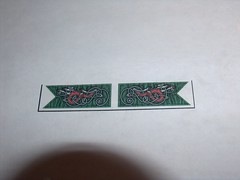
Next it is just a question of cutting out the banner and glueing it to the figure's standard:
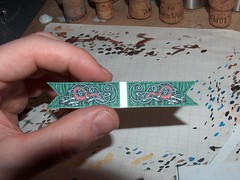
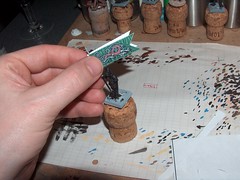

I preform the banner around the standard before glueing, and I use gel super glue on one side of the banner to glue it together. The reason I use gel super glue is because it dries fast, so that any folds I create hold immediately, and because it fills the small gap between the standard and the banner where it wraps around the pole.
The only thing that needs to be done to finish the banner, is to paint the white paper around the flag staff in an appropriate color and to touch up the cut sides of the flag with black, both during the painting of the rest of the figure.
TT tags: miniatures modelling LBM painting
First off, the transfers are called 'rub off' transfers, whilst they are in fact anything but. When you say 'rub off transfer' to me, I think of the rub off drawings we all used as kids, where you just scribbled all over the reverse side of a piece of special paper to apply the design on the front side to whatever you were holding it against. These transfers are nothing like that. In fact, they are better called 'stick on' transfers, in that they essentially consist of a very thin transparent film with the design printed on one side, and glue on the other side. The idea is that you stick the sticky side down on your paper or shield, leaving the design facing outward.
Now that that has been cleared up, let's take a look at the banner we're trying to use.
On the actual transfer sheet, the design (the transparent film mentioned above) is sandwiched between two layers of plastic. One is a thick, clouded plastic that covers the design side of the banner and acts as a protective sheet. The other is a thin, transparent sheet that covers the glued side and is a bugger to remove. Unfortunately, the first step you need to do, and the one that is causing the most grief to first time LBM users, is to remove this sheet, whic is called the backing sheet in the instructions supplied with each banner or transfer sheet from LBM.
Perversely, though logically enough, the protective plastic layer comes off a lot easier than the backing sheet, but it is that one that does need to come off first. For a banner, it is usually possible, as evidenced on the photo above, to score the plastic outside of the banner itself with a hobby knife and get a grip on the plastic like that. For a shield transfer, which are cut to size before the plastic layer is removed, this is not possible without damaging the design. In that case, patience and a steady hand is called for. Steve from LBM gives the tip of sticking the clear plastic side down on a piece of sticky tape and removing it like that (assuming the bond between the backing sheet and the sticky tape is stronger than the one between the design and the backing sheet, of course). Once the backing sheet is removed, the sticky side of the design is exposed and it can be applied to the paper or shield.
After the banner has been stuck down on the paper (rubbing with the back of a pencil or pen helps here, hence the term 'rub off' transfers, presumably), the clouded plastic protective layer is removed, which is mercifully easy compared to removing the backing sheet. Once this is done, the design of the banner appears in full glory:
Next it is just a question of cutting out the banner and glueing it to the figure's standard:
I preform the banner around the standard before glueing, and I use gel super glue on one side of the banner to glue it together. The reason I use gel super glue is because it dries fast, so that any folds I create hold immediately, and because it fills the small gap between the standard and the banner where it wraps around the pole.
The only thing that needs to be done to finish the banner, is to paint the white paper around the flag staff in an appropriate color and to touch up the cut sides of the flag with black, both during the painting of the rest of the figure.
TT tags: miniatures modelling LBM painting
Hyperborea
Hi everyone, I have now had starting positions from 5 players. Three laggards are still to submit their contributions, but I hope to have those for the end of the week. In the meantime, some updates.
New version of the rules. Download file
Updated map: the best way to see the map is to download the free CC2 viewer - see [http://www.profantasy.com/library/dpv.asp](http://www.profantasy.com/library/dpv.asp). Here is the CC2 version of the map: Download file
And here is a JPG version, but it's not totally satisfactory:
View image
__Update__: (Robartes) Linkified CC2 link.
Thursday, 6 April 2006
Workbench
Never being one to miss a trend, let alone a bandwagon to jump on, I thought I'd show a few pictures of my painting desk with work in progress figures. After such luminaries as Alexander over at [Witchhunter](http://www.witchhunter.net) and Belgium's own [Stipsicz Hussars](http://www.stipsicz-hussars.be) on [their blog](http://www.stipsicz-hussars.be/Blog/index.php/post/10), I cannot stay behind. So without further ado, here's a few shots of what's on my painting desk at the moment:
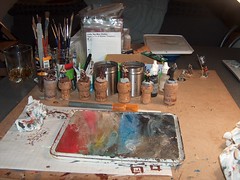
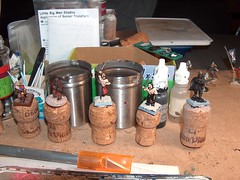
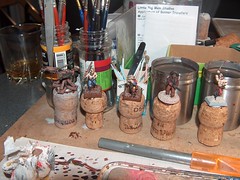
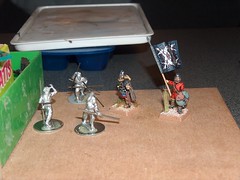
Comments on what you can see on the pictures are on the Flickr photo pages linked to each of the thumbnails above.
You can also see the latest workbench shot in the sidebar.
Comments on what you can see on the pictures are on the Flickr photo pages linked to each of the thumbnails above.
You can also see the latest workbench shot in the sidebar.
Wednesday, 29 March 2006
What's on my painting table - redux
Quite some time ago, I wrote [an entry on what was then on my painting table](http://www.nirya.be/snv/ttm/archives/000051.html). I thought the time was ripe to do so again.
So, currently on my painting table are:
* 28mm Celtic warriors -- yes, more of them, and still for my WAB army. I'm currently wrapping up the 1000 points - 4 more warriors and 10 javelinmen I recently found out are in my army list. Of the warriors, one is already painted, two are three quarters painted, and the fourth is still in primed state. The javelinmen are still in the prepping stage. I'm planning on decking them out with lots of javelins apiece to really go for the porcupine look. I'm using Brico 25mm framing pins for the javelins, so I'm hoping that I get to play JP with the Celts. Years ago he has sold me a Lysimachid army using sharpened steel pins for javelins and pikes, and they draw blood every time I play with them. This can be my revenge :)
As to manufacturers, the warriors are Old Glory (the last ones from a pack of 30 I bought in the now defunct but ever fragrant _Figs_ shop in Brussels, probably as my very first purchase of historical miniatures). The javelinmen are Foundry.
* 28 mm Carolingian Franks -- these are the start of one of the armies that will (hopefully, given the projected time sink in the near future) feature in this year's Crisis game. The figures I'm currently painting are from Artizan Designs newest range and are very nice indeed.
* 28mm Viking -- this one will feature in the Crisis game as well. For the Vikings of that game, I'm planning on only painting a few character figures, with the bulk of the troops made up of suitable Dark Age warriors from Alan's Saxon army and the Vikings from old stalwart David van Dijck. The figures I'm painting now are from one version of Foundry's _Ragnar's raiders_ pack. In another of Foundry's questionable marketing practices, the pack I bought (from the Mons shop at the recent Gent convention) contains a completely different set of miniatures (both in number and kind) as the one currently listed on the Foundry website. Go figure.
* 28mm [Dwarven crossbowteam](http://www.hobbyproducts.com/images/html_en/18018.htm) -- from Hobby Products. These are being painted for sale on eBay (or anyone reading this and is interested - the first of the crewmen can be seen on [this photo](http://www.flickr.com/photos/robartes/105994590/in/set-27460/). They're about three quarters done.
As to plans, I have decided to bring the Celts up to only 1000 points for now, and then concentrate on the Carolingians to at least have a hope of getting enough of them done for the Crisis game. With baby number two arriving any day now, I expect that over the next few months, my painting time will be diminished drastically.
What's on everyone else's painting table?
__TT tags__: miniatureswargaming
Sunday, 26 March 2006
Hyperborea - start up
Some years ago we ran an amusing Ancients campaign, inspired vaguely by the Tony Bath Hyboria model. It lasted 12 months or so before dying a natural death, partly GM fatigue and also because players didn't really have the time to devote to it.
Version two is about to be launched and here are the basic rules and ideas:
Download file
Alan
And here is the map. It was made in Campaing Cartographer.
View image
Version two is about to be launched and here are the basic rules and ideas:
Download file
Alan
And here is the map. It was made in Campaing Cartographer.
View image
Wednesday, 22 March 2006
WEC round 4 - Gauls vs Saxons
Yesterday Alan came over to Zemst for our game in round 4 of the
[WEC](http://www.nirya.be/snv/sections/WEC) - his Saxons fighting for
civilisation versus my Gauls fighting for the barbarians. This was the first
game up in the attic that has been recently promoted to wargames room (due
to the evacuation of the old one that is now fast becoming child number
two's room).
The armies were 1000 points each (well, mine was 959 -- I only noticed
halfway through the game that I had a unit of javelin armed skirmishers on
the army list that I had not painted yet) and we played the 'Breakthrough'
scenario, with the Saxons having to break through the Gauls. The Saxon army
was from the Shieldwall supplement, the Gauls came from the list in the
Hannibal and the Punic Wars book, which is much more realistic and
historical than the vanilla barbarian list in the basic book (not to mention
the heavy throwing spears you could give your Celts with it and FoTW).
The Saxon army consisted of two big warrior blocks of 32 men. The front rank
of each consisted of thegns (armoured WS4 and strength 4 brutes), and both
had a character in them wielding a double handed axe. The rest of the
warrriors were ceorls. All were armed with thrusting spears. A third block
of warriors was slightly smaller, consisting only of 20 men and having no
character leading them. Two units of skirmishers, one with javelins and one
with bows, and the general rounded out the army.
[The Gauls]() have [featured here before]() -- the only change from that army is
that yesterday's list did not include the army standard bearer and should
have included a unit of javelinmen extra. These last are now on my work desk
for painting prep :).
We played on a standard 6'x4' table, which had a river on one flank, some
woods and a steep hill on the smallest side of the table, and some gentle
hills and woods scattered throughout the rest of the table:
The Saxons deployed with, from their left on the river to their right, the
bowmen, the two big warrior blocks, the smaller warrior block and the
javelinmen on the right flank. The general was stationed behind the two big
warbands. I deployed the Gauls, from our right on the river to our left,
with the chariots against the river, the two regular warbands next and the
fanatics on the left. The bowmen were covering the front of the fanatics
and the leftmost warband. Bartolomix was stationed in his customary position
between the Malini and Zemstiani.
<-- insert map here -->
My deployment turned out to be a bit suboptimal. On the one hand, the
skirmishers are actually slower than the warbands and fanatics, so they hold
them up by standing in front of them. On the other hand, my chariots would
probably have been better placed on the far left flank, behind the main
battle line. This was compounded by the fact that the Saxons, being the
party breaking through in the scenario, got to deploy their units after all
of the Gauls were deployed, so could tailor their deployment to ours.
Turn one saw a general advance of both armies, with some desultory bow fire
resulting in very few casualties. The real fun started in turn 2 when my
chariots declared a charge on the Saxon bowmen in front of them, only to
have them fire (killing one chariot) and flee out of reach. This opened up a
charge opportunity (redirected charge) on the Saxon warband block behind
them. This is where I made my first mistake -- I reasoned that the chariots
would be charged the next turn anyway so I declared that they redirected
their charge against the warband (a great idea). What I should have done was
to make it a failed charge, and chosen fire and flee as the reaction to the
inevitable charge of the Saxons next turn. That way, I had a good chance of
getting away from the Saxons and possibly keeping the chariots in the game
if they managed to rally. As it was, the charge of four chariots against 32
Saxons was predictably a massacre: my chariots were summarily dealt with and
the lone survivor chased down and killed in the next turn:
<-- insert map here -->
While the chariots were meeting their bumpy end on the right flank, the game
defining charge and subsequent melee was taking place in the center. The
Malini, one of the regular warband units, and Bartolomix himself charged the
32 man warband unit in front of them. This was very much a make or break
charge. With the fanatics out on the left flank trying to maneuver on the
flank of the third Saxon warband, I needed some other hammerblow to knock
out a Saxon unit -- hence the charge of warband and general. If I would be
able to win the combat, the Gauls would autobreak the Saxons and things
would start looking very good indeed. To make things more interesting,
Bartolomix challenged the opposing 2 handed axe wielding character.
Well, it turned out to be a frustating round of combat. To begin with,
Bartolomix, although outclassing the Saxon wild man on stats, managed to
only score one wound (which was saved) and had to endure the ignominy of
receiving a wound in return (that did not save). The rest of the warband (7
attacks with rerolls of misses - HatPW mixed weapons rule) only managed to
score one extra wound. So 2 wounds to the Celts. Not very good. Luckily, the
Saxons only scored 2 wounds as well (appaling dice rolling on both sides),
and with equal numbers of ranks (4) and standard bearers (1) on both sides,
it came down to a musician roll-off: a battle of the horns (carnyx vs
hollowed out piece of cow). Tension mounted as the dice tumbled ... drat ...
a Gallic one to the Saxon five. A lost combat and the chance of breaking the
Saxon warband was gone for good.
<-- insert map here -->
The Saxon reply in their round of combat saw a massive difference in wounds
inflicted - my 2 versus the Saxon 9 or so, resulting in both the Gallic
warband and Bartolomix breaking from the combat. To add injury to insult,
Bartolomix tripped over his cloak while running and was caught by the
pursuing Saxons. Cue one dead general and a general panic test for the
Gallic army. Luckily, my two intact units (the other warband and the
fanatics) held their morale, although the rest of the army was now fleeing
back to the roundhouse.
Thursday, 16 March 2006
Battlegames
I received the first issue of Battlegames this week (wesbite).
I have to say I'm pleasantly surprised. There is a lot of gaming content in the magazine, and it was very enjoyable to read. If you consider subscribing to a magazine, I can recommend Battlegames.
I have to say I'm pleasantly surprised. There is a lot of gaming content in the magazine, and it was very enjoyable to read. If you consider subscribing to a magazine, I can recommend Battlegames.
Wednesday, 15 March 2006
All Quiet on The Western Front revisited
Tuesday March 14 saw the 3rd game in the now highly succesful (ahem, shameless self-promotion) series of "Games in Phil's Attic".
The theme this time was the Western front during WW1. The Germans had to attack a British trench system. Due to the fact that I have far less British than German figures, the Germans always end up being the attacker.
The map was laid out such that would be a 'defence in depth' scenario. The main attack direction was along the length of the table to allow for this. To simulate this defence in depth idea, the British deployment was such that a minimum number of units had to be in the frontal zone, but the bulk was in the rear zone, where the main trenches were located. Unknown to the Germans, the British also had the availability of barbed wire sections and minefields which they could deploy anywhere.
The Germans had to divide their force in 3 Stosstruppen, and each Stosstrupp was assigned a particular attacking axis. Units could not leave their sector, thereby simulating the idea of 3 formations attacking in parallell, but each in their own sector of the battlefield. We called this the 'German Doctrine'.
The game was spiced up by random events, ranging from infantry reinforcements, morale boosts, airplanes, an A7V tank, off-board artillery, etc.
Frank en Koen took the German side, Eddy and Bart played the British. Initially, the German advance went well. The frontal sentry units of the Tommies were wiped out fast. When reaching the 2nd line (this was the first trench), the advance halted for a moment, but in the end, the British vacated this position as well (British mortars seem to have problems hitting anything) to fall back to their third line. This third line (and full trnech system) was reinforced by troops coming from the back (and due to lucky random events).
The losses on the German side started to pile up, but the impetus of the attack was still strong. In the mean time, an A7V tank had entered the battlefield, and despite rumours of tanks not working, it kept pushing forward, refusing to malfunction. Also, an Albatros bomber had also appeared to help the infantry assaults underneath.
The German infantry managed to infiltrate the final trenches, but resistance was very stiff. However, by that time, it was after midnight, and we decided to stop the game. Some discussion followed about who would have won, but fairest thing to say is that it still could have gone either way. By looking at the random events still left, the British would still receive quite a few new reinforcements, but the Germans still had their field guns intact, with which they could keep hammering the British Infantry from a distance.
So, in the end, it went just as in WW1: lots of casualties on both sides, , and no-one really was sure who had won in the end. But gamewise, it was a lot of fun!
Here's a not so sharp picture. I just bought a new GSM, and apparantly, I don't know how to work the camera properly yet ...
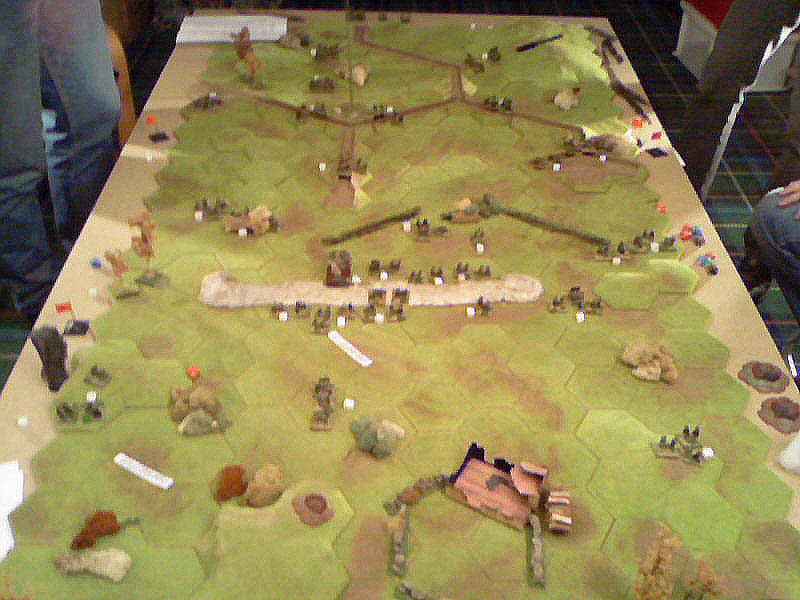
Tuesday, 7 March 2006
My Celtic army
Those of you following this blog know that we're currently involved in a [WAB Escalation Campaign](http://www.nirya.be/snv/sections/WEC), where the armies grow from 500 points in size to a large size over the course of the campaign. We're currently in [Round 4](http://www.nirya.be/snv/sections/WEC/turn4.html), where the nominal point size would be 1250 (we've been working with increments of 250 points), but we're allowing a range of 1000 - 2000 points to account for different painting speeds of the various players.
I'm on the slower side of the painting speed distribution, and my Celtic army has only just reached 1000 points (minus four models, but who's counting :) ?). This entry is a photo introduction of this army.
Without further ado, here's Bartolomix' warband. You can find these pictures in [their own set on my Flickr account](http://www.flickr.com/photos/robartes/sets/72057594075245680/) as well as here below.

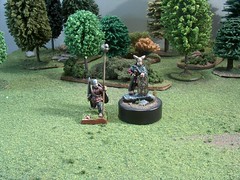
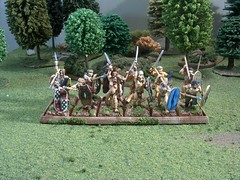
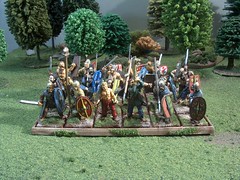
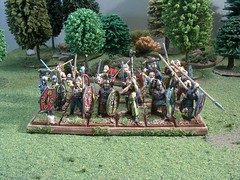
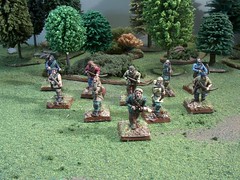
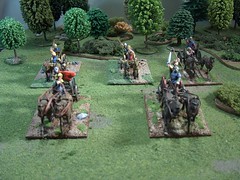
On to the next 1000 points. At 5 points per warrior, that's only 200 more.
I'm on the slower side of the painting speed distribution, and my Celtic army has only just reached 1000 points (minus four models, but who's counting :) ?). This entry is a photo introduction of this army.
Without further ado, here's Bartolomix' warband. You can find these pictures in [their own set on my Flickr account](http://www.flickr.com/photos/robartes/sets/72057594075245680/) as well as here below.
On to the next 1000 points. At 5 points per warrior, that's only 200 more
Monday, 6 March 2006
Red Barons
Saturday March 4 the yearly Red Barons convention took place in Gentbrugge. Schild en Vriend took part with a display of our Arnhem game (see other posts in this blog). Although there were some vague plans of actually playing a game we never really got farther than setting up the boards and putting some units in more or less historical positions. Bart and I mostly chatted with various people, browsed the trade stands and had a good time, all without the stress of actually having to run a game.
There were a few good games going on, some being repeats from Crisis (e.g. the Ancient Naval attack on a Fortress run by La Grande Armee). TSA had an Afriboria game featuring characters from the TinTin novels. Quite original.
There was also a Zombie-game with 3D paper scenery, which was also quite good w.r.t. visual appeal.
Other games were more standard in nature, and of course there were various GW games as well.
As for buying, I got the Commands & Colors Ancient game, 2 blisters with fantasy figures from Chiltern and some trees from Woodland Scenics. Not that I really need these last 2 items, but I felt I had to buy at least something to support the industry ;-)
Nevertheless, I really had to scrounge to find some things I wanted to buy. I'm always eager to spend some money at conventions, but I felt the choices this year were very limited. In my opinion, the RB convention is just above the level at which it becomes interesting to attend as a casual visitor (that is, not being involved in any of the club-games) in the hopes of finding some good items. Now, this may be the fate of any small-scale convention, so let's see what next year brings.
Sunday, 5 March 2006
Leipzig revisited
Regular readers with their memories in overdrive might remember my report of last year's Big Game, organised by our old friend Adrian and his chums from Cheltenham. That saw a glorious French defence of Leipzig, 1813, ahem. I played, by the way, Napoleon.
This year, Adrian went one better and organised a very amusing campaign game, played by e-mail, which culminated in big battles on the tabletop, played out in rural Gloucestershire. I had the role of Napoleon again, ably assisted by (the sometimes querolous) Marshall 'Alisdair' Ney and the Royal Saxons, faithfully led by David. Against us was ranged a huge array of opponents, James, Kieron and Orhan playing the Russians and Prussians. The scenario was the Allied invasion of Germany in 1813 and Napoleon's riposte.
The email game was played out over several turns, with communication forbidden between players unless they were in the same place on the map. This led to inevitable confusion and some stress (in gaming terms), with Commanders out of touch with each other and unable to trace each other. GM Adrian provided us with amazing game reports and sketch maps.
For those interested in the mechanics, a crucial aspect of the game was an initial choice of strategy. You had ten strategy points to allocate between five different aspects of the army: cavalry strength, infantry,artillery, scouting and logistics (including map movement). As Napoleon, I decided to maximise scouting and logistics with the aim of using this to get our troops into the right place to achieve local superiority. I think that in the end, it was a fair strategy, as the map movement ended with the following situation: the Russians slipped into Leipzig, with Prussians supporting from the North. More Russians were to the South, trying to reinforce their heavily pressured friends. Hot on their heels from the East were my French, Poles and Saxons.
Acdrian assembled the team to play out two massive battles on a 20' by 4' table in the (warm and freshly painted) garden shed at Andy's house in an obscure (but pleasant) village somewhere in South West England. As I was driven their and back by various members of the group, I never really worked out where I was. Though I think it is the cake making centre of England, judging by the vast quantities of cake and fudge provided by Andy's wife.
I won't bore everyone with the full story of the games. On Saturday, we fought out three battles on one table, with a mass assault of the Poles on Leipzig causing big casualties on the Prussians but faling ultimately to capture the city. A simultaneous scrap between the French and battered Russians, a bit further south, was notable principally for Kieron's confused but heroic Cossacks:
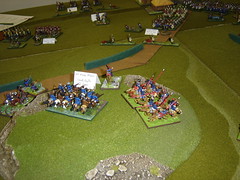
Champagne Moment
Originally uploaded by ahuyton.
And my horse artillery that routed a large part of Moscow's finest:
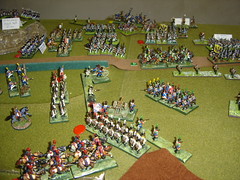
Gloating
Originally uploaded by ahuyton.
For his feats with the Cossacks, that consisted of holding a hill against an entire French Division, Kieron deseredly won the Hero of the Match Award.
Day two was different. Simultaneously with the three scraps going on near Leipzig, was a massive battle further south, with each side having about 15 regiments of Cavalry. The French had some unexpected success:
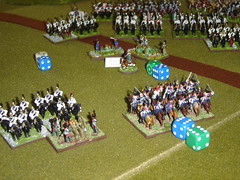
An unlikely win for the French cavalry
Originally uploaded by ahuyton.
The stress...
Oh dear
Originally uploaded by ahuyton.
Again, poor Kieron's Russians took a pasting, this time with the French imperial guard lending a hand. But David's Saxons bravely held the left flank against the Russian Guard, who notoriously were lost by their Commander in the campaign game.
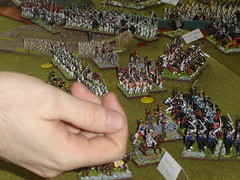
The Hand of God?
Originally uploaded by ahuyton.
In the centre, a massive cavalry meleee, finally indecisive, but not without moments of amusement (see photos!).
A good weekend, despite Adrian's (very reasonable) ruling that the French didn't uite do enough to win the day. By the way, we played using the shako rules, which play well and smoothly, are great fun and give a good feel. Definitely the best Napoleonic rules around.
The good news though is that Adrian is already talking of another game next year. Great!
This year, Adrian went one better and organised a very amusing campaign game, played by e-mail, which culminated in big battles on the tabletop, played out in rural Gloucestershire. I had the role of Napoleon again, ably assisted by (the sometimes querolous) Marshall 'Alisdair' Ney and the Royal Saxons, faithfully led by David. Against us was ranged a huge array of opponents, James, Kieron and Orhan playing the Russians and Prussians. The scenario was the Allied invasion of Germany in 1813 and Napoleon's riposte.
The email game was played out over several turns, with communication forbidden between players unless they were in the same place on the map. This led to inevitable confusion and some stress (in gaming terms), with Commanders out of touch with each other and unable to trace each other. GM Adrian provided us with amazing game reports and sketch maps.
For those interested in the mechanics, a crucial aspect of the game was an initial choice of strategy. You had ten strategy points to allocate between five different aspects of the army: cavalry strength, infantry,artillery, scouting and logistics (including map movement). As Napoleon, I decided to maximise scouting and logistics with the aim of using this to get our troops into the right place to achieve local superiority. I think that in the end, it was a fair strategy, as the map movement ended with the following situation: the Russians slipped into Leipzig, with Prussians supporting from the North. More Russians were to the South, trying to reinforce their heavily pressured friends. Hot on their heels from the East were my French, Poles and Saxons.
Acdrian assembled the team to play out two massive battles on a 20' by 4' table in the (warm and freshly painted) garden shed at Andy's house in an obscure (but pleasant) village somewhere in South West England. As I was driven their and back by various members of the group, I never really worked out where I was. Though I think it is the cake making centre of England, judging by the vast quantities of cake and fudge provided by Andy's wife.
I won't bore everyone with the full story of the games. On Saturday, we fought out three battles on one table, with a mass assault of the Poles on Leipzig causing big casualties on the Prussians but faling ultimately to capture the city. A simultaneous scrap between the French and battered Russians, a bit further south, was notable principally for Kieron's confused but heroic Cossacks:
Champagne Moment
Originally uploaded by ahuyton.
And my horse artillery that routed a large part of Moscow's finest:
Gloating
Originally uploaded by ahuyton.
For his feats with the Cossacks, that consisted of holding a hill against an entire French Division, Kieron deseredly won the Hero of the Match Award.
Day two was different. Simultaneously with the three scraps going on near Leipzig, was a massive battle further south, with each side having about 15 regiments of Cavalry. The French had some unexpected success:
An unlikely win for the French cavalry
Originally uploaded by ahuyton.
The stress...
Oh dear
Originally uploaded by ahuyton.
Again, poor Kieron's Russians took a pasting, this time with the French imperial guard lending a hand. But David's Saxons bravely held the left flank against the Russian Guard, who notoriously were lost by their Commander in the campaign game.
The Hand of God?
Originally uploaded by ahuyton.
In the centre, a massive cavalry meleee, finally indecisive, but not without moments of amusement (see photos!).
A good weekend, despite Adrian's (very reasonable) ruling that the French didn't uite do enough to win the day. By the way, we played using the shako rules, which play well and smoothly, are great fun and give a good feel. Definitely the best Napoleonic rules around.
The good news though is that Adrian is already talking of another game next year. Great!
Tuesday, 21 February 2006
Hex-based terrain systems
Over the years, I have experienced with many different terrain systems in my games. I started with chalking rivers and roads on a table surface, gradually adding styrofoam hills. Later on, my brother and I painted our wargames table limegreen (we had some leftover paint from a home-decoration project), and for bigger battles we used the ping-pong table. From that period I also have some 30cmx30cm home-made terrain tiles lying around ... we never got more then 10 tiles ;-)
Then a friend and I bought a Geohex master set. We considered this the ultmate system, but in the end it was considered to be too fragile for easy and fast setup and storage. Then I bought a big green flocked felt mat (back to basics). This was now the perfect system due to ease of setup, and transportable! So I acquired new styrofoam hills that go with the mat. These days, I'm using a Kallistra terrain set (hex-based), and I now consider this the ultimate system, especially because of the many terrain attributes available. All these previous terrain systems are still stored in my house, of course. And I didn't even mention some of the very specialized terrain boards for convention games and the felt mats I have for starship combat, air combat and naval combat. Oh yes, I also have a hex-gridded map made out of brown packing paper for desert games.
Sigh. How many terrain systems do you need for 'generic' games? Right now, I feel that the Kallistra set is the most flexible, but maybe this will change again in a few years? Should I sell or throw out the previous ones? Existential questions ... !
But let me go on a bit and tell you why I think the Kallistra system is the best. It is high-quality material, light and has a good visual appeal. But the main advantage is that it speeds up gameplay because it is inherently hex-gridded; i.e. it superimposes a hex-grid (about 10cm side-to-side) on your playing surface. And this is the best advantage of them all.
I have become a big adept of hex-based games over the past 2 years. Hexes allow for easier movement (no more measurements), range calculations etc., and so in general, significantly speed up a game. I used to think that no serious wargame should use hexes, because we need those 1" accurate movements and ranges. But, movement and ranges in most game systems comes in multiples of 3" or 4" anyway (I checked a few systems to make sure). So, if you would divide your distances by 3" or 4", you get the range expressed in hexes, and nothing is lost. So, for movement and range calculations, hexes are a big win.
What about visibility? Visibility is always a problem in miniature wargames, and is often eye-balled. Traditional hex-based board wargames assume that visibility is 'calculated' from hex-centre to hex-centre, and one is inclined to do the same for a hex-based miniature wargame. That is fine, but not strictly necessary. Visibility can still be determined on a figure by figure basis, even though you compute ranges expressed in hexes. And thus, skirmish-based games such as Western shootouts bacome perfectly possible, with all the expected detail of hiding behind a single tree or bush. And eye-balling the visibility the traditional way is actually faster than drawing a line from hex-centre to hex-centre. And for games involving precise orientation of figures or regiments, this is also perfectly possible within the hex, since the lines of sight are not determined using the hex-grid, only their length is.
Now, the Geohex system also come in hexes, but mich bigger ones, and this is not useful to translate into a gaming system. A Kallistra hex can contain one unit of let's say 10 25mm figures, but a Geohex hex is much bigger than that. So, although Geohex is also hex-gridded, the grid is not very useful for games. Being a computer-graphics person, I can 'visualize' all sort of finer resolution grids on top of the Geohex (e.g. all the centre-points and corner-points of a hex-grid also form a hexgrid at double resolution), but I think that most people will not be able to make those abstractions, such that gaming speed will slow down again.
My main objections against hex-gridded systems has always been twofold: visual appeal and accuracy of gameplay. The first one is solved by Kallistra; the second one is not an issue when using small enough hexes, and being able to move away from the inch-crunching mentality.
HEXES RULE!
Monday, 20 February 2006
Roads the Stipsicz way
Fonzie has a great [article on flexible roads](http://www.stipsicz-hussars.be/flexiroad/flexiroadsE.html) up on the [Stipsicz Hussars](http://www.stipsicz-hussars.be/) web page. He uses _mastic_, which according to the discussion over on [The Miniatures Page](http://theminiaturespage.com/boards/msg.mv?id=66561) is called _caulking_ in the States.
Anyway, here's a picture of the final results, have a look at the linked page for more:

Great work, Fons!
Anyway, here's a picture of the final results, have a look at the linked page for more:
Great work, Fons!
Subscribe to:
Posts (Atom)