Two years ago I bought a load of 6mm Adler figures of our good friend BD, who in turn had bought them off JP (we address each other in simple terms here in Belgium). In that time, I painted up a few more regiments, made a little farm model and generally prepared for the Big Day when the figures would see battle. This happy moment occurred last Friday when a small group of us gathered in the sauna like atmosphere of GW's top floor gaming room to play a game using the Principles of War rules.
First a word about the rules. It is an elegant system, with an army list of units (you can choose what operational scale to play at - it makes no difference to the rules), each of which has a numerical rating (generally from 6 to 18) which represents its combat factor and morale factor. Weapons and doctrine may also be noted against the unit, defining what may be done by way of maneouvre, melee, firing range, etc. To give you an idea of how the game works, a volley of rifle fire from an average unit will do 1 or 2 hits at close range - thus the unhappy target unit may have a starting factor of 12 and this will go down to 10 if it is takes 2 hits. This is recorded on the unit roster. Every time hits are inflicted the victim unit must take a morale test. He rolls a D20 and if the score is equal or lower than the current roster score (in our example earlier it was 10) then the unit passes the test. If more, then the unit is shaken, if doubled, the unit retires, if trebled it flees from the game in disgust. So as the game goes on, attrition wears down a unit and at some stage it will break. There are of course modifiers, for example if a general is nearby, if you are hit in the flank. Important note - don't roll a 20 when testing morale, this automatically gives a result one level worse than would otherwise be the case.
Movement is simple and always has to be in conformity with the orders set for the unit. The distance you can move depends on the quality of your officer - the mechanic is a die roll per officer (who commands 3+ units, typically) and that is the number of units to move.
You get a D4 id a lousy officer, a D6 if normal or an average die if good.
Now I have bored you enough with the rules. The scenario is an action from 1864, a desperate attack by the Confederates against a flanking movement by Hooker's Union troops. I took it from the 'Charge' magazine on Magweb. Each side has roughly 20 units of infantry, with a big advantage for the Union in terms of artillery. I decided to give a couple of units of cavalry to the Confederates, even if historically they weren't on the field. why? I had painted them and wanted them see action and just to give the rebels a bit of a chance in what would be a stern ask.
The terrain is dominated by a three creeks that run from the confederate right to the centre of the table, where there is much marshy ground and a cornfield. On the left are woods all along the edge plus Kolb's farm halfway across the table. A road runs from the Confederate centre to the Union right. Each side is ordered to capture both ends of the road.
The Union plan is simple but effective, a concentration of their forces before the farm and across the table to the other side of the cornfield, leaving their left flank open. They are also allowed to place an ambush in the woods.
The Confederates split their forces. Two infantry brigades on the far right with orders to undertake a huge Napoleon style flanking move. Two brigades on the left with orders to capture Kolb's farm. The cavalry hold the centre. A solitary smoothbore artillery piece is to give support to the left flank.
With typical GW cunning, rather than use his Kentucky ambushers under Colonel Gallop, he asks me (in my GM role, though I am also playing the Confederate left due to the unfortunate but can't be helped absence of one of our players) if he can give orders to them and move them. Blithely I agree. From a Rebel viewpoint this is an error, as Gallop races out of the words to occupy the farm before I can get there. Damn.
On my turn, I march as fast as I can towards the farm, determined to take it. My supporting brigade finds a Grand battery in front of it and forms a firing line, spending much of the game firing at long range into the Union artillery causing sporadic casualties but not having much impact.
The story of the game is simple. A massive scrap for the farm, won by the Blues, thanks to their getting there first and taking advantage of the cover. I didn't help myself by entering into melee rather impetously and then rolling a couple of '20's on the dice at inopportune moments. Gradually I was worn down and one brigade eliminated. On the confederate right, progress was too slow and though eventually a firing line against the Union left was established no coordinated attack was possible. Our cavalry, alas, suffered indecision and did nothing the entire game.
At about Midnight, with the Union advancing on all sides, my troops surrounded and hopes on the right flank in tatters, we fled back to Atlanta leaving the now battered and burnt Kolb's Farm to a happy Union pair of players (Graham W and Graham K).
A very good game, very enjoyable and a final result very similar to the historical one - the confederates made frontal charges across the front, stalled in the marshes and were massacred. I definitely want to play with these splendid little troops again, so nicely painted by JP.

Sunday, 29 April 2007

ACW - Battle of Kolb's Farm
Two years ago I bought a load of 6mm Adler figures of our good friend BD, who in turn had bought them off JP (we address each other in simple terms here in Belgium). In that time, I painted up a few more regiments, made a little farm model and generally prepared for the Big Day when the figures would see battle. This happy moment occurred last Friday when a small group of us gathered in the sauna like atmosphere of GW's top floor gaming room to play a game using the Principles of War rules.
First a word about the rules. It is an elegant system, with an army list of units (you can choose what operational scale to play at - it makes no difference to the rules), each of which has a numerical rating (generally from 6 to 18) which represents its combat factor and morale factor. Weapons and doctrine may also be noted against the unit, defining what may be done by way of maneouvre, melee, firing range, etc. To give you an idea of how the game works, a volley of rifle fire from an average unit will do 1 or 2 hits at close range - thus the unhappy target unit may have a starting factor of 12 and this will go down to 10 if it is takes 2 hits. This is recorded on the unit roster. Every time hits are inflicted the victim unit must take a morale test. He rolls a D20 and if the score is equal or lower than the current roster score (in our example earlier it was 10) then the unit passes the test. If more, then the unit is shaken, if doubled, the unit retires, if trebled it flees from the game in disgust. So as the game goes on, attrition wears down a unit and at some stage it will break. There are of course modifiers, for example if a general is nearby, if you are hit in the flank. Important note - don't roll a 20 when testing morale, this automatically gives a result one level worse than would otherwise be the case.
Movement is simple and always has to be in conformity with the orders set for the unit. The distance you can move depends on the quality of your officer - the mechanic is a die roll per officer (who commands 3+ units, typically) and that is the number of units to move.
You get a D4 id a lousy officer, a D6 if normal or an average die if good.
Now I have bored you enough with the rules. The scenario is an action from 1864, a desperate attack by the Confederates against a flanking movement by Hooker's Union troops. I took it from the 'Charge' magazine on Magweb. Each side has roughly 20 units of infantry, with a big advantage for the Union in terms of artillery. I decided to give a couple of units of cavalry to the Confederates, even if historically they weren't on the field. why? I had painted them and wanted them see action and just to give the rebels a bit of a chance in what would be a stern ask.
The terrain is dominated by a three creeks that run from the confederate right to the centre of the table, where there is much marshy ground and a cornfield. On the left are woods all along the edge plus Kolb's farm halfway across the table. A road runs from the Confederate centre to the Union right. Each side is ordered to capture both ends of the road.
The Union plan is simple but effective, a concentration of their forces before the farm and across the table to the other side of the cornfield, leaving their left flank open. They are also allowed to place an ambush in the woods.
The Confederates split their forces. Two infantry brigades on the far right with orders to undertake a huge Napoleon style flanking move. Two brigades on the left with orders to capture Kolb's farm. The cavalry hold the centre. A solitary smoothbore artillery piece is to give support to the left flank.
With typical GW cunning, rather than use his Kentucky ambushers under Colonel Gallop, he asks me (in my GM role, though I am also playing the Confederate left due to the unfortunate but can't be helped absence of one of our players) if he can give orders to them and move them. Blithely I agree. From a Rebel viewpoint this is an error, as Gallop races out of the words to occupy the farm before I can get there. Damn.
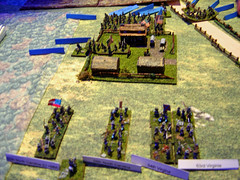
DSC00945_edited
Above: the rebel columns attack Kolb's Farm
On my turn, I march as fast as I can towards the farm, determined to take it. My supporting brigade finds a Grand battery in front of it and forms a firing line, spending much of the game firing at long range into the Union artillery causing sporadic casualties but not having much impact.
The story of the game is simple. A massive scrap for the farm, won by the Blues, thanks to their getting there first and taking advantage of the cover. I didn't help myself by entering into melee rather impetously and then rolling a couple of '20's on the dice at inopportune moments.
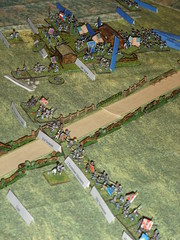
DSC00949
Above: storm over the farm, and the confederate firing line.
Gradually I was worn down and one brigade eliminated.
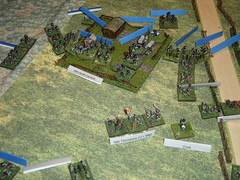
DSC00950
Above: last desperate attack by the Rebels, they are destined to be massacred.
On the confederate right, progress was too slow and though eventually a firing line against the Union left was established no coordinated attack was possible. Our cavalry, alas, suffered indecision and did nothing the entire game.
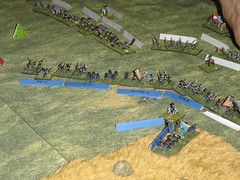
DSC00951
Above: The Union left holds up the Rebel attack
At about Midnight, with the Union advancing on all sides, my troops surrounded and hopes on the right flank in tatters, we fled back to Atlanta leaving the now battered and burnt Kolb's Farm to a happy Union pair of players (Graham W and Graham K).
A very good game, very enjoyable and a final result very similar to the historical one - the confederates made frontal charges across the front, stalled in the marshes and were massacred. I definitely want to play with these splendid little troops again, so nicely painted by JP.
First a word about the rules. It is an elegant system, with an army list of units (you can choose what operational scale to play at - it makes no difference to the rules), each of which has a numerical rating (generally from 6 to 18) which represents its combat factor and morale factor. Weapons and doctrine may also be noted against the unit, defining what may be done by way of maneouvre, melee, firing range, etc. To give you an idea of how the game works, a volley of rifle fire from an average unit will do 1 or 2 hits at close range - thus the unhappy target unit may have a starting factor of 12 and this will go down to 10 if it is takes 2 hits. This is recorded on the unit roster. Every time hits are inflicted the victim unit must take a morale test. He rolls a D20 and if the score is equal or lower than the current roster score (in our example earlier it was 10) then the unit passes the test. If more, then the unit is shaken, if doubled, the unit retires, if trebled it flees from the game in disgust. So as the game goes on, attrition wears down a unit and at some stage it will break. There are of course modifiers, for example if a general is nearby, if you are hit in the flank. Important note - don't roll a 20 when testing morale, this automatically gives a result one level worse than would otherwise be the case.
Movement is simple and always has to be in conformity with the orders set for the unit. The distance you can move depends on the quality of your officer - the mechanic is a die roll per officer (who commands 3+ units, typically) and that is the number of units to move.
You get a D4 id a lousy officer, a D6 if normal or an average die if good.
Now I have bored you enough with the rules. The scenario is an action from 1864, a desperate attack by the Confederates against a flanking movement by Hooker's Union troops. I took it from the 'Charge' magazine on Magweb. Each side has roughly 20 units of infantry, with a big advantage for the Union in terms of artillery. I decided to give a couple of units of cavalry to the Confederates, even if historically they weren't on the field. why? I had painted them and wanted them see action and just to give the rebels a bit of a chance in what would be a stern ask.
The terrain is dominated by a three creeks that run from the confederate right to the centre of the table, where there is much marshy ground and a cornfield. On the left are woods all along the edge plus Kolb's farm halfway across the table. A road runs from the Confederate centre to the Union right. Each side is ordered to capture both ends of the road.
The Union plan is simple but effective, a concentration of their forces before the farm and across the table to the other side of the cornfield, leaving their left flank open. They are also allowed to place an ambush in the woods.
The Confederates split their forces. Two infantry brigades on the far right with orders to undertake a huge Napoleon style flanking move. Two brigades on the left with orders to capture Kolb's farm. The cavalry hold the centre. A solitary smoothbore artillery piece is to give support to the left flank.
With typical GW cunning, rather than use his Kentucky ambushers under Colonel Gallop, he asks me (in my GM role, though I am also playing the Confederate left due to the unfortunate but can't be helped absence of one of our players) if he can give orders to them and move them. Blithely I agree. From a Rebel viewpoint this is an error, as Gallop races out of the words to occupy the farm before I can get there. Damn.
DSC00945_edited
Above: the rebel columns attack Kolb's Farm
On my turn, I march as fast as I can towards the farm, determined to take it. My supporting brigade finds a Grand battery in front of it and forms a firing line, spending much of the game firing at long range into the Union artillery causing sporadic casualties but not having much impact.
The story of the game is simple. A massive scrap for the farm, won by the Blues, thanks to their getting there first and taking advantage of the cover. I didn't help myself by entering into melee rather impetously and then rolling a couple of '20's on the dice at inopportune moments.
DSC00949
Above: storm over the farm, and the confederate firing line.
Gradually I was worn down and one brigade eliminated.
DSC00950
Above: last desperate attack by the Rebels, they are destined to be massacred.
On the confederate right, progress was too slow and though eventually a firing line against the Union left was established no coordinated attack was possible. Our cavalry, alas, suffered indecision and did nothing the entire game.
DSC00951
Above: The Union left holds up the Rebel attack
At about Midnight, with the Union advancing on all sides, my troops surrounded and hopes on the right flank in tatters, we fled back to Atlanta leaving the now battered and burnt Kolb's Farm to a happy Union pair of players (Graham W and Graham K).
A very good game, very enjoyable and a final result very similar to the historical one - the confederates made frontal charges across the front, stalled in the marshes and were massacred. I definitely want to play with these splendid little troops again, so nicely painted by JP.
Tuesday, 17 April 2007
Romano British slingers
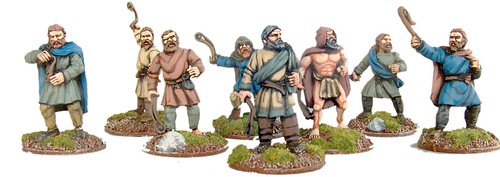
These are of course the [ex Pictish ones](http://www.nirya.be/snv/ttm/archives/000268.html), now painted.
These took me a bit longer than an hour apiece, for the simple reason that I lost momentum halfway through painting them (sick children and sick self), and it seems it is difficult to pick up again. Also, when I started painting them again, I slipped back in to 'full on' painting mode instead of my fast painting mode. I caught it quickly however :).
Next up are some command figures for my Romano British cavalry units that are still without.
Monday, 9 April 2007
Recent books read
I thought I'd bore you all by recounting some of the recent books I've finished, which might be of interest to all right thinking wargamers.
First, S M Stirling's excellent post-apocalyptic trilogy set in Oregon, which tells the tale of a world where suddenly one day electricity, gunpowder and other similar technologies stop working. Catastrophe follows but, happily for the wargaming enthusiast, small groups survive and start to find ways of coping with a world riddled by plague, cannibals and bandits. In fact, the three books tell the story of enterprising individuals who start to develop societies, gather resources, learn technologies, fight evil etc etc. I won't go into detail, because that would ruin what is in fact a well told tale. Anyone who has played Age of Empires, or a good build and conquer pbm game will enjoy this. It is well written and much less right wing and dogmatic than some of his books. And the title? 'Dies the Fire'.
Second, very different, a fascinating account of the Long Range Desert Group's activities, 'Providence their Guide' by David Lloyd Owen, who become the big chief of the group. Well written and enthralling, I learned a lot about the LRDG in the North African campaign and also, which I confess that I didn't know, their activities in Albania and Yugoslavia once Rommel had fled and left the Afrika Korps to abject surrender. I bought my copy from the amazing military bookshop in Erpe, De Krijger, but I'm sure you can find a copy on Abebooks.
Last, assuming you're not interested in the various detective novels that have been consuming my limited time on this earth, is a very amusing autobiography of a (very British) wargamer, Harry Pearson, called 'Achtung Schweinehund'. Great, but I wonder how well it translates to other cultures. It is very much a story of English childhood in the 1960s and 1970s and its repercussions on apparent adulthood later on in life. Hilariously funny in places, stridently dogmatic in others but what of course wins the day is a mention of our one and 'own' (I say this as an ex-pat who struggles daily with the Dutch language) 'Crisis' convention and the glory days of Bart's Schild en Vriend club. Definitely recommended to English readers of a certain age. Maybe it helps others understand the oddities of that race and generation?
First, S M Stirling's excellent post-apocalyptic trilogy set in Oregon, which tells the tale of a world where suddenly one day electricity, gunpowder and other similar technologies stop working. Catastrophe follows but, happily for the wargaming enthusiast, small groups survive and start to find ways of coping with a world riddled by plague, cannibals and bandits. In fact, the three books tell the story of enterprising individuals who start to develop societies, gather resources, learn technologies, fight evil etc etc. I won't go into detail, because that would ruin what is in fact a well told tale. Anyone who has played Age of Empires, or a good build and conquer pbm game will enjoy this. It is well written and much less right wing and dogmatic than some of his books. And the title? 'Dies the Fire'.
Second, very different, a fascinating account of the Long Range Desert Group's activities, 'Providence their Guide' by David Lloyd Owen, who become the big chief of the group. Well written and enthralling, I learned a lot about the LRDG in the North African campaign and also, which I confess that I didn't know, their activities in Albania and Yugoslavia once Rommel had fled and left the Afrika Korps to abject surrender. I bought my copy from the amazing military bookshop in Erpe, De Krijger, but I'm sure you can find a copy on Abebooks.
Last, assuming you're not interested in the various detective novels that have been consuming my limited time on this earth, is a very amusing autobiography of a (very British) wargamer, Harry Pearson, called 'Achtung Schweinehund'. Great, but I wonder how well it translates to other cultures. It is very much a story of English childhood in the 1960s and 1970s and its repercussions on apparent adulthood later on in life. Hilariously funny in places, stridently dogmatic in others but what of course wins the day is a mention of our one and 'own' (I say this as an ex-pat who struggles daily with the Dutch language) 'Crisis' convention and the glory days of Bart's Schild en Vriend club. Definitely recommended to English readers of a certain age. Maybe it helps others understand the oddities of that race and generation?
Sunday, 8 April 2007
A Saxon Raid
Bart and I met up in his fine wargaming attic to put our Warhammer Ancients armies into action again. We're both convinced that the new 'Age of Arthur' is one of the best gaming source books and inspirations around.
For his part, Bart has a splendid Arthurian army, led by Comes Bartholomeus Grassus, new Count of Britain (following the glorious exploits of his ancestors in darkest Germany) and foreshadowing great adventures of his successors in the distant future. Facing him are my Saxons, a little Alfredian in character it has to be said, but now at full strength (ie painted and based).
Bart set up a scenario from the source book, a Saxon raid on a British village (featuring Bart's very nice hillfort). Basically on the right side of the table is a village in a corner, leaving that are three carts of plunder that have to exit the other side of the table without being intercepted by the British. Defending them is the mass of the Saxon army.
I won't bore you with a blow by blow account of the battle. Basically, the Saxons set up a battleline with their elite armoured troops on the left, two massive units of Ceorls (peasants with spear and shield) on the right and some skirmishers in front. My 'plan' was to rush the baggage off table while attacking with my heavy infantry and holding with the rest.
Regrettably, Bart had a much better plan. He rushed his two cavalry units to my left (to where the baggage are racing) and quickly launched a dashing attack into my flank, sweeping away both my best unit and the King's brother, attached to them. On my right, a melee between my Ceorls and a unit of Arthurian spearmen was a bloody grind, my men holding out unexpectedly well.
Regrettably, Bart had in reserve some very good quality spearmen units which he proceeded to throw into the battle. They swept away my other unit of Ceorls and the subsequent rout led to my entire army panicking and running.
Yet another defeat for the Saxons. Well Rosemary Sutcliffe (author of the best Arthurian novels available) would be happy, I suppose.
For his part, Bart has a splendid Arthurian army, led by Comes Bartholomeus Grassus, new Count of Britain (following the glorious exploits of his ancestors in darkest Germany) and foreshadowing great adventures of his successors in the distant future. Facing him are my Saxons, a little Alfredian in character it has to be said, but now at full strength (ie painted and based).
Bart set up a scenario from the source book, a Saxon raid on a British village (featuring Bart's very nice hillfort). Basically on the right side of the table is a village in a corner, leaving that are three carts of plunder that have to exit the other side of the table without being intercepted by the British. Defending them is the mass of the Saxon army.
I won't bore you with a blow by blow account of the battle. Basically, the Saxons set up a battleline with their elite armoured troops on the left, two massive units of Ceorls (peasants with spear and shield) on the right and some skirmishers in front. My 'plan' was to rush the baggage off table while attacking with my heavy infantry and holding with the rest.
Regrettably, Bart had a much better plan. He rushed his two cavalry units to my left (to where the baggage are racing) and quickly launched a dashing attack into my flank, sweeping away both my best unit and the King's brother, attached to them. On my right, a melee between my Ceorls and a unit of Arthurian spearmen was a bloody grind, my men holding out unexpectedly well.
Regrettably, Bart had in reserve some very good quality spearmen units which he proceeded to throw into the battle. They swept away my other unit of Ceorls and the subsequent rout led to my entire army panicking and running.
Yet another defeat for the Saxons. Well Rosemary Sutcliffe (author of the best Arthurian novels available) would be happy, I suppose.
Monday, 26 March 2007
The story of the (now) British archers
So you know that I planned [transforming some Pictish archers to Romano British ones](http://www.nirya.be/snv/ttm/archives/000266.html). Well, it's done now, they're dressed in green stuff. This is them before:

and after:

As you can see, I left one of them in his loincloth, just because there's a nutter in every army. There's also quite a lot of left over green stuff spread around the bases. It always amazes me how little of the stuff you actually need. Basically, take the smallest estimate of what you think you are going to need, and then mix up half that. You'll still have some left over.
Total conversion time was around 3 hours, so a bit longer that I expected, but I like the result. Now let's see how they paint up -- they're off to get some mold lines (and one 'shield knob' I forgot to snip off) removed before they go into the spray booth (aka the great outdoors).
and after:
As you can see, I left one of them in his loincloth, just because there's a nutter in every army. There's also quite a lot of left over green stuff spread around the bases. It always amazes me how little of the stuff you actually need. Basically, take the smallest estimate of what you think you are going to need, and then mix up half that. You'll still have some left over.
Total conversion time was around 3 hours, so a bit longer that I expected, but I like the result. Now let's see how they paint up -- they're off to get some mold lines (and one 'shield knob' I forgot to snip off) removed before they go into the spray booth (aka the great outdoors).
Thursday, 22 March 2007
Celtic archers
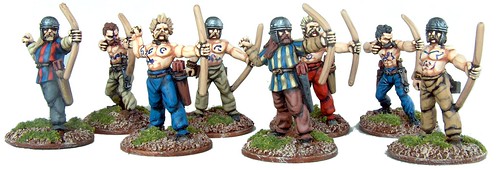
These are Renegade figures. The painting time was again around an hour per figure. The tattoos were done with a gel pen (thanks for the tip, Koen DS).
Wednesday, 21 March 2007
The story of the Pictish slingers
At the Red Barons convention a few weeks ago, where the Mons shop guy was selling off his remaining stock for 50%, I bought a pack of 8 [Black Tree Design](http://www.black-tree-design.com/) Pictish Slingers. I have been toying with the idea of building a 5th - 6th century CE Pictish army (Age of Arthur period), and those would fit right in, I thought.
Of course, when checking the book, it seems the Picts did not employ slingers, only javelinmen, bowmen and the nebulous crossbowmen. So plan B is to use them as slingers in my Arthurian army. Unfortunately, the slingers are dressed in Pictish fashion (obviously), wearing just a tunic and no trousers or shoes, and in the case of two of the figures in a loincloth and cloak only. This would not do for a (semi) civilised Romano British force. So, before painting the little buggers, I'm 'dressing' them with green stuff. Six of the figures need trousers and shoes, and two need those and a tunic.
As I'm typing this, I have finished two and a half conversions (two pairs of trousers, two pairs of shoes and one tunic) and although this is by far my most ambitious conversion project so far, I'm fairly happy with the results so far. Photos to follow when the conversions are done.
As an aside, the painting queue is now the Pictish slingers, then a Romano British cavalry command group (leader, standard bearer, musician), then 10 ACW Zouaves (which I'll paint up as Louisiana Tigers for Ebay), and after that, we'll see. The Celtic archers that were on the queue before the slingers are done and are awaiting photographs.
Of course, when checking the book, it seems the Picts did not employ slingers, only javelinmen, bowmen and the nebulous crossbowmen. So plan B is to use them as slingers in my Arthurian army. Unfortunately, the slingers are dressed in Pictish fashion (obviously), wearing just a tunic and no trousers or shoes, and in the case of two of the figures in a loincloth and cloak only. This would not do for a (semi) civilised Romano British force. So, before painting the little buggers, I'm 'dressing' them with green stuff. Six of the figures need trousers and shoes, and two need those and a tunic.
As I'm typing this, I have finished two and a half conversions (two pairs of trousers, two pairs of shoes and one tunic) and although this is by far my most ambitious conversion project so far, I'm fairly happy with the results so far. Photos to follow when the conversions are done.
As an aside, the painting queue is now the Pictish slingers, then a Romano British cavalry command group (leader, standard bearer, musician), then 10 ACW Zouaves (which I'll paint up as Louisiana Tigers for Ebay), and after that, we'll see. The Celtic archers that were on the queue before the slingers are done and are awaiting photographs.
Sunday, 18 March 2007
King Kong Pulp game
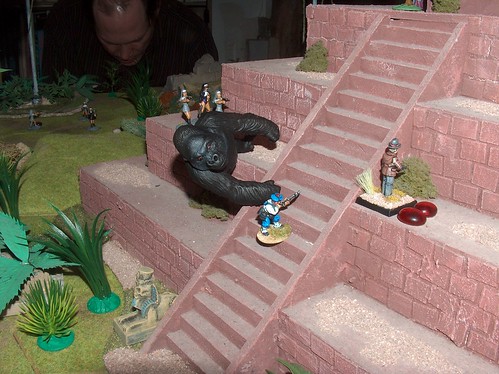
Last Tuesday we played a 'Pulp era' game over at Phil's Den of Lead Delights (read: his attic), of which pictures can be found here.
The rules we used were .45 Adventure by Rattrap Productions, and we played with some of Frank's new alternative WWII figures and some of my Darkest Africa figures (with one new one). Players were Frank, Koen, Phil, Eddy and myself.
The scenario involved the delightful Elizabeth, assistant to the archeological team running around the jungle, mysteriously being abducted to a sinister pyramid deep in the steamy jungles (just getting into the pulp lingo here, bear with me). The archeologists, two teams of figures, went out into the jungle to rescue the fair damsel, while a bunch of Nazis and nuns arrrived after them to get to Elizabeth themselves, for reasons that were never really clear.
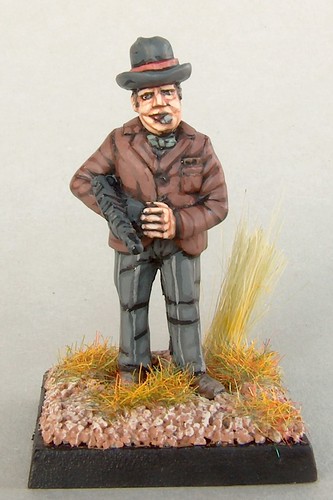
I played one of the archeologists' teams, with 'Winston Churchill' as the professor, his assistant Arthur and four French marines, Jean Luc, Jean Francois, Jean Louis and Jean Marc. Eddy took the second archeologist team, while Frank and Koen played the (mostly female) Nazis and (entirely female -- we think) nuns respectively. The rest of this entry will be a report of the game from the viewpoint of my character.
Before the start of the game, umpire Phil had indicated that according to ancient legend and rumour, one needed three gems to successfully ascend the pyramid, of a fate worse than bears telling would befall the climber. These gems were to be found throughout the jungle, embedded as eyes in a variety of idols and statues. So item number one on the agenda for the good guys was to find these statues and collect three gems. Eddy and I decided to go part of the way together and then split up to take different paths through the jungle to the pyramid.
As it happened, the evil guys arrived on scene fairly quickly, and we (well, Eddy) decided on a change of plan: while Winston would forge on ahead, part of Eddy's party would try and delay the Nazis who were by then hot on the trail of the two adventurers. Meantime, the nuns took off into the jungle on a path of their own.
While Eddy was playing hide and seek (or rather, hide and be struck down in close combat), I discovered the first statue and duly cut out one of its eyes -- gem number one! However, right after getting gem number one, Jean Luc, our point man, discovered the dangers of the jungle first hand when a huge snake reared up from the undergrowth and bit him in the arm. In the end, it took two of Jean Luc's fellow Jeans to dispatch the slithery bugger (the snake, not Jean Luc).
Undeterred, either by slitherings in the bushes ahead or the cries of combat behind where Eddy was entertaining the nazis, we forged on to stumble upon a crowd of natives (well, three) in front of their hut. Not wanting to go into combat and losing time which we could not afford, I held aloft the gem from the statue and bellowed across the jungle 'Behold the Eye of Umbulumbuth'. That put the fear of, well, Umbulumbuth into the natives who promptly scattered into the jungle never to be seen again. Well done, methought.
And onwards to the jungle we go, taking out a tentacle (and presumably whatever was attached to said tentacle below the water) with a single well aimed shotgun blast (thank you, Arthur) and accepting the handover of a gem from one of Eddy's henchmen that had come running forward. Two gems collected!
At this point in the game, Eddy's delaying action had pretty much played out, with all of his figures in the delaying group being put out of action (something about a blademaster in the nazi camp), and the rest of the gems were out of reach or in the hands of the bad guys. After a mercifully short deliberation, we decided to take the 'legend says' part of 'get up the pyramid with three gems' with a good grain of salt and take our chances with only two.
So on we went to the pyramid, this time with Jean Francois leading the way. Of course, after successfully vaulting over a stream that turned out *not* to be fordable at a ford (thank you, umpire Phil), a rumble in the jungle just ahead of him turned out to be a huge herbivorous dinosaur, although Jean Francois might disagree with the plant eating bit, as the dino promptly took off one of his arms. However, fearless Winston, having paid attention in school, dug out the remains of his lunch and threw a healthy bit of lettuce downrange, momentarily distracting the big beastie and allowing the party to smartly bypass the behemoth and start the ascent of the pyramid.
And so it was done. While Arthur and two of the Jeans held off (well...) the increasing pressure of the nazi pursuers (who, together with the nuns, had 3 gems for themselves by now), Jean Francois and Winston climbed the steep steps to the top of the pyramid. It was then that they found out who kidnapped Elizabeth in the first place ... a big hairy ape, that was very big, sitting on top of the pyramid and was really big. Did I mention it was big? Anyway, undeterred, or rather being out of other options as well as lettuce by then, I bravely ventured further onto the pyramid. To my great relief, the ape seemed to be ignoring me (bad after shave?), though he did throw Jean Marc (who had had enough of the nazis) into a three a few miles away. After this however, a party of nuns arrived to entertain the monkey, and Jean Francois and Winston reached the top of the pyramid.
Thus we came to the crux of the evening, the pinnacle of excitement, yea even the climactic apotheosis, when Winston took his two gems and placed them in gem sized indentations in the altar Elisabeth was enchained on.... CLICK ... turns out that the old legends could'nt count. We won!
I had a blast with this game, even harking back to my roleplaying days (a long time ago when I was still wet behind the ears) at times (the natives and the lettuce ideas came from there). The rules proved a tad awkward at times (a bit too much math on occasion, even is it is just addition and subtraction), but they did get the job done. To be repeated, I'm sure.
Thursday, 15 March 2007
Subscribe to:
Posts (Atom)