Monday, 27 December 2010

Ral Partha Samurai

Due to some complications in my personal life, my wargaming activities have been at a low level for the past couple of months. However, now and then, I find the time to paint some figures. I am slowly working at my backlog of figures acquired during the past 20 years, in the hopes of ending up with 0 (yes, zero) unpainted figures a year from now. Is that a choir of maniacal laughter I hear in the background?

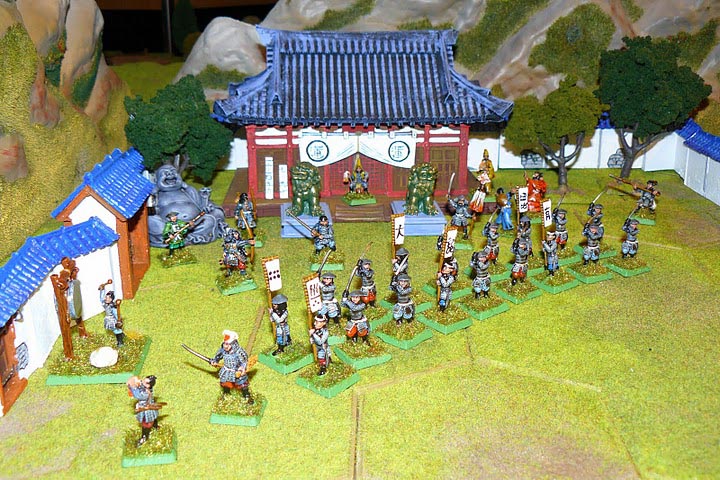
Anyway, here's my latest paint job. A bunch of old Ral Partha Samurai figures, currently sold by Iron Wind (Iron Wind took over much of the Ral Partha catalogue). Ral Partha once was a giant in the fantasy miniature scene in the eighties and nineties, but I haven't followed them anymore since a long time.

The figures are painted to a rather quick gaming standard (I've always been a gamer first, painter second), and given the [Army Painter Quick Shade dip treatment](http://www.thearmypainter.com/). I use the medium tone, and so far, most figures I've dipped in the brown goo come out pretty ok.

samurai.jpg
The building in the background is Japanese Temple the from John Jenkins designs. The happy Buddha is a cheap figure from an oriental trinket store, the lion statues are Temple Dogs from Ainsty Castings. The photograph is a bit oversaturated, but oh well.

Time to organize some Samurai skirmish games ...

Saturday, 25 December 2010

Building a big river - the sequel

Some days ago, I [wrote about building a river](http://www.nirya.be/snv/ttm/archives/000394.html). Since then, I've progressed a bit on said river.

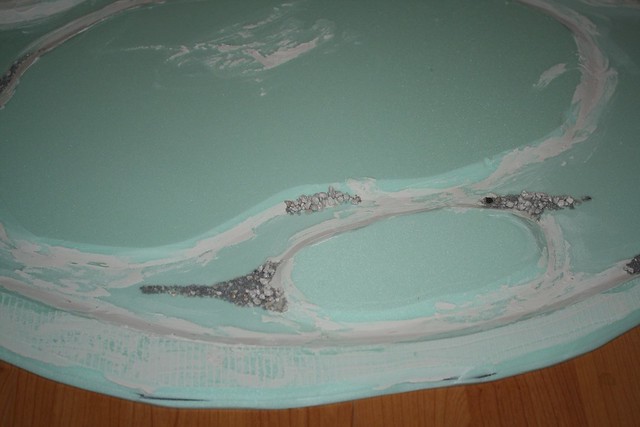
After cutting and glueing the river pieces, the next step was to level the banks a (tiny little) bit using filler (I used bog standard Polyfilla). The filler also serves to level out scrapes and hollows in the foam of the banks, as well as the grooves where I used the foam upside down (remember, the foam I used is meant to be used under laminate flooring and can be glued to the ground - the underside is grooved to provide grip for the glue).

The next step is to glue a mixture of various grades of stones in the river, along the banks and in areas where the stones might collect due to the way the river flows. This is glued using simple white glue.

IMG_1792

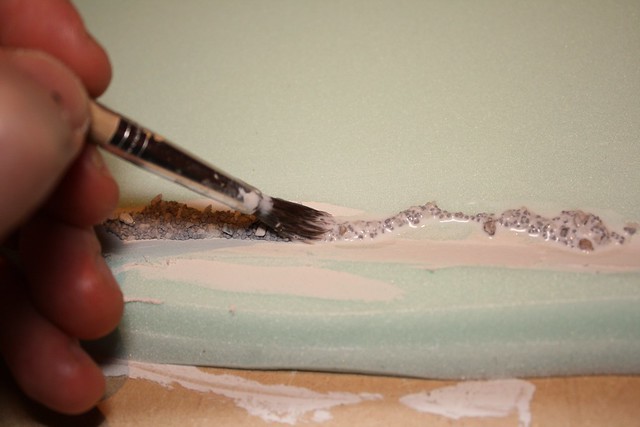
After this glue had dried, I decided to strengthen the bond of the stones to the foam by 'washing' them again with diluted glue. I used a mixture of about 1:1 glue to water (the exact ratio is undetermined - I just throw water and glue together rather haphazardly) and slathered the stones liberally with this:

IMG_1788

The stones are a mixture of actual model railroad gravel of various grades and (unused) kitty litter, by the way.

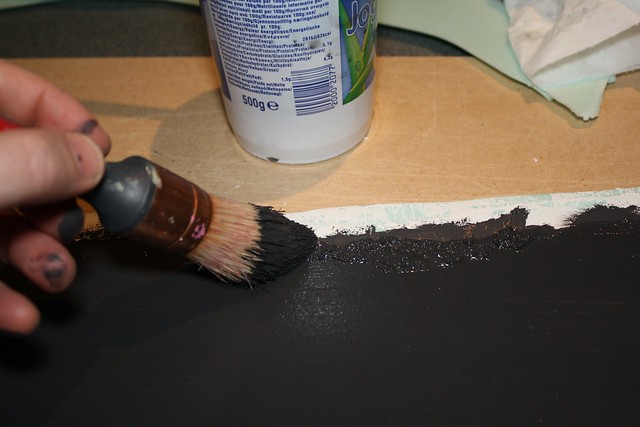
After this second coat of glue has dried, the first coat of paint goes on the boards. Normally I use spray paint to provide the first coat on scenery items, but the spray paint I use eats the foam (I tested on a scrap piece). So, I mixed up a very dark shade of brown (which actually looks black in the photos) and painted the river boards with a big brush (that's important - it goes fast that way :) ):

IMG_1793

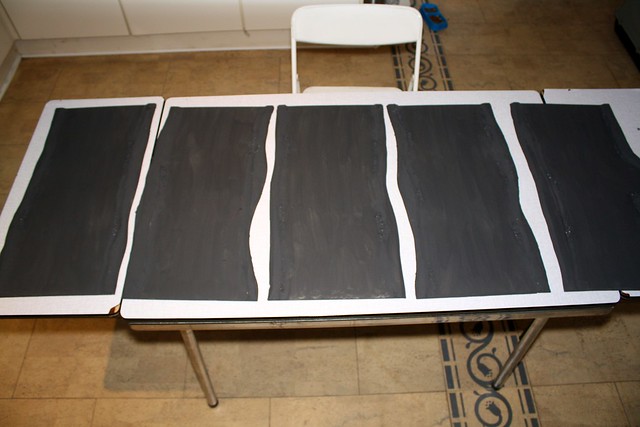
And that's the state the river boards are in now - first coat of paint is on:

IMG_1797

That's it for now, but the story will be continued :)

Thursday, 23 December 2010

Bavarian 1st Light Infantry - full

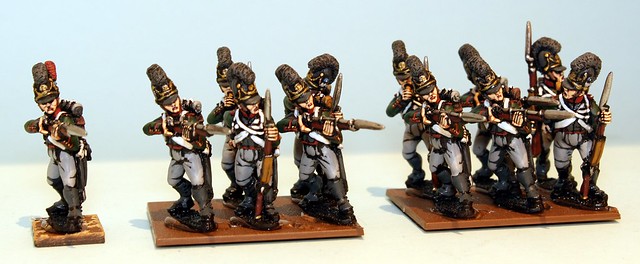
Earlier this month, [I showed](http://www.nirya.be/snv/ttm/archives/000392.html) the first half of the 1st Bavarian Light Infantry Battalion. The full battalion has now been painted:

Bavarian 1st Light Infantry

The bases obviously need to be finished and the flags need tassels. But for that, I first have to do some research (read: dig out the relevant Osprey) to see whether the Bavarians used only tassels or tassels and cravats, as the French did.

Sunday, 19 December 2010

Building a big river

While I have a set of rivers for my 28mm games, they are rather on the smallish side - the widest of them is around 3" wide. That's fine for most games, but not for a few I am planning. I'm working some games which involve assault crossings of a river using pontoon bridges and possibly barges and boats as well. In order to do that, you need a river that actually looks like something you'd want to cross in a boat instead of hop-skipping over it with one swift jump.

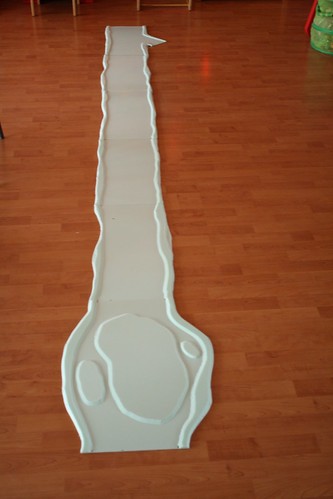
So, with that in mind, I set about creating this river. As my table is 6x8 feet, I decided to build the river in 2 foot sections, so I can use three of them to cross the table breadth wise and four to cover it lengthwise. As a river of this size does not tend to meander that much, especially in the small area represented on the table, I also decided on only doing straight sections. Additionally, I intend to build a second river set which is about half the width of this one, so I wanted to build a piece where the smaller river joins the bigger one. Finally, with shades of Lobau island in my mind, I wanted to build a sixth piece with a big island in the middle of the river.

Jumping straight to the end result, here's the set as it stands at the moment:
IMG_1785

The material I used is a kind of foamboard that is normally used to form the base to put under laminate floors and as such is easily available in various DIY stores (I went to the nearest Brico for it). The specific one I used is [this one](http://p112335.typo3server.info/index.php?id=122&L=7).

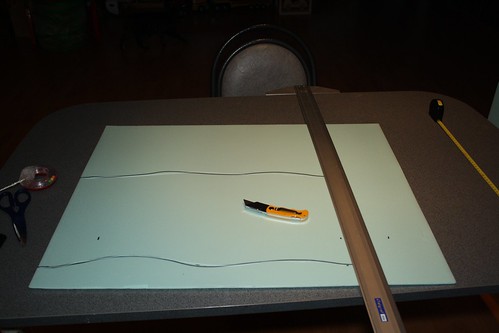
Transforming them into a river is just a question of deciding on a number of measures, particularly a standard profile at the ends so they join up to any other section. My measurements for this river are: 30cm wide, with the banks three cm in on each side (so the river itself is 24cm wide) and 60 cm long. The next step is breaking out the cutter knife and hacking away:
IMG_1777

The offcuts are turned into banks by means of diagonal cuts to create slopes and glued onto the river using simple wood glue, as are the islands in the big island section:
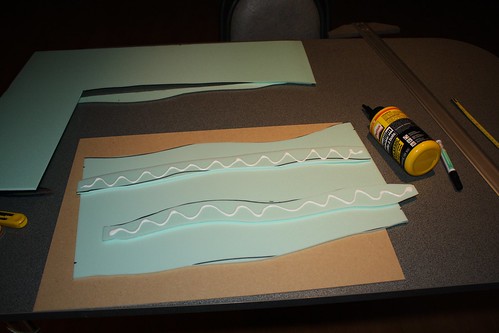
IMG_1778

And that's where the project is at currently. Next step will be spackling the banks and glueing small stones along the banks in the riverbed, before painting the thing.

More pictures can be ogled at in [this photoset](http://www.flickr.com/photos/robartes/sets/72157625630457616/with/5274194568/).

Sunday, 12 December 2010

Here's one I did earlier

In rummaging through my drawers of painted miniatures, as one does, I came across this one:

Briton  10

He's an old [Metal magic Asterix Briton](http://wk.frothersunite.com/sc/asterix/asterix.htm) (look for code C1705b in the Britons picture) bought way back when in the Lonely Mountain store in Leuven (in the first golden age of Schild en Vriend). He was snapped of at the ankles so I repaired him today.

He forms an interesting view of how my painting evolved. This chap was painted in 1997 (I still marked the figures bases with the painting year back then) and he shows the beginning of my move to the three layer style. The flesh shade is still done with inks, the entire figure is painted on a grey undercoat (hence no deep shadows or blacklining) and the highlights are nowhere near as exaggerated as I do these days. However, glimpses of that later style (I think I came into my later style about a year after this figure) are already apparent, especially in the trousers for example.

Just thought it would be an interesting walk down memory lane :)

Sunday, 5 December 2010

Bavarian 1st Light Battalion, 1st three companies

Wet off the painting table, here's the first three companies of the 1st Bavarian Light battalion:

Bavarian 1st Light - 1st half

Purists will notice that it's 2 companies and 3/4th of the third, with a carabinier tacked on instead. Further purists will note that carabiniers were not added to Bavarian lights until after the 1809 campaign which is my focus for this project. Tough luck.

The plan with basing these is to have the main 'line' companies on two 45x40 bases, the command on a single 30x40 base and the light and carabinier companies on single 15x20 bases so they can be deployed as skirmishers. Line battalions will probably be based on 4 45x40 bases (which means that I have come to my senses and am going for 24 figure battalions again, as opposed to 36).

Next on the painting table are the 12 chaps completing this battalion. Oh yes, the figures for these are from Front Rank.

Tuesday, 30 November 2010

A red that works

Those of you who regularly apply brush to miniature know that there are certain colours that are, shall we say, reluctant participators in this whole painting thing. I'm talking about reds and yellows of course.

Reds and yellows, because of the way these pigments work physically, do not cover easily. You will usually need more than one layer to get a good coverage with any yellow or red, even with miniature paints where the amount of pigment in the paint is higher than usual. And if you do get coverage with a reddish or yellowish colour, I'm certain you'll find that it is more of a brownish colour, which is cheating really.

Until now that is. I've discovered a red that actually covers a black undercoat in one go. [Games Workshop](http://www.games-workshop.com) (yes, the vaunted evil empire and bugbear of many supposedly stout hearted historical wargamer) do a range of paints called [Foundation Paints](http://www.games-workshop.com/gws/catalog/armySubUnitCats.jsp?catId=cat470012a&rootCatGameStyle=) which are specifically formulated to be used as base coats and intended to cover in one layer. I'm guessing what that means is that they have so much pigment in them that they're just a midsomer nights sigh away from being chalk.

But, never one to shy away from some experimentation (I blame my education) I bought the red ([Mechrite Red](http://www.games-workshop.com/gws/catalog/productDetail.jsp?catId=cat470012a&prodId=prod810840)) and one of the yellow ([Ivanden Darksun](http://www.games-workshop.com/gws/catalog/productDetail.jsp?catId=cat470012a&prodId=prod810844)) ones to try them out. You'll notice that I went straight for the difficult customers here.

Earlier this week, I used the red one as the shade coat for the piping on a bunch of Bavarian light infantrymen I'm painting and you can hit me over the head with a flabby flounder and call me flaky if it didn't cover the black undercoat in one go. Even thinned (I almost never use paint straight out of the pot) down to my preferred consistency it still covers the black. I'm sold.

Now only to find something to paint yellow to try the other one.

Tuesday, 23 November 2010

Meeples & Miniatures painting specials

While painting the last few days, I've been listening to two episodes of the [Meeples and Miniatures podcast](http://www.meeplesandminiatures.co.uk/): episodes 65 and 69 which form two parts of a special on painting miniatures.

Host Neil Shuck and guest presenter Steve Archbold talk about painting miniatures (obviously) for someone who is only just beginning to paint. So they go into all the basics such as material, painting techniques and painting styles.

A few things I particularly like about it is that they have a firm emphasis on army painting, i.e. painting a miniature to a standard that works on the tabletop in a time frame that actually gets said miniature on the tabletop with a few tens or hundreds of its friends and enemies. Additionally, it hits upon a few of the things that I know are true (I have a bit of experience painting miniatures myself) but haven't really heard or read in much other places. Things like brush control, brush size (the bigger the better - which is somewhat counterintuitive) and the amount of contrast you need on a wargame level figure (more than you think).

Of course, there are areas where I disagree (I *do* dip figures in Army Painter, as real men do - you can be the judge as to the [result](http://www.nirya.be/snv/ttm/archives/000295.html) ) and the hosts accent is thick enough to host an elephants picknick on, but in general these are two very good podcast episodes to listen to, preferrably while painting miniatures. Heartily recommended.

[Meeples and Miniatures episode 65](http://traffic.libsyn.com/meeplesandminiatures/meeplesandminiatures_ep65.mp3)

[Meeples and Miniatures episode 69](http://traffic.libsyn.com/meeplesandminiatures/meeplesandminiatures_ep69.mp3)

Sunday, 21 November 2010

US Cavalry

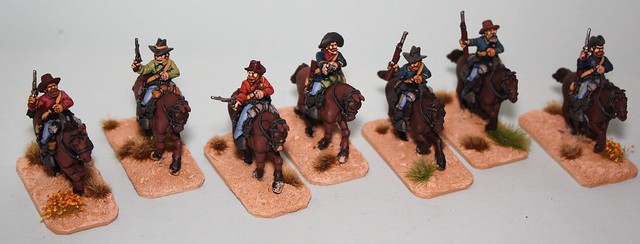
These are some of my last unpainted Old West type figures (they're Foundry figures if you hadn't guessed). They were half (well, a quarter) painted what must have been almost 10 years ago and then abandoned. They ended up in a shoebox that made it through about 4 house moves before I rediscovered them when rearranging storage in my attic last week.

US Cavalry

Anyway, they've been painted over the last few days. Three of these figures were three quarters done 10 years ago, when I still painstakingly mixed my own colours and used upwards of 4-5 layers on each colour. The rest of them are painted in my current army level 2-layer style. If you can spot which is which, feel free to comment with your guesses :)

Next up on the painting table is a battalion of 24 Bavarian light infantry (Napoleonic). They'll make up the 1st Light Battalion.

Great Northern Powder

27 April 2016: links updated, and downloadable document restored.

As reported here earlier we played a Great Northern War scenario using Black Powder as the ruleset. As the Great Northern war falls just outside of the purview of these rules -- not in chronology but rather in weaponry and tactics -- we used a number of adaptations to the rules.

The below document, now christened _Great Northern Powder_, repeats these adaptations, with a few modifications brought upon by the experience of the game and with everything dolled up a bit as well.

Great Northern Powder (606Kb)

Differences with the earlier version are:
  • Slight rewording
  • Further clarified pike rules
  • Upped cavalry HtH stats
  • Included sample unit stats 
Feel free to use and adapt these in your own games. The version linked above is the low resolution version. If you want to print it, send me an email and I'll send the hires version (though be warned that that's a lot bigger).