We played a massive battle last Friday at Bart's wargaming mansion. The game was based on the battle of
Lobositz, but using Napoleonic troops, and using Black Powder rules.
The lay-out was following the suggestions as made by Charles Grant in
Wargaming in History, volume 9 (full title: The Seven Years War, Lobositz, Reichenberg, Prague and Kolin). This series of books is an excellent source for picking wargaming scenarios, since ost of the work of translating a historical battle into good scenario already has been taken care of.
 |
| Scenario map for Lobisitz, from Wargaming in History, Volume 9. |
Bart decided to use his Napoleonic figures instead, keeping the Austrians on the defense, but switching the attacking Prussians for a Franco-German force, led by King Ludwig of Bavaria. As is common in our games, we diced for sides, and the die roll decided I would play the Franco-German side, while Bart would take the roll of defending Austrians.
Due to time constraints, we weren't able to complete the entire game, but when we halted, the Franco-Germans were making some light headway towards breaking through the Austrian lines.
Overall, the scenario seemed to work, although there was the usual discussion afterwards whether the troop balance was right. In our game, the Austrians had fewer, but stronger units; while the Franco-Germans had more, but somewhat weaker units. Probably this should have been switched, giving the attacker fewer but stronger units, and the defender more, but weaker units. The idea would be that in a game, the defender is mostly static, but it's up to the attacker to manoeuvre his troops and choose his point of attack. Hence, it would be better not to burden the attacker with a high troop density, thereby limiting his moeuvring possibilities. Fewer troops for the attacker (more manoeuvring), and somewhat stronger units (so he can put pressure on a small frontage) is something we should try next time, and would probably benefit the scenario.
And here are the pictures:
 |
| Overview of the table after 2 moves. Franco-Germans on the left, Austrians on the right. Lobositz in the far-right corner. The Franco-German army is attacking on a narrow frontage, with Artillery deployed on the central hill firing at the village of Sullowitz, and flanked by cavalry on their far left flank (bottom middle of photograph). The Austrians are deployed in a wide defensive position. |
 |
| View on the centre of the Austrian position. |
 |
| Attacking Franco-German force, wedged between two hills. On the hill on the left flank, skirmishers are involved, while artillery on the right flank is providing covering fire. |
 |
| Franco-German infantry advancing on their left flank. The Austrian cavalry is threatening the Franco-German advance, and forcing opposing infantry into square (but the reaction roll failed!). |
 |
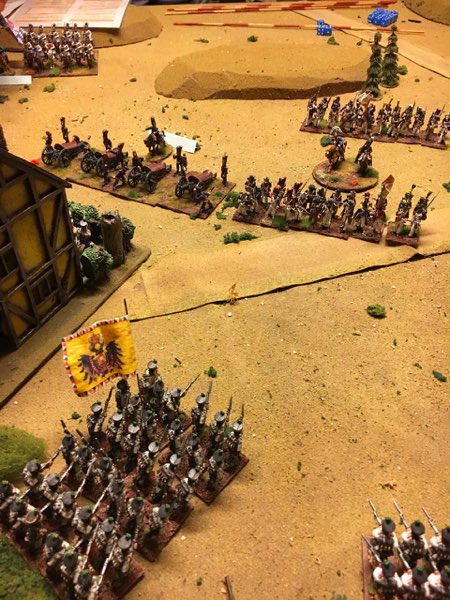
| Same position, one turn later. Franco-German infantry has been able to form line to fire at the upcoming Austrian cavalry. The result of this engagement was that the Franco-German infantry held their position, and was able to shake the Austrian cavalry, thereby severely weakening the Austrian right flank. |
 |
| View from the Austrian right. The Franco-German horse Artillery finally came forward and deployed right in front of Sullowitz, forcing the Austrian Infantry out of the village. |


No comments:
Post a Comment