Sunday 30 August 2020

Programmed Wargames Scenarios (2): Broken Ground (c)

The third part in the continuing battle, based on scenario 2 from Programmed Wargame Scenarios.

An advantage of playing a solo game is that you can change the rules halfway the game. So, after some discussion regarding unit-based vs commander-based activation, I decided to switch to commander-based activation. This allows for more units to be activated, but also gives Red (with more units and 4 commanders) a fairer chance of activating units proportional to its strength.

Moreover, I also decided that the +3 bonus commanders gave on top of their 7+ baseline score was a bit too generous, so I downgraded those to +2. See also here for a full analysis on our sister blog Wargaming Mechanics.

Back to the game!

The orders didn't change, although I decided the feint attack on Red's left flank had run long enough and it was time for Red to push forwards in the centre. I also decided Red's right flank should move forward a bit to protect Red's centre flank.

Red's centre is pushing forward. The artillery is also (re)deployed such that Red's left flank can be attacked and the attacking force is protected.

The cavalry on Red's right flank is moving forward to protect the right side of the centre force, although it is not participating in the attack itself - as per the programmed orders.

Red's left flank (the flank of the feint attack) is happy to stay where they are and fire at Blue's forces. However, since the woods need to be cleared (also a programmed order), I gave a charge order o the cavalry, but their morale check failed, saying "Unit refuses charge order ...".
 

As for Blue, they were happy to return fire as much as possible. On Blue's left flank I decided their would be some movement in response to Red's cavalry moving up, and on Blue's right units were simply protecting their position. In a player-vs-player game there would probably be some clever manoeuvring back-and-forth, but I guess overall that wouldn't make much of a difference.

The view from Blue's centre. Red's infantry is moving up, and the following turns probably will be a massive firefight.

Blue's left flank, moving in response to Red's cavalry. The flank forces (light and cav) could move boldly to face any enemy troops, so that's what they're doing.

Blue's right flank. Some units had to retreat 1 or 2 hexes due to morale, so they mved back into position. As long as they can keep the Red units at a distance, they are happy.

Since the Red attack against Blue's strong centre was now fully developing, I decided it was time to roll on the response table for Blue. The result is "Negative", meaning "no change of plans, no initiative, ...". Red will only have to take a response when Blue's units will actually retreat from one of the hill features (which can happen if Blue will fail some morale tests in my rules).

Saturday 29 August 2020

Commander-based vs unit-based activation

As a small follow-up to my ongoing game report, I did a little analysis on how many units one can activate on average using a roll-for-activation mechanisms. You can read it on our sister-blog, Wargaming Mechanics.

I use an activation system in my ACW house rules. For a long time, we have used activations based on commander rolls, an idea we borrowed from game such as Black Powder. Each turn, a commander can issue an order to a unit by rolling vs its activation number, and if he fails, that commander is done for the turn, but other commanders still can issue further orders. Typically, each commander also has a "command radius" . Units outside this radius cannot be activated. I used some fix for that (you can activate one unit per turn anywhere on the table), but it never felt quite right.

Therefore, I decided to switch to unit-activation: units have an activation number (usually 7+ on 2D6), and you roll for any unit you want to activate. A failed die roll still stops the turn. Commanders can give a bonus if they are within their command radius. It is a nuance, but it does make a difference in actual play. Instead of looping over commanders, a player loops over units, with commanders merely providing some bonus.

I use cards for commanders, to be drawn at random at the start of the game. Different commanders have different modifiers for different type of orders, and hence, it's up to the players to use his commanders as he sees fit.

A selection of cards for my ACW commanders. I have  10 cards per side, players draw typically 3 or 4 at random at the start of the game. Modifiers are for move, fire and charge order. Cards are from Dixie (Columbia Games), but are only used for illustrative purposes.

 So why my analysis?

  • I wanted to know how many units one can activate on average using activation-based systems;
  • I wanted to know whether a bonus of +3 for some command rolls wasn't a bit too generous.

So, if you want to find out, read about it here yourself :-)

Wednesday 26 August 2020

Programmed Wargames Scenarios (2): Broken Ground (b)

I played turns 3 and 4 of the programmed solo game.

The orders and responses didn't change, so these two turns were continuation of the previous plans. So far, the situation:

Red (Union), attacking:

  • Mission: "Seize the broken ground dominating the roads to the north"
  • Units (rolled for): 10 infantry, 2 light infantry, 5 cavalry, 3 artillery. I multiplied the units in the book by 1.5 to get a good troop density on the table. I gave Red 4 commanders.
  • Execution (rolled for after Blue's deployment): "Attack centre after feinting to weak flank". The weak flank was determined at random, and resulted in the left flank.
  • Response rolled after Blue's attack from the woods on the left flank: "After defeating the surprise attack the woods must be cleared and all further woods must be cleared insofar Blue's forces in those woods could surprise Red."

Blue (Confederate), defending:

  • "Hold the broken ground to the north of the table"
  • Units (rolled for): 6 Infantry, 3 light infantry, 3 cavalry, 3 artillery. I gave Blue 3 commanders.
  • Deployment (rolled for): 60% centre, 20% left flan, 20% right flank. Light troops must be divided evenly between the flanks. All troops other than cavalry must be deployed in woods or on hills; reserve of 15% must be maintained in the centre and not in the front rank.
    I decided to deploy as follows:
    • right: 1 inf, 1 cav, 2 light
    • centre: 1 cav as reserve, 4 infantry, 3 artillery
    • left: 1 cav, 1 infantry, 1 light
  • Execution (rolled for): You will hold the central section and not give up ground., nor will you counterattack or follow up with the main body. You may give up ground on the flanks although you should aim to hold them to protect the position. You may counterattack off the flanks or counterattack with your reserve to retake them. You should use cavalry and light troops boldly on the flanks to harass the enemy.
  • Response rolled for after Red developed its attack on left: Steady ... work out sensible but limited counterplans.

Turn 3, Red: Further development of the attack on the left flank, but gradually launching the main centre attack as well. Since I use command rolls, and a failed one stops the turn, Red didn;t get far this turn. The remaining half of the centre (not in the image) didn't move, nor did anything happen on the right flank.


Turn 3, Blue: On Blue's right flank (upper left in the picture below), firing actions to contain the enemy. Also the centre starts firing heavily. The commander there has a +3 on firing, meaning units only needs a 4+ to be able to fire. Perhaps a bit too generous ...


Turn 4, Red: Again a limited Red turn. I decided to start launching the attack in the centre, so infantry units start to move up. Artillery also limbered up to position elsewhere.


Turn 4, Blue: Blue again had some successful infantry and battery fire and managed to rout completely one of the cavalry units on its right flank (Red's left). Picture below is from behind Blue's lines.

I guess Red's attack on the left flank has been "feinted" long enough, so time to press forwards with Red's attack in the centre.

Ruleswise, I have encountered a slight problem. I use an ativation mechanic. Units activate on a 7+ (with possible bonuses from commanders), and a failed roll ends the turn. But, that means each side on average will activate the same number of units, which favours the side with the lesser number of units, as is often the case in an attack/defence scenario. Perhaps I should switch back to my former system in which I have commanders issue order (and hence, more commanders means more orders on average).

Another problem in my ruleset (although I am aware of it), is that it's a move or fire ruleset, meaning the defender has the edge if he doesn;t have to move. I usually counterbalance this by giving more units to the attacker, but combined with my unit-based activation system (instead of commander-based activation), it doesn't work that well for the attacker.

Tuesday 25 August 2020

Programmed Wargames Scenarios (2): Broken Ground (a)

In this semi-lockdown period, time for another sologame. I decided to use the 2nd scenario from the Programmed Wargames Scenarios book, "Broken Ground" using my homebrewn ACW rules. Typically, I use programmed options for both sides.

The idea of the scenario is that the defender is defending a combination of lesser features such as some small hills, woods and some rocky grounds.

The first stage in these scenarios is to generate the ground. The left, centre and right sections of the battlefield are diced for randomly (3 choices for each section), and then one has to translate it to the own wargames table and what works in the rules w.r.t. movement and firing ranges.

Then, I need to role for the defending "Blue" force, and again translate the generated army list to my own system, which is not too difficult. The deployment is rolled for as well, as well as Blue's orders. These state Blue has to hold the centre ground without counterattacking, but Blue has freedom on the flanks and can use cavalry and light troops boldly.

I then do the same for Red. The plan for read is rolled for and results in "attack the centre after feinting to attack a weak flank."

Ok, that all sounds great, so here's the initial setup:

Initial setup as seen from Red's position


Initial setup as seen from Blue's position.

Turn 1, Red - in this battle the Union - starts to move on the left flank.

Turn 1, Blue (Confederates), some responses on the same flank. Light troops deployed in the woods shoot at Red's cavalry.

Turn 2, Red, I rolled for a response since Red was attacked from one of the woods. The response says Red should try to clear the woods and afterwards also clear other woods if they could surprise Red's troops again. So I continue the attack against the wood on Red's left flank, still in accordance with the overall plan and the orders.

Turn 2, Blue. I roll for a response, since Red is attacking on a weak flank for Blue, and the response is "Steady" ... limited counterplans. So I decide that Blue troops will remain where they are and simply fire at Red's troops. Blue's centre is also firing heavily at the upcoming Union troops.

To be continued ...

Saturday 15 August 2020

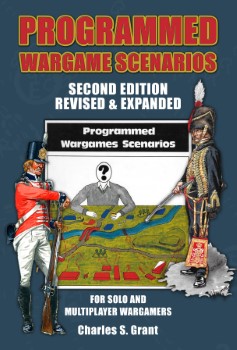
New edition of Programmed Wargames Scenarios

Caliver books have announced a new edition of Programmed Wargames Scenarios, the excellent book by Charles Grant for conducting solo games.

(image from Caliver Books website)

This book has been part of my wargaming library for many years (if I remember correctly, I bought it 92 or 93 in Orc's Nest, London), and it has been very useful. As I understand, it is also a much sought after book and my fetch high prices on the 2nd hand market.

See my review on boardgamegeek I wrote in 2019.

More Car Madness

 I finished 4 cars ... the big truck is just present as a scenery element.